In this guide, we’ll walk you through the “how to install cane webbing on cabinet doors” step-by-step process, providing clear instructions to ensure a successful and visually stunning upgrade to your cabinets. Get ready to elevate the aesthetic appeal of your living space with this simple yet impactful DIY endeavor.
Transforming your cabinet doors with cane webbing adds a touch of timeless elegance to your space, infusing it with a chic and contemporary vibe.
Whether you’re a seasoned DIY enthusiast or just starting to explore the world of home improvement, installing cane webbing on cabinet doors is a gratifying project that yields impressive results.
1. Steps to install cane webbing on cabinet doors
Cane webbing is a type of material made from rattan or bamboo fibers that are woven together to create beautiful patterns. Cane webbing can be used to decorate cabinet doors, creating a classic and elegant style.
To install cane webbing for cabinet doors, you need to prepare the following tools: scissors, hammer, nails, paper cutter, tape, pencil and ruler. Then, you can diy cane webbing cabinet doors follow these steps:
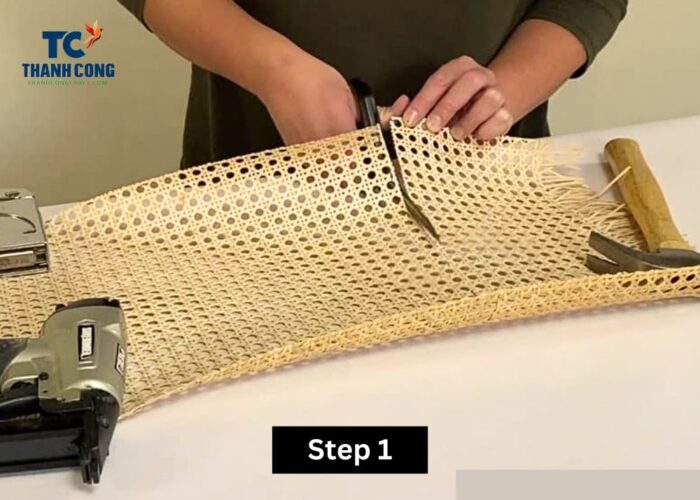
Step 1: Precise cutting of cane webbing
Begin by cutting the cane webbing to size, ensuring it slightly exceeds the opening dimensions. Using heavy objects to weigh down the edges during cutting helps maintain accuracy, preventing unintentional errors.
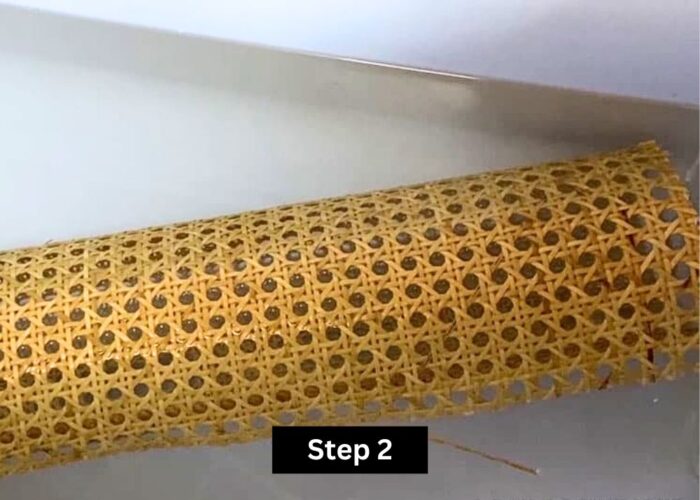
Step 2: Preparing cane webbing with warm water
Soak the cut cane webbing in warm water for a minimum of 30 minutes. This soaking process not only enhances the material’s pliability for easier handling but also ensures that it tightens as it dries. After the soaking period, pat the cane webbing dry with a towel.
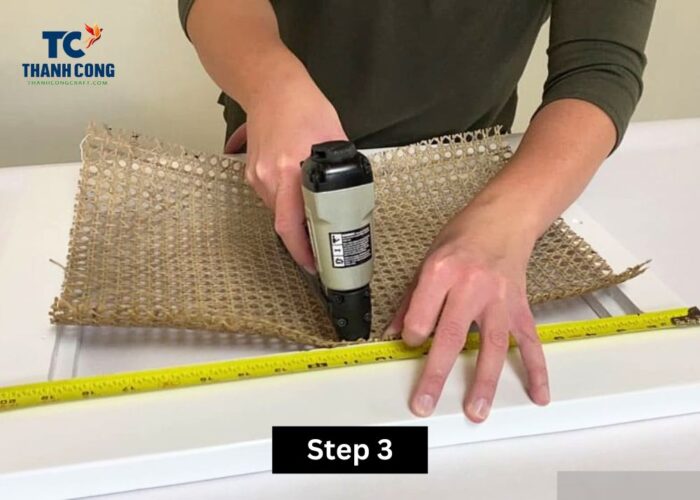
Step 3: Secure cane webbing to wood
To put rattan on cabinet door, utilize a T50 stapler to firmly attach the cane webbing to the wood. Start stapling from the middle on one side, repeat the process on the opposite side, and then proceed to staple the remaining two sides. Work your way around the edges, pulling the cane webbing taut and aligning it before installation stapling.
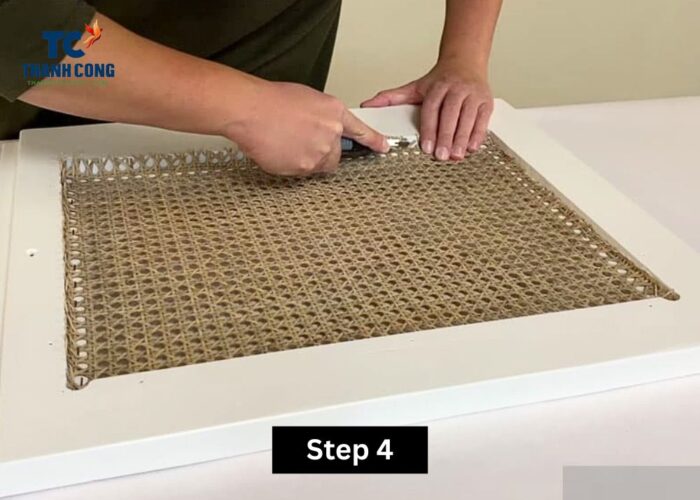
Step 4: Trim excess cane webbing with a utility knife
Employ a sharp utility knife to trim any excess cane webbing. While a sharper knife is preferable, a dull one can still serve the purpose effectively.
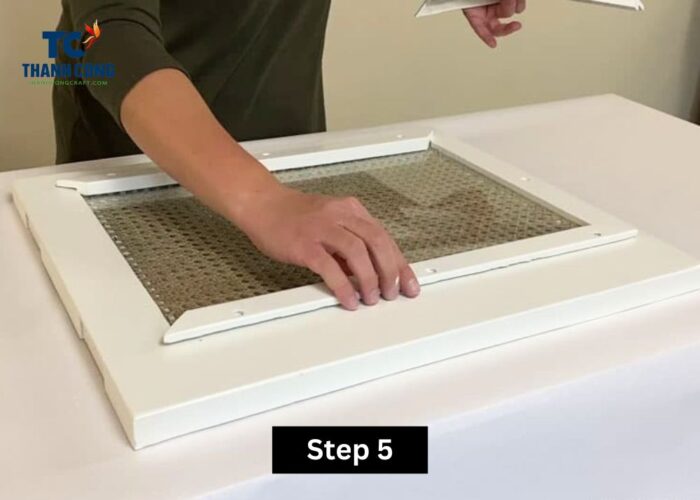
Step 5: Conceal edges with wood
If there was initially wood covering the opening, reposition the glass and secure the wood in its place. For areas without existing coverage, consider gluing or nailing thin wood trim over the edges for a polished finish.
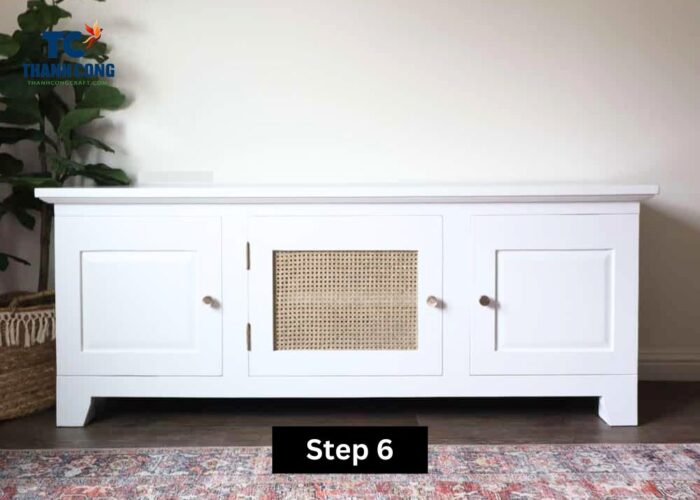
Step 6: Allow cane webbing to dry
Let the cane webbing air-dry. Once fully dried, it should be taut and resilient, not flexible. Following these steps ensures a successful installation of cane webbing onto a door, as demonstrated in the accompanying guide.
2. FAQs
2.1 Why do you soak cane webbing?
You need to soak the rattan before using it to make it soft and easy to bend. If you don’t soak it, the rattan will break or crack when you stretch or weave it. Soaking the rattan also helps it shrink when dry, creating a tight and beautiful cover.
You should soak the rattan in warm water for 15 to 30 minutes, depending on its thickness and size. After soaking, you can use the rattan immediately or keep it moist in a plastic bag until use.
2.2 Can you hot glue cane webbing?
Yes, hot glue can be used to attach cane webbing to certain surfaces, particularly those that may not be conducive to traditional stapling. However, it’s important to note that hot glue might not provide as strong or long-lasting of an adhesion as stapling, especially in areas subject to tension or stress.
If you choose to use hot glue, apply it evenly along the edges of the cane webbing and press it firmly onto the surface. Make sure the glue is compatible with both the material of the cane webbing and the surface to which you are attaching it.
Additionally, consider reinforcing the glued edges with staples for added durability. Always test a small, inconspicuous area first to ensure the desired result.
2.3 How do you finish the edges of webbing?
To finish the edges of webbing, especially when working with materials like cane webbing, you have several options for a clean and polished look:
- Fold and Staple: One common method is to fold the edges of the webbing over the frame or surface and secure them in place using staples. This creates a neat and secure finish. Ensure that the folds are even and the staples are applied at regular intervals.
- Binding Tape: Applying binding tape along the edges provides a decorative and functional finish. This tape, available in various materials and colors, not only conceals the raw edges but also adds a tailored appearance. Secure the binding tape using glue or stitching, depending on the type of tape.
- Wood Trim: Attach thin strips of wood trim along the edges of the webbing. This not only covers the raw edges but also adds a decorative border. Use wood glue or small nails to secure the trim in place.
- Hot Glue: If working on a project where staples or other methods are impractical, you can use hot glue to secure the edges. Apply hot glue along the edges, press them down, and hold until the glue sets. Keep in mind that this may not be as durable as other methods, especially in high-stress areas.
3. Conclusion
In conclusion, the cane webbing on cabinet doors does not only enhances the visual appeal of your furniture but also introduces a touch of natural elegance. As demonstrated through the cane webbing installation step-by-step guide above, this process offers a creative and customizable way to breathe new life into your cabinets.
If you have any further questions about “how to install cane webbing on cabinet doors“, don’t hesitate to send thanhcongcraft an email us at [email protected] or message us at WhatsApp: +84967485411. Hope to serve you soon! Best regard!


