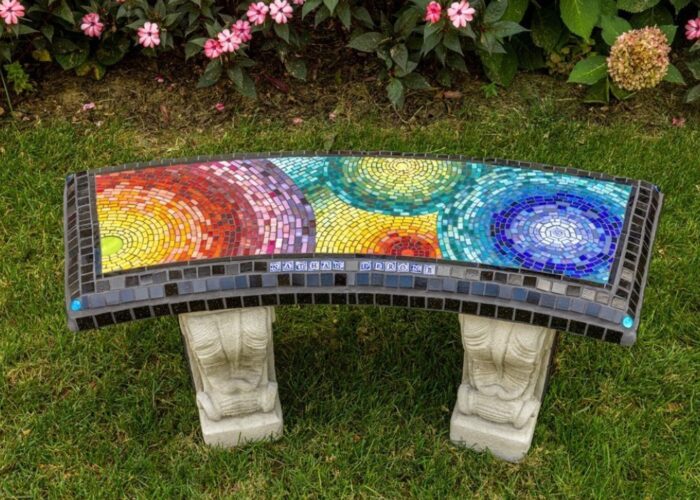
Creating a unique and eye-catching piece of furniture can be both a rewarding and enjoyable project, especially when it comes to crafting a DIY mosaic bench. How to make a mosaic bench? In this guide, we’ll walk you through the steps and techniques needed to create your very own mosaic bench, ensuring that you have all the tools and knowledge necessary to bring your artistic vision to life. Have a read!
Contents
- 1. Steps to make a DIY mosaic bench
- Step 1: Plan your design
- Step 2: Prepare the bench
- Step 3: Lay out the tiles
- Step 4: Apply tile adhesive
- Step 5: Let the adhesive dry
- Step 6: Apply grout
- Step 7: Clean and seal
- Step 8: Final touches
- 2. FAQs
- 2.1 Can I use any type of bench as a base for a mosaic project?
- 2.2 How do I protect my mosaic bench from weather damage?
- 2.3 Can I use this same process to create a mosaic table or another outdoor piece?
1. Steps to make a DIY mosaic bench
To create a DIY mosaic bench, you will need some basic materials and tools:
Materials:
- A Bench: Choose a sturdy bench made of wood, metal, or concrete.
- Tiles: Select a variety of colorful mosaic tiles, broken china, glass pieces, or ceramic tiles.
- Tile Adhesive: Use a strong adhesive suitable for your bench material.
- Grout: Choose grout in a color that complements your tiles.
- Sealer: To protect your mosaic from the elements.
- Tile Cutter/Nippers: For cutting tiles to fit your design.
- Safety Gear: Gloves and safety glasses.
- Spatula or Putty Knife: For spreading adhesive.
- Grout Float: For applying grout.
- Sponge and Bucket: For cleaning excess grout.
- Pencil and Paper: For planning your design.
- Measuring Tape: To ensure precision.
Step-by-Step Instructions:
Step 1: Plan your design
To begin, sketch your mosaic design on paper to visualize the final look and ensure a cohesive design. Decide on the color scheme and patterns that will best complement your space and personal style. Next, measure the surface area of your bench to determine how many tiles you’ll need.
Step 2: Prepare the bench
Cleaning its surface to remove any dirt, dust, or debris that could interfere with the adhesive. If the bench has a glossy finish, lightly sand it to create a rougher texture, which will help the adhesive bond better to the surface.
Step 3: Lay out the tiles
Arranging the tiles on the bench surface without adhesive to visualize your design. Use a tile cutter or nippers to cut any tiles that need adjusting to fit perfectly into your layout. This step ensures that you can plan and adjust the placement of each tile before permanently fixing them into place with adhesive.
Step 4: Apply tile adhesive
Spread a thin layer of adhesive on a small section of the bench using the spatula or putty knife. Press the tiles firmly into the adhesive according to your design. Continue this process until the entire surface is covered, working in small sections to prevent the adhesive from drying out.
Step 5: Let the adhesive dry
Allow the adhesive to dry completely, following the manufacturer’s instructions (usually 24 hours).
Step 6: Apply grout
Mix the grout according to the package instructions. Spread the grout over the tiles using the grout float, pressing it into the spaces between the tiles. Wipe off excess grout with a damp sponge, being careful not to remove grout from between the tiles. Let the grout dry for the time specified by the manufacturer.
Step 7: Clean and seal
Once the grout is dry, clean the surface of the tiles with a damp sponge to remove any grout haze. Apply a sealer to protect your mosaic bench from moisture and stains, following the sealer’s instructions.

Step 8: Final touches
Check for any missing grout and fill in as needed. Clean the entire bench one final time to ensure it looks pristine.
By following these steps, you can create a beautiful and durable DIY mosaic bench that will be a standout piece in any space. Enjoy the process of bringing your artistic vision to life and take pride in your custom-made bench!
2. FAQs
2.1 Can I use any type of bench as a base for a mosaic project?
You can use various types of benches as a base for a mosaic project, depending on your design and practical considerations. Wooden benches are commonly used because they provide a stable and flat surface that can easily support the weight of mosaic tiles and adhesive.
However, benches made of other materials like metal or concrete can also be used, provided they are suitable for adhering tiles securely and can withstand the mosaic installation process.
2.2 How do I protect my mosaic bench from weather damage?
To protect your mosaic bench from weather damage, several precautions can be taken. Start by applying a weather-resistant grout sealer to shield the grout from moisture and UV rays. Use a waterproof adhesive suitable for outdoor use when affixing the tiles.
Once the mosaic is complete, coat the entire surface with a clear, weather-resistant sealant or varnish to safeguard both tiles and grout from rain, sunlight, and temperature changes.
2.3 Can I use this same process to create a mosaic table or another outdoor piece?
Yes, you can use a similar process to create a mosaic table or any other outdoor piece. The key steps include sealing the grout, using waterproof adhesive, applying a weather-resistant sealant, and considering placement under cover for added protection against weather damage. These steps help ensure durability and longevity in outdoor settings.
If you have any further questions, don’t hesitate to send thanhcongcraft an email us at [email protected] or message us at WhatsApp: +84967485411. Hope to serve you soon! Best regard!


