Creating a mosaic candle holder is a delightful and rewarding DIY project that adds a touch of elegance and personality to your home decor. This step-by-step guide will walk you through the process of “how to make a mosaic candle holder“, perfect for anyone looking to explore their creativity and craft a unique piece.
With just a few materials and a bit of imagination, you’ll be able to transform ordinary candle holders into extraordinary works of art. Have a read!
1. Steps to make a DIY mosaic candle holder
Mosaic candle holders are decorative pieces made by arranging small pieces of glass, tile, or other materials into a pattern or design on the surface of a candle holder. These intricate designs create a stunning interplay of light and color when a candle is lit inside, casting beautiful patterns and adding a warm, inviting ambiance to any room.
Making your own mosaic candle holder not only allows you to personalize your decor but also offers a cost-effective way to enhance your home. Plus, it’s a fantastic opportunity to develop your crafting skills and create thoughtful, handmade gifts.
To make your own glass mosaic candle holders diy, follow our guide:
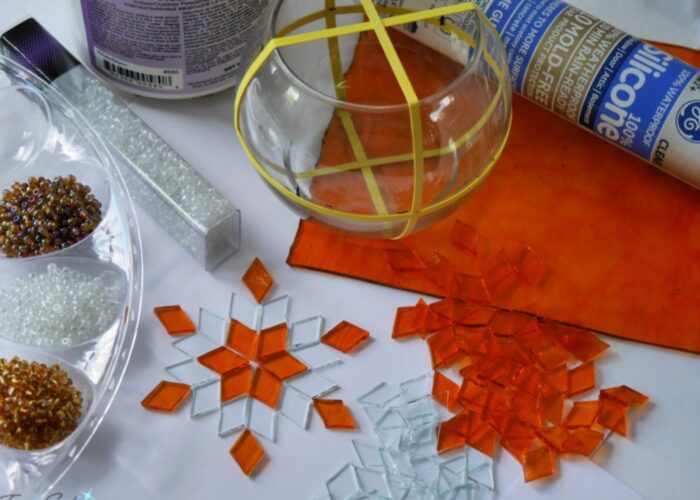
Materials:
- Glass Candle Holder: Any shape or size you prefer.
- Mosaic Tiles: Small pieces of colored glass, ceramic, or broken china.
- Tile Adhesive: Strong and suitable for glass surfaces.
- Grout: In a color that complements your mosaic tiles.
- Tile Cutter/Nippers: For cutting tiles to fit your design.
- Spatula or Putty Knife: For spreading adhesive.
- Grout Float: For applying grout.
- Sponge and Bucket: For cleaning excess grout.
- Protective Gear: Gloves and safety glasses.
- Old Newspapers or a Drop Cloth: To protect your workspace.
Step-by-Step Instructions:
Step 1: Prepare your workspace
Start by laying down old newspapers or a drop cloth to protect your workspace from adhesive and grout spills. Ensure you have all your materials and tools gathered and within easy reach. This preparation helps maintain a clean working area and allows for a smooth, organized crafting process as you create your mosaic candle holder.

Step 2: Clean the candle holder
Thoroughly clean the surface of the glass candle holder to remove any dirt or grease. This step is crucial as it ensures that the adhesive bonds well, providing a strong foundation for the mosaic tiles and enhancing the durability of your finished candle holder.
Step 3: Plan your design
Lay out your mosaic tiles on a flat surface to create your design. This helps you visualize the final look and make any adjustments before starting.
Step 4: Cut tiles to fit
Use tile cutters or nippers to trim any tiles that need to fit specific areas or edges of the candle holder. This step allows for precise placement of the mosaic tiles, ensuring they conform perfectly to the contours and dimensions of the holder, resulting in a polished and professional-looking final product.
Step 5: Apply tile adhesive
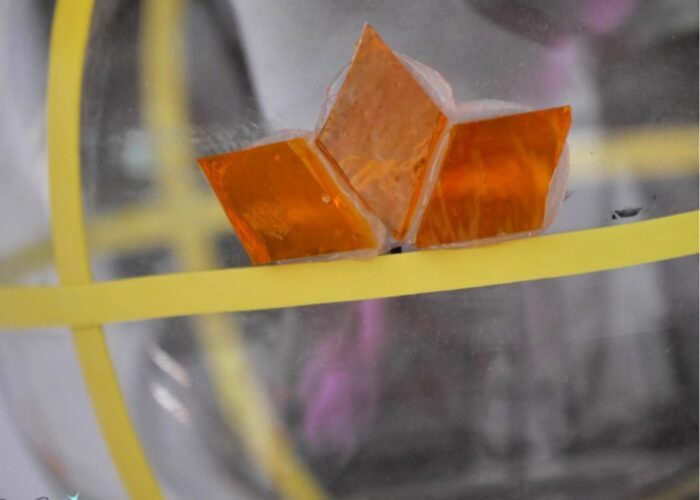
Using a spatula or putty knife, spread a thin layer of tile adhesive onto a small section of the candle holder. Start from the bottom and work your way up to prevent tiles from sliding.

Step 6: Place the mosaic tiles
Press each mosaic tile firmly into the adhesive, following your planned design. Ensure you leave small gaps between the tiles to allow space for the grout, which will help secure the tiles in place and create a seamless, cohesive look.
Step 8: Let the adhesive dry
Allow the adhesive to dry completely, adhering to the manufacturer’s instructions (typically around 24 hours). This crucial step ensures that the mosaic tiles are securely bonded to the candle holder, providing a stable foundation for the grouting process and ensuring a durable finish.
Step 9: Apply grout
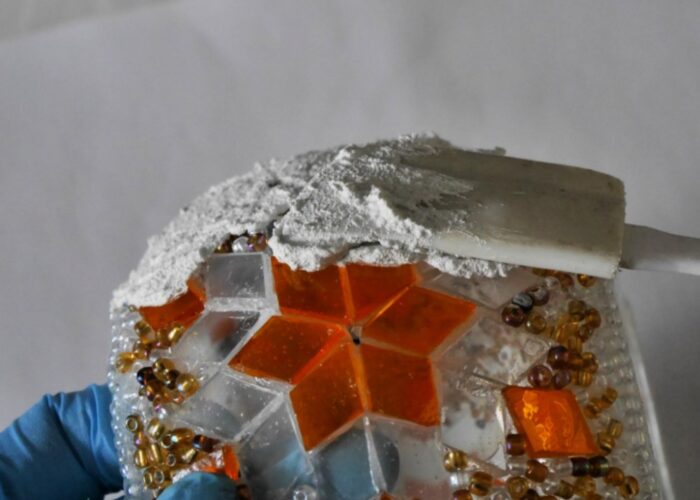
Once the adhesive is dry, prepare the grout according to the package instructions. Use a grout float to spread the grout over the tiles, pressing it into the gaps between them.

Step 11: Final cleaning
After the grout has fully dried, polish the surface of the tiles with a dry cloth to remove any remaining grout haze. This step enhances the appearance of your mosaic candle holder, ensuring a clean and polished finish that highlights the beauty of the tiles and completes your DIY project with a professional touch.
Step 12: Enjoy your mosaic candle holder
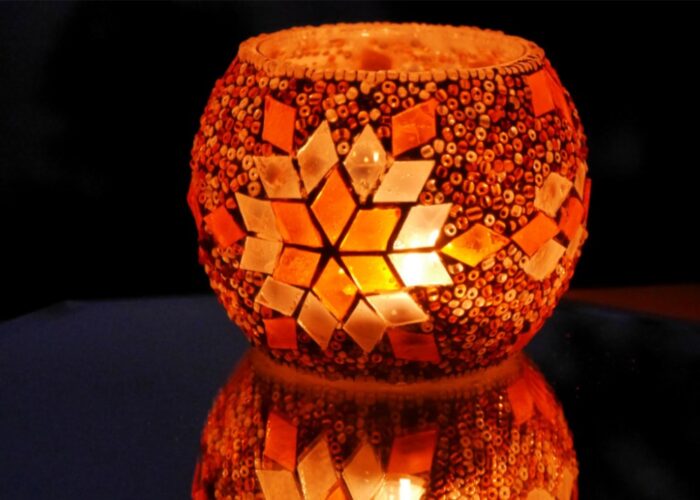
Place a candle inside your newly crafted mosaic candle holder and delight in the beautiful, handmade glow it casts across your space. This personalized creation adds warmth and charm, enhancing the ambiance of any room with its unique design and artistic flair.

By following these steps, you can create a stunning DIY mosaic candle holder that adds a touch of personalized elegance to any room.
2. FAQs
2.1 Can I use any type of candle holder for a mosaic project?
Yes, you can use various types of candle holders for a mosaic project, including glass, ceramic, or even metal holders. The key is to ensure the surface is clean and suitable for adhesive bonding. Glass holders are particularly popular due to their transparency, which showcases the mosaic tiles effectively.
However, ceramic and metal holders can also be used with proper preparation and adhesive selection to achieve a beautiful mosaic finish.
2.2 What kind of glue should I use for a mosaic candle holder?
For a mosaic candle holder, it’s best to use a strong adhesive that is suitable for bonding materials like glass, ceramic, or metal. A recommended adhesive is clear silicone adhesive or a multi-surface glue that adheres well to various materials and provides a durable bond.
Ensure the adhesive is waterproof and suitable for indoor use, as it will secure the mosaic tiles effectively to the candle holder surface. Always follow the manufacturer’s instructions for application and drying times to achieve the best results.
2.3 Can I use broken pieces of china for my mosaic project?
Yes, broken pieces of china can be used effectively for mosaic projects. China has a smooth and glossy surface that can add unique texture and color to your mosaic design. Ensure the pieces are clean and free from sharp edges before adhering them to your project surface. Using china in mosaics allows for creative patterns and designs, making your project visually interesting and distinct.
3. Conclusion
Creating a mosaic candle holder is a delightful and rewarding DIY project that adds a touch of elegance and personality to your home decor. By following this above step-by-step guide, you can craft a unique piece that showcases your creativity and brings a beautiful, handmade glow to your space. With just a few materials and a bit of imagination, you’ll be able to transform ordinary candle holders into extraordinary works of art.
So gather your materials, follow our guide, and let your artistic side shine as you create a stunning mosaic candle holder that will impress your guests and add warmth to any room. Enjoy the process and the beautiful results of your craftsmanship!
If you have any further questions, don’t hesitate to send thanhcongcraft an email us at [email protected] or message us at WhatsApp: +84967485411. Hope to serve you soon! Best regard!


