A grapevine basket is a charming and rustic handcrafted container made from dried grapevines. These baskets offer a unique and natural way to add a touch of organic elegance to your home decor. Crafted through traditional weaving techniques, grapevine baskets showcase the beauty and versatility of grapevines.
In the following article, we will guide you on how to make a grapevine basket with just a few basic materials and tools. Have a read!
1. How to make a grapevine basket?
Grape vine basket weaving can be a rewarding and creative DIY project. Here is a step-by-step guide to help you make your own grapevine basket:
Materials:
- Dried grapevines;
- Pruning shears or scissors;
- Soaking container or bucket;
- Water;
- Towels;
- Twine or thin wire (optional).
Steps by step:
Step 1: Gather the grapevines
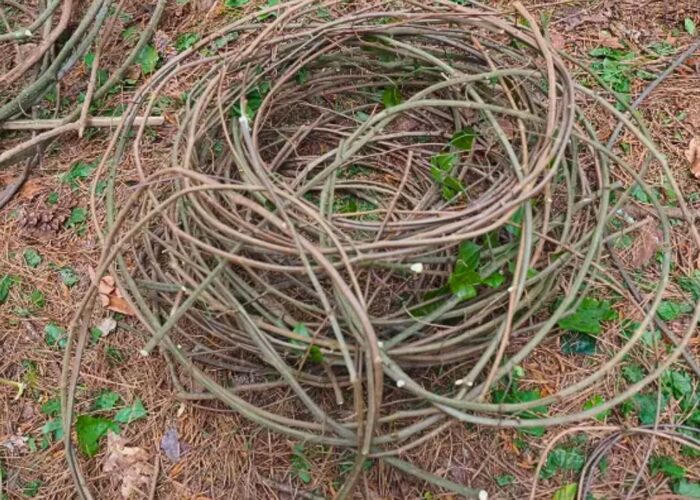
Collect dried grapevines. You can either purchase them or use wild grape vines from your garden. Make sure they are pliable and easy to work with.
Step 2: Soak the grapevines
Submerge the grapevines in a container or bucket filled with water. Allow them to soak for several hours or overnight. This will make the vines more flexible and easier to weave.
Once soaked, separate the grapevines and organize them by size. This will help you plan the structure of your basket.
Step 3: Create a base
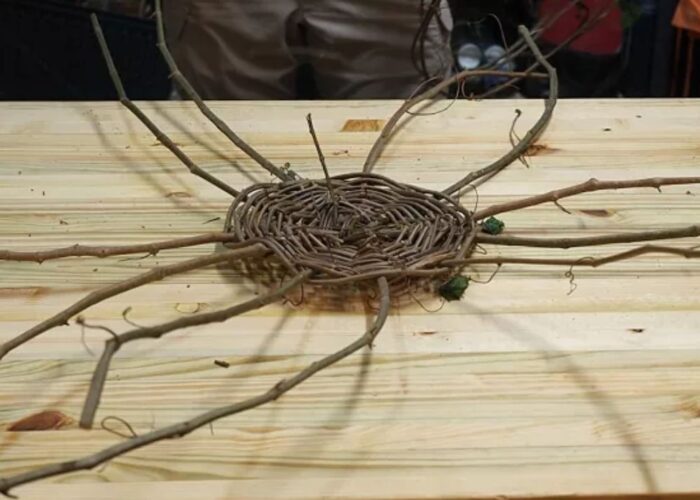
To make a basket out of vines, form the base of the basket by selecting a few longer vines. Shape them into a circle, tying the ends together securely. This will be the foundation for your basket.
Step 4: Weave the sides
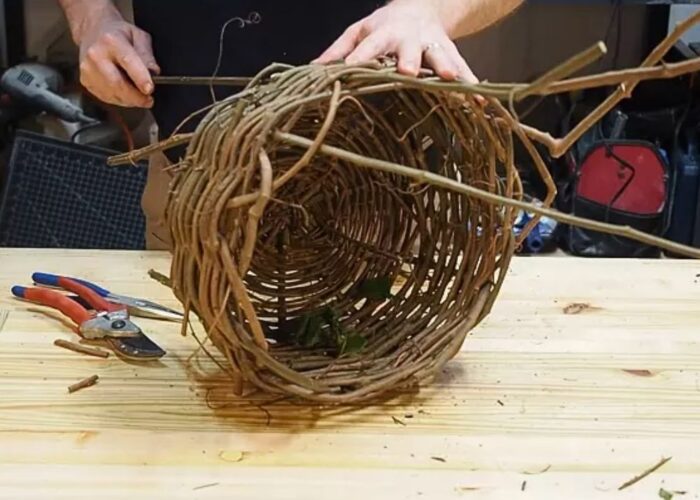
Start weaving additional vines around the base circle to create the sides of the basket. Continue weaving, gradually building up the height of the basket.
Step 5: Secure with twine or wire (Optional)
If needed, use twine or thin wire to secure the vines at key points as you weave. This will add extra stability to your basket.
Step 6: Shape the basket
As you continue weaving, shape the basket to your desired form. You can create a traditional round shape or experiment with different designs.
Step 7: Finish the edges
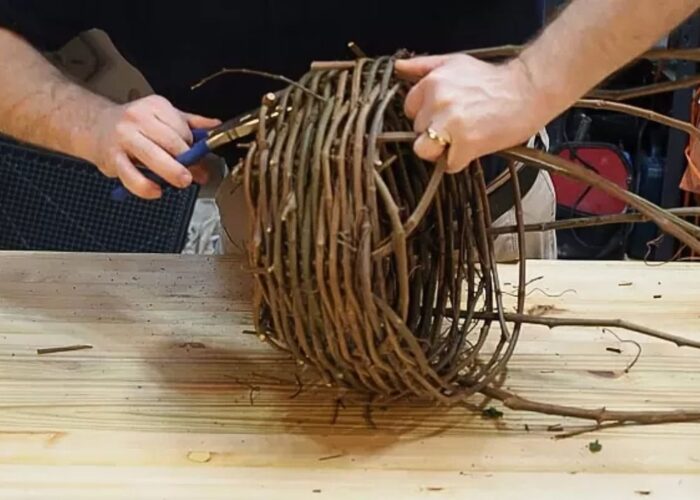
Once you’ve reached the desired height, finish the edges neatly. Secure the ends by tucking them into the weave or using twine.
Step 8: Trim excess vines
Trim any excess vines with pruning shears or scissors, ensuring a tidy and polished finish.
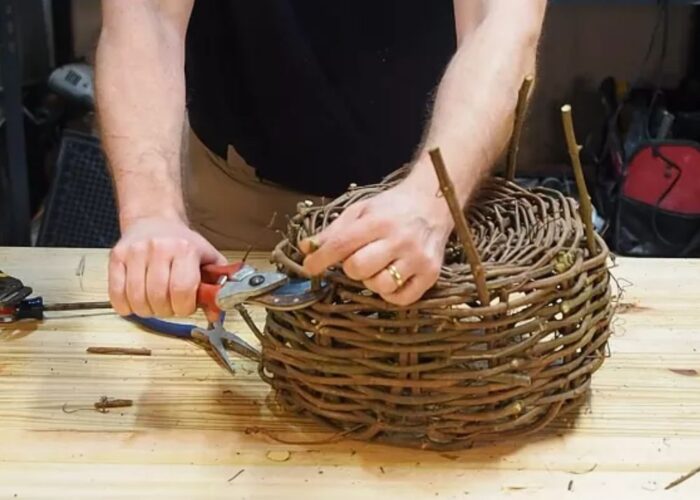
Step 9: Let it dry
Allow the basket to air dry thoroughly. This will help it maintain its shape and durability.
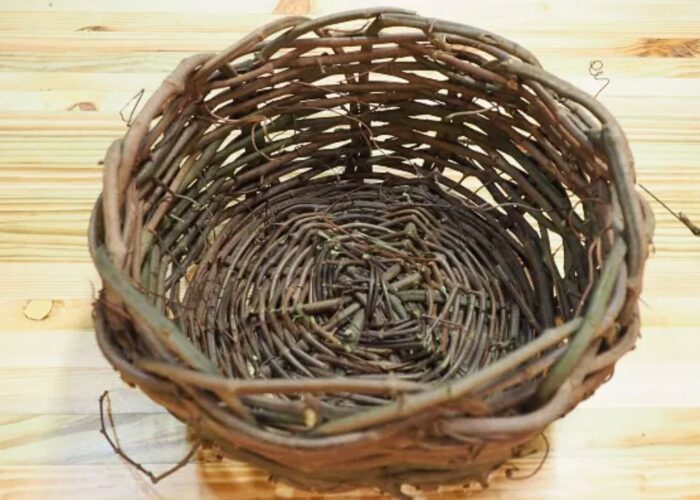
Step 10: Add handle or decorations
If you want, you can add a handle by attaching additional vines. You can also decorate your basket with ribbons, twine, or other embellishments.
By following these steps, you can create a unique and handmade grapevine basket to use for various purposes, such as storage, decoration, or as a thoughtful gift.
2. FAQs
2.1 Can you weave with grapevine?
You can weave with grapevines. Grapevines are known for their flexibility and pliability, making them suitable for weaving projects. Whether you’re creating decorative crafts, baskets, wreaths, or other woven items, grapevines can be woven together to form unique and rustic designs.
The process typically involves soaking the grapevines to make them more flexible and then weaving or intertwining them to achieve the desired shape or pattern. The natural and organic qualities of grapevines add a charming and authentic touch to woven creations.
2.2 What can you make from grape vines?
Grapevines provide a versatile material for crafting various items. From wreaths and baskets to garden structures like trellises, these vines offer a natural and rustic aesthetic. You can also create decorative balls, vineyard-inspired decor, and unique furniture pieces.
Additionally, grapevines can be used for bird nesting material or incorporated into sculptures and weaving projects. The flexibility and organic qualities of grapevines make them an excellent choice for a wide range of creative DIY endeavors, adding a touch of nature to your home and garden.
2.3 How do you harvest grape vines for crafts?
Harvesting grapevines for crafts involves a thoughtful process to ensure optimal flexibility and suitability for crafting. It is best done during late fall or winter when the vines are dormant. Using sharp pruning shears, select healthy vines, about the thickness of a pencil, and make clean cuts near the base.
After cutting, remove any remaining leaves and soak the vines in water for several hours or overnight to enhance their pliability. Depending on your project, cut the vines into appropriate lengths.
Subsequently, either air-dry them for a few days or use them immediately, allowing you to create beautiful and flexible crafts while preserving the natural qualities of the grapevines.
2.4 What are the best vines for weaving?
The best vines for weaving include English Ivy, Wisteria, Clematis, dried Grapevines, Willow branches, Virginia Creeper, Honeysuckle, Morning Glory, and Bittersweet. Each offers unique characteristics such as flexibility, durability, and aesthetic appeal, making them suitable for various weaving projects.
3. Final thought
Making a grapevine basket is not only a rewarding DIY project but also a testament to the beauty and versatility of natural materials. By following the steps outlined in this guide, anyone can create a unique and handmade basket.
The process of harvesting, soaking, and weaving grapevines allows for endless creativity and customization, making each basket a truly one-of-a-kind piece. Happy crafting!


