Making a mosaic bowl is a delightful way to combine artistry and functionality. With just a few materials and a bit of creativity, you can transform a plain bowl into a stunning decorative piece that showcases your unique style. This step-by-step “how to make a mosaic bowl” guide will walk you through the process, from selecting the right materials to the final finishing touches.
Let’s dive in and discover the joy of mosaic art!
1. How to make a DIY mosaic bowl?
Creating your own DIY mosaic bowl is a rewarding craft project that allows you to blend creativity with functionality. Here’s a comprehensive guide to help you get started:
Materials:
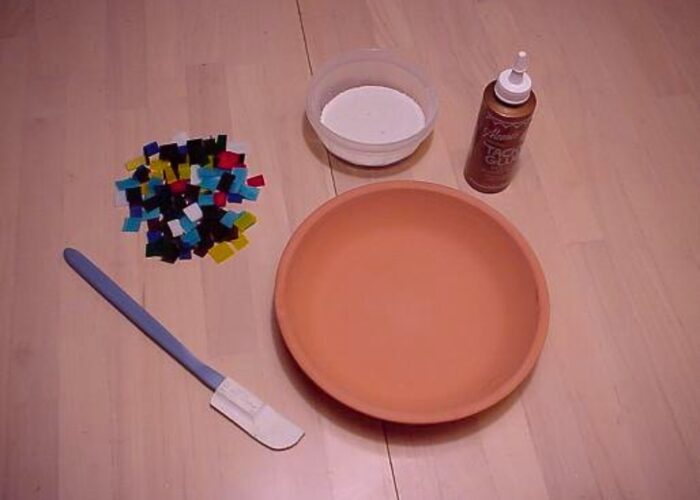
- Bowl or Base: Choose a bowl as your base. Ceramic, glass, or even plastic bowls work well depending on your preference and design.
- Mosaic Tiles: Select mosaic tiles in various colors, shapes, and sizes. You can use glass, ceramic, porcelain, or even recycled materials like broken dishes or tiles.
- Adhesive: Use a strong adhesive suitable for the materials you’re working with. Weldbond, mosaic adhesive, or thin-set mortar are common choices.
- Grout: Choose grout in a color that complements your mosaic tiles. You can opt for sanded or unsanded grout depending on the size of the gaps between your tiles.
- Tile Nippers: Necessary for cutting and shaping tiles to fit your design.
- Safety Gear: Wear safety glasses and gloves when working with tiles and grout to protect yourself from sharp edges and chemicals.
Step-by-Step Guide:
Step 1: Design and prepare
Clean and dry the bowl thoroughly. Prepare your workspace with newspaper or a drop cloth to catch any mess. Sketch out your design on paper or directly on the bowl with a marker to plan your mosaic pattern.
Step 2: Apply adhesive
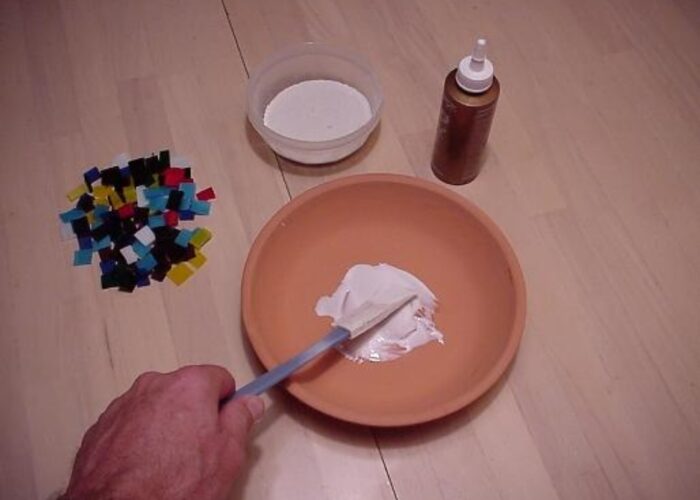
Working in small sections, apply adhesive to the surface of the bowl using a spatula or putty knife. Place your mosaic tiles onto the adhesive, following your design. Press each tile firmly into place to ensure a strong bond.
Step 3: Fill the surface
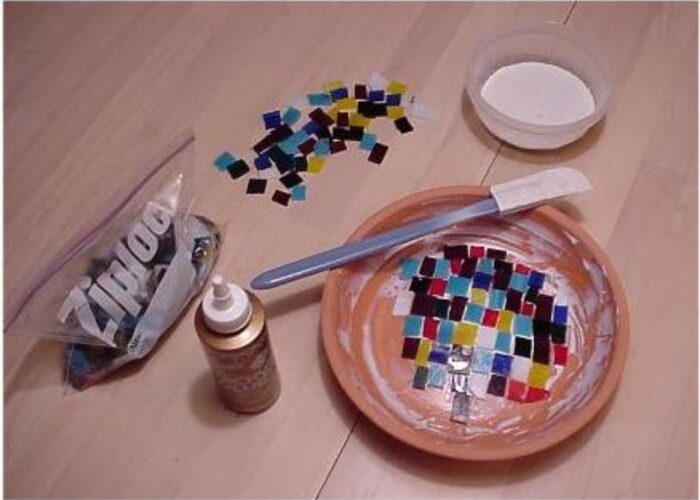
Continue adding tiles and adhesive until the entire surface of the bowl is covered with your mosaic design. Trim tiles as needed using tile nippers.
Step 4: Allow to cure
Let the adhesive dry and cure completely according to the manufacturer’s instructions, usually overnight.
Step 5: Apply grout
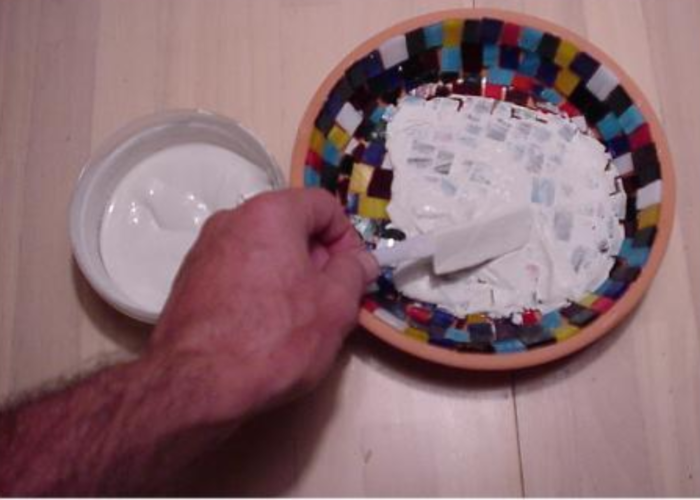
Once the adhesive is fully cured, prepare the grout according to the manufacturer’s instructions. Using a rubber grout float, spread the grout over the mosaic tiles, pressing it into the gaps between the tiles.
Step 6: Clean off excess grout
Allow the grout to set for a few minutes, then wipe off the excess grout from the tile surfaces using a damp sponge. Rinse the sponge frequently in clean water to ensure a smooth finish.
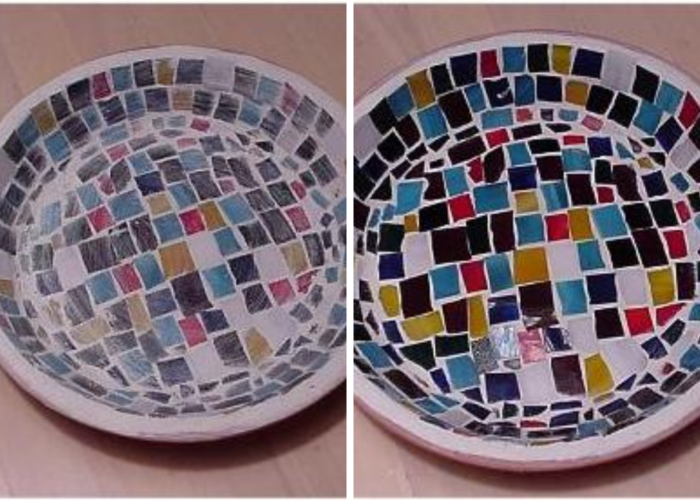
Step 7: Final touches
After the grout has dried completely (typically after 24-48 hours), polish the tiles with a soft cloth to remove any remaining haze. Optionally, apply a grout sealer to protect your mosaic bowl and enhance its longevity.
Step 8: Display and enjoy
Your DIY mosaic bowl is now ready to display! Use it as a decorative piece, a catch-all for keys and jewelry, or a stylish serving dish.
2. FAQs
2.1 What type of glue is best for making mosaics?
Common choices include Weldbond glue for versatility and clear drying, mosaic adhesive for specific mosaic projects, and epoxy adhesive for strong, quick-setting bonds. Choose based on your project’s needs for durability, drying time, and material compatibility.
2.2 Can I use any type of bowl for a mosaic project?
Yes, you can use various types of bowls for a mosaic project, depending on your design and preferences. Ceramic, glass, plastic, and metal bowls are all suitable choices. Consider the material’s durability and how well it adheres to mosaic tiles and adhesive.
Ensure the bowl’s surface is clean and suitable for adhering tiles, and adjust your adhesive and grouting techniques accordingly based on the bowl’s material.
2.3 Is grouting a necessary step?
Grouting is typically a necessary step in mosaic projects to fill the gaps between tiles, ensuring a cohesive and finished look. It not only enhances the appearance of the mosaic by defining the design but also strengthens the bond between tiles and protects them from moisture and dirt.
2.4 How long to let the grout dry before wiping the mosaic?
You should let the grout dry for about 15-30 minutes after application before wiping the mosaic tiles. This allows the grout to firm up slightly without fully setting. Use a damp sponge to gently wipe away excess grout from the tile surfaces while being careful not to disturb the grout lines.
After this initial wipe, let the grout cure for another 24-48 hours before doing a final cleanup to ensure a clean and polished finish on your mosaic project.
3. Final thought
Creating a DIY mosaic bowl allows you to showcase your artistic flair while producing a functional and eye-catching piece of decor. With these steps and materials, you can create a mosaic bowl that reflects your personal style and adds a touch of handmade beauty to any space.
If you have any further questions, don’t hesitate to send thanhcongcraft an email us at [email protected] or message us at WhatsApp: +84967485411. Hope to serve you soon! Best regard!


