Creating diy mosaic coasters is a fun and rewarding DIY project that adds a touch of personal flair to your home decor. Making mosaic coasters allows you to express your creativity while crafting functional and eye-catching pieces.
In this following article, we’ll guide you how to make a mosaic coaster step-by-step, providing tips and inspiration along the way. Get ready to transform simple materials into stunning coasters that will impress your guests and make perfect handmade gifts!
1. Step to make a mosaic coaster
Creating a mosaic coaster allows you to blend practicality with artistic expression. Here’s how to get started:
Materials Needed:
- Base Coasters: Plain ceramic or wooden coasters as your base.
- Mosaic Tiles or Tesserae: Small ceramic tiles, glass tiles, or other mosaic pieces.
- Adhesive: Mosaic glue or thin-set mortar.
- Grout: Sanded grout in a color of your choice.
- Sealant: Mosaic sealant or waterproofing sealer.
- Tools: Tile nippers, safety goggles, gloves, spatula or spreader, grout float, sponge, and water bucket.
Step-by-Step Instructions:
Step 1: Design your coaster
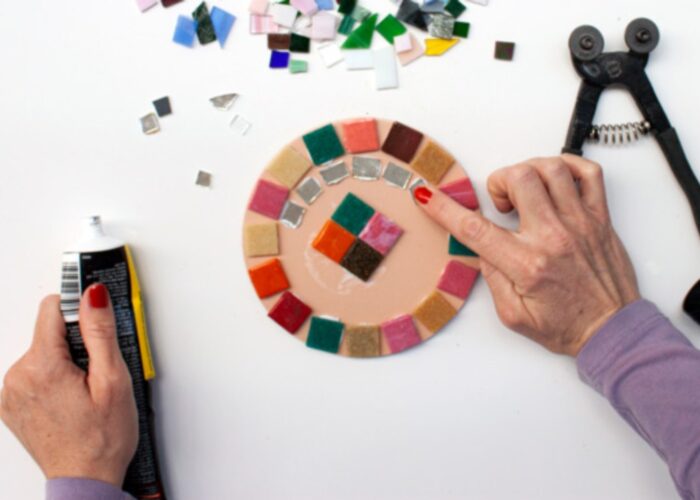
Plan your design on paper or directly on the coaster. Arrange tiles to create patterns or images. Whether you sketch your design on paper or directly on the coaster itself, this stage allows you to explore different patterns, colors, and compositions before committing to the mosaic tiles.
Step 2: Prepare tiles
To ensure your design fits perfectly, employ tile nippers to meticulously cut tiles or tesserae into smaller pieces, adjusting as necessary to harmonize with your envisioned design.
Step 3: Apply adhesive
Begin by spreading mosaic adhesive or thin-set mortar onto the coaster’s surface, working in small sections using a spatula or spreader. This ensures even coverage and adherence to your design specifications.
Step 4: Place tiles
With precision, firmly press each tile or tessera into the adhesive, aligning them according to your design layout. Maintain a slight gap between tiles to accommodate grout application later, ensuring a seamless finish.

Step 5: Let it dry
Once all tiles or tesserae are securely placed, allow the adhesive to dry thoroughly, following the specific drying times recommended by the manufacturer. This crucial step ensures that the mosaic sets properly before proceeding to the next stage of the project.
Step 6: Apply grout
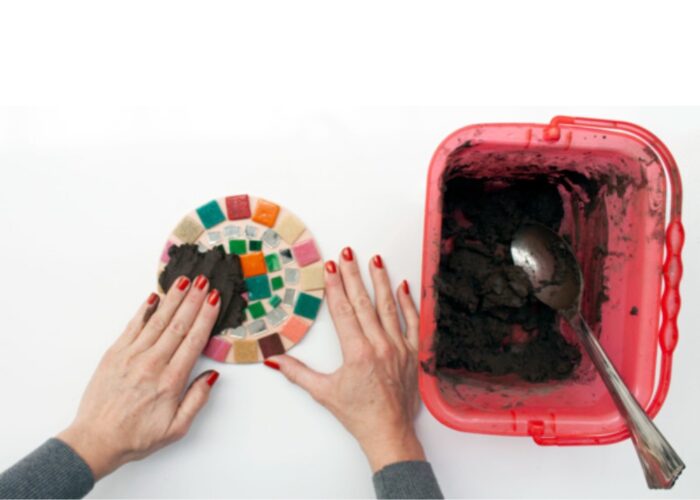
Mix sanded grout to a thick, paste-like consistency, then use a grout float to spread it evenly over the tiled surface. Press the grout firmly into the gaps between tiles, ensuring complete coverage and a secure bond. This step not only reinforces the mosaic but also enhances its overall appearance by filling in the spaces between each tile.

Step 7: Clean excess grout
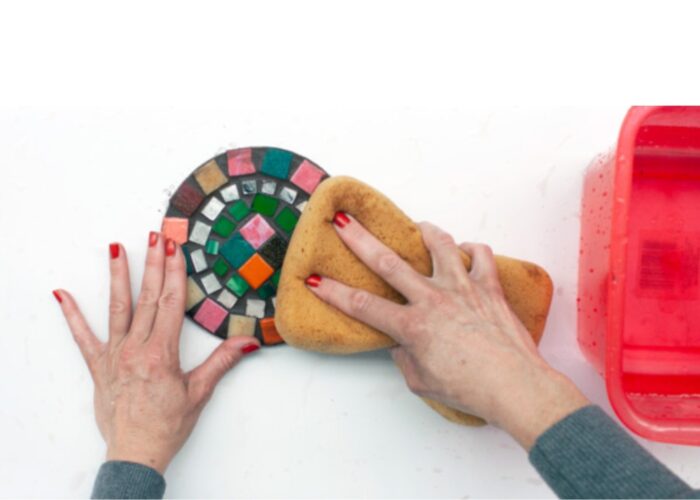
After about 15-20 minutes, when the grout begins to set, use a damp sponge to wipe off excess grout from the tiles. Rinse the sponge frequently.
Step 8: Final touches and sealing
Buff any grout haze off the tiles with a dry cloth once the grout is fully dry. Apply mosaic sealant or waterproofing sealer to protect the coaster and enhance its colors. Once sealed and dried, your mosaic coaster is ready to use or give as a handmade gift.

2. FAQs
2.1 How do I prevent the tiles from moving or shifting during grouting?
To prevent the tiles from moving or shifting during grouting, ensure that the adhesive or thin-set mortar has fully cured according to the manufacturer’s instructions before applying grout. Additionally, pressing the tiles firmly into the adhesive during installation helps secure them in place. Using tile spacers or wedges can also maintain consistent spacing between tiles, minimizing the risk of movement.
Finally, work in small sections when applying grout, ensuring thorough coverage and pressing the grout into the gaps between tiles firmly to further stabilize them.
2.2 What can I use instead of grout for mosaics?
Instead of traditional grout, you can use alternative materials such as epoxy grout, which is more resistant to stains and moisture compared to cement-based grouts. Another option is acrylic caulk, which is easy to apply and can be found in various colors to complement your mosaic design.
Some mosaic artists also use resin or polymer-based grout substitutes, which offer durability and flexibility. These alternatives provide different aesthetic and functional qualities depending on your project’s needs and preferences.
2.3 How long will it take for my mosaic coasters to dry completely?
The drying time for mosaic coasters can vary depending on factors like the type of adhesive and grout used, humidity levels, and ventilation. Typically, mosaic adhesive may take 24 to 48 hours to dry thoroughly, while grout can take an additional 24 hours or longer to fully cure.
It’s essential to follow the specific drying and curing times recommended by the product manufacturers to ensure your mosaic coasters are completely dry and ready for use.
2.4 Can I sell my handmade mosaic coasters?
Yes, you can sell handmade mosaic coasters that you create. Handcrafted items like mosaic coasters can be popular among buyers looking for unique and artistic pieces. Before selling them, consider factors such as pricing, packaging, and marketing to attract potential customers.
Additionally, ensure that you comply with any local regulations or permits required for selling handmade goods, especially if you plan to sell them through markets, online platforms, or stores.
3. Final thought
Making beautiful mosaic coasters is a fulfilling and creative endeavor that brings a personal touch to your home decor. By following the detailed steps outlined in this guide, you can transform simple materials into stunning, functional pieces of art.
Whether you’re making these coasters for yourself or as thoughtful handmade gifts, the process allows you to explore your artistic side and enjoy the satisfaction of crafting something unique.
Remember, patience and attention to detail are key to achieving a professional-looking result. So gather your materials, plan your design, and embark on this enjoyable DIY project that’s sure to impress your guests and add a splash of color to any setting. Happy crafting!
If you have any further questions, don’t hesitate to send thanhcongcraft an email us at [email protected] or message us at WhatsApp: +84967485411. Hope to serve you soon! Best regard!


