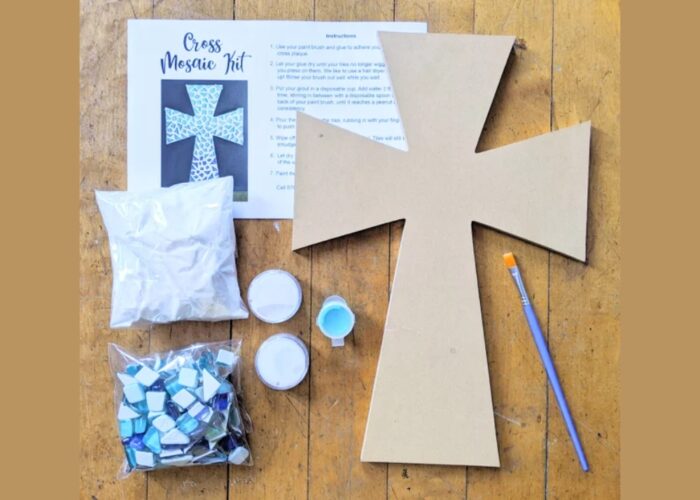
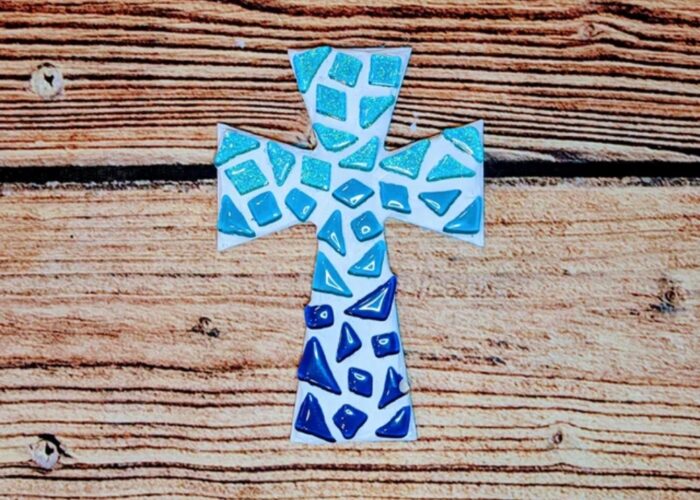
Creating a mosaic cross is a beautiful and rewarding project that allows you to express your creativity while crafting a meaningful piece of art. Making a mosaic cross offers a wonderful opportunity to work with vibrant tiles and intricate patterns.
This guide will walk you through the entire “how to make a mosaic cross” process, from gathering materials to the final finishing touches, ensuring your mosaic cross turns out stunning and unique. Let’s dive into the world of mosaic art and start crafting your masterpiece!
1. How to make a DIY mosaic cross craft?
Creating a DIY mosaic cross craft is a rewarding project that combines artistic expression with spiritual symbolism. Here’s a comprehensive guide on materials needed and step-by-step instructions to get you started:
Materials Needed:
- Wooden Cross Base: Choose a wooden cross of your preferred size and shape.
- Mosaic Tiles or Tesserae: Ceramic tiles, glass tiles, stones, or other mosaic pieces.
- Adhesive: Mosaic glue or thin-set mortar for securing tiles.
- Grout: Sanded grout in a color of your choice.
- Sealant: Mosaic sealant or waterproofing sealer.
- Tools: Tile nippers, safety goggles, gloves, spatula or spreader, grout float, sponge, and water bucket.
Step-by-Step Instructions:
Step 1: Design your cross
Sketch or plan your design on paper or directly on the wooden cross. Consider using geometric patterns, symbols, or abstract designs that hold personal or spiritual significance.
Step 2: Prepare tiles
Use tile nippers to cut mosaic tiles or tesserae into smaller pieces as needed to fit your design. Organize tiles by color or texture for easier application.

Step 3: Apply adhesive
Apply mosaic adhesive or thin-set mortar to a small section of the cross using a spatula or spreader. Work in manageable areas to prevent the adhesive from drying out.
Step 4: Place tiles
Press each tile or tessera firmly into the adhesive, following your design pattern. Leave a small gap between tiles for grout.
Step 5: Let it dry
Allow the adhesive to dry completely according to the manufacturer’s instructions before proceeding.
Step 6: Apply grout
Mix sanded grout to a thick consistency and apply it over the tiles using a grout float. Press grout into the gaps between tiles, ensuring all spaces are filled evenly.
Step 7: Clean excess grout
After about 15-20 minutes, when the grout begins to set, use a damp sponge to wipe off excess grout from the tiles. Rinse the sponge frequently in clean water to avoid smearing grout over the tiles.
Step 8: Final touches and sealing
Buff any grout haze off the tiles with a dry cloth once the grout is fully dry. Apply mosaic sealant or waterproofing sealer to protect the cross and enhance its colors.

Step 9: Display your cross
Once sealed and dried, your DIY mosaic cross is ready to display. Place it on a wall, altar, or use it as a meaningful decorative piece or gift that reflects your faith and artistic craftsmanship.
2. FAQs
2.1 What type of adhesive is best for making a mosaic cross?
The best adhesive for making a mosaic cross is mosaic glue or thin-set mortar, depending on the project’s size and location. Mosaic glue is ideal for smaller, indoor projects due to its ease of use and quick drying properties.
For larger or outdoor crosses, thin-set mortar offers a strong, weather-resistant bond. Both adhesives ensure that mosaic tiles or tesserae adhere securely to the wooden base, allowing you to create a durable and visually appealing mosaic cross.
2.2 Can I use other materials besides tiles for my mosaic cross?
Yes, you can incorporate various materials besides tiles into your mosaic cross, such as glass gems, broken pottery, seashells, beads, mirrored glass, and even small found objects like buttons or coins. These materials add texture, color, and personalization to your artwork, allowing you to create a unique and visually striking mosaic cross that reflects your creativity and artistic vision.
Ensure that the materials are suitable for mosaic application and adhere securely to the base for a durable and aesthetically pleasing result.
2.3 Do I have to grout my mosaic cross?
Grouting your mosaic cross is optional but highly recommended to enhance its durability and visual appeal. Grout fills in the gaps between tiles or tesserae, creating a seamless and polished finish while also securing the mosaic pieces in place.
Additionally, grout helps protect the edges of the tiles from damage and makes cleaning the surface easier. However, if you prefer a different aesthetic or texture, you can explore leaving the mosaic grouted or using alternative finishing techniques.
2.4 How can I hang my mosaic cross?
You can hang your mosaic cross using various methods such as picture hooks, wire with eye screws, sawtooth hangers, Command Strips, or decorative ribbons. Choose a method based on the cross’s size, weight, and the wall surface where you plan to hang it. Ensure the hanging hardware provides secure support to display your mosaic cross safely and beautifully in your desired location.
3. Final thought
Creating a mosaic cross is a beautiful and rewarding project that allows you to express your creativity while crafting a meaningful piece of art. By following this comprehensive guide, you can successfully design and assemble a stunning cross that reflects your personal style and spiritual significance.
Whether you choose to display your work at home, gift it to a loved one, or use it as a decorative piece, it will undoubtedly become a cherished item that showcases your artistic talent and devotion. Happy crafting!
If you have any further questions, don’t hesitate to send thanhcongcraft an email us at [email protected] or message us at WhatsApp: +84967485411. Hope to serve you soon! Best regard!


