Creating a mosaic picture is a wonderful way to express your creativity and produce a unique piece of art that you can proudly display in your home or give as a thoughtful gift.
In this guide, we’ll take you through the process of “how to make a mosaic picture” step-by-step. From selecting the right materials to mastering the techniques needed to assemble and finish your artwork, you’ll find all the information you need to start your mosaic journey.
1. Steps to make a mosaic picture
Creating a mosaic picture is an engaging and artistic process that allows you to transform small pieces of tile, glass, or other materials into a cohesive and beautiful image. Here’s a guide to help you get started:
Materials Needed:
- Base Surface: A sturdy board or canvas to build your mosaic on.
- Tiles or Glass Pieces: Colored tiles, glass, or other mosaic materials.
- Adhesive: A strong glue suitable for your chosen materials.
- Tile Cutter: For cutting tiles or glass into desired shapes and sizes.
- Grout: To fill the gaps between the mosaic pieces.
- Protective Gear: Safety glasses and gloves.
- Grout Sealer: To protect the finished piece.
- Spatula or Grout Float: For applying grout.
- Sponge and Water: For cleaning excess grout.
Step-by-Step Guide:
Step 1: Choose and prepare the base surface
Select a sturdy base such as a wooden board or canvas. Ensure it is clean and smooth. If needed, prime the surface to improve adhesion and provide a solid foundation for your mosaic.
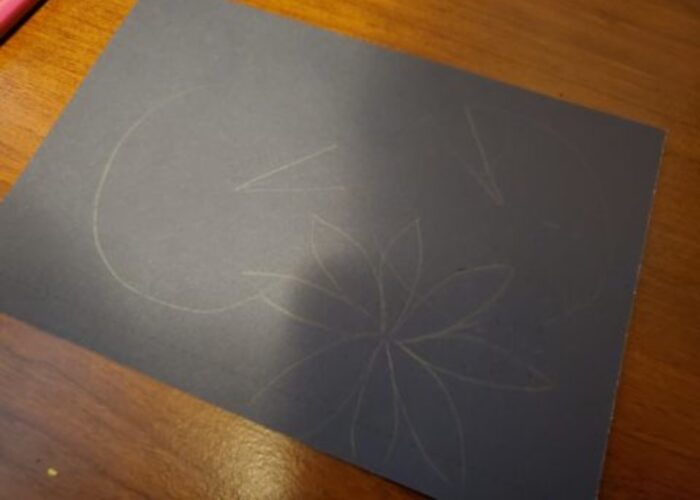
Step 2: Design your mosaic
Plan your design on paper first. Draw a template directly onto the base surface to guide the placement of your mosaic pieces. This will help you visualize the final product and make adjustments before committing to the adhesive.

Step 3: Cut and arrange the tiles or glass
Use a tile cutter to shape your tiles or glass pieces as needed. Lay them out on your base surface without adhesive to finalize the arrangement and ensure everything fits according to your design.
Step 4: Adhere the pieces
Apply adhesive to the back of each tile or glass piece and press it firmly onto the base surface, following your design. Allow the adhesive to dry completely according to the manufacturer’s instructions, ensuring a strong bond.
Step 4: Apply the grout
Once the adhesive is dry, spread grout over the entire surface of the mosaic using a spatula or grout float. Ensure the grout fills all gaps between the pieces to create a uniform and finished look.

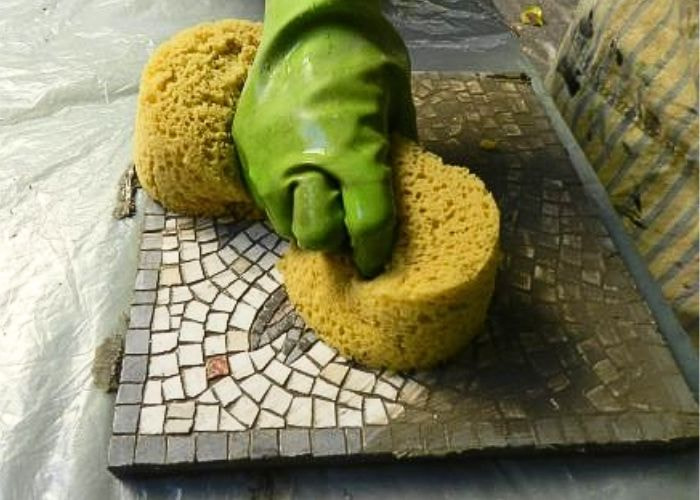
Step 6: Clean off excess grout
After about 15-20 minutes, when the grout begins to set but is still workable, wipe off excess grout from the mosaic surface using a damp sponge. Rinse the sponge frequently to avoid smearing grout over the tiles.

Step 7: Let the grout cure
Allow the grout to cure completely, typically taking about 24 hours. This step is crucial for ensuring the stability and durability of your mosaic picture.
Step 8: Seal the grout
Apply a grout sealer to protect your mosaic from moisture and stains. Follow the sealer’s instructions for application and drying time. Sealing helps maintain the appearance and longevity of your mosaic.
Step 9: Final touches
Once the grout sealer is dry, clean the surface of your mosaic with a soft cloth to remove any remaining grout haze. This final cleaning enhances the shine of the tiles or glass, bringing out the vibrant colors and details of your design.
2. FAQs
2.1 Where can I buy mosaic supplies?
You can buy mosaic supplies from various places including major craft stores or online retailers like Alibaba, Amazon, Etsy, and Mosaic Art Supply provide a wide selection that can be delivered to your home. Additionally, local art centers, tile stores and glass shops specializing in stained glass may have the supplies you need.
These sources offer various options to find everything required for your mosaic projects.
2.2 How do you prevent grout from drying too quickly?
To avoid grout drying too quickly, make sure to mix the mortar continuously. Avoid using too much water, which can cause the grout to dry faster. Work in a cool, shaded area, away from direct sunlight and high temperatures, as these conditions can speed up drying. Lightly spray water on the tiles and work space before applying grout to keep the area lightly moist.
Additionally, consider using a grout retarder, an additive that slows down the drying process.
2.3 Is mosaic art suitable for children?
Yes, mosaic art is suitable for children with proper supervision and age-appropriate materials. Use larger, non-toxic pieces for younger children and ensure they are monitored, especially if using sharp tools or small pieces. Adjust the complexity of the project to match the child’s skill level.
2.4 How can I preserve my mosaic artwork?
To preserve your mosaic artwork, start by sealing the grout with a grout sealer to protect it from moisture, stains, and wear. Regularly clean the mosaic gently with a soft cloth and mild soap to prevent dirt buildup without using harsh chemicals that could damage the grout or tiles.
If displayed outdoors, place the mosaic in a sheltered area to minimize exposure to extreme weather conditions. Handle the artwork with care to avoid dropping or knocking it, which could cause damage to the tiles and grout. These steps will help maintain the beauty and longevity of your mosaic artwork.
3. Final thought
By following these steps, you can create a stunning mosaic picture that showcases your creativity and craftsmanship. Enjoy the process of transforming simple pieces into a beautiful work of art!
If you have any further questions, don’t hesitate to send thanhcongcraft an email us at [email protected] or message us at WhatsApp: +84967485411. Hope to serve you soon! Best regard!


