Creating a DIY mosaic plant pot/ flower pot is a delightful way to add a personalized touch to your garden or home decor. This project combines the art of mosaic-making with the practical use of a plant pot, resulting in a beautiful and functional piece.
Our step-by-step guide will walk you through the process of “how to make a mosaic plant pot” to help you create your very own work. Gather your materials, unleash your creativity, and let’s get started on this rewarding and visually stunning project!
1. Steps to to make a mosaic plant pot
Creating a mosaic plant flower pot is a rewarding and creative project that allows you to personalize your garden décor. Follow these steps to make your own beautiful mosaic plant pot.
Materials Needed:
- Terracotta pot;
- Mosaic tiles (ceramic, glass, or broken tiles);
- Tile nippers;
- Adhesive (tile adhesive or strong craft glue);
- Grout;
- Sponge;
- Sealer (optional);
- Safety goggles;
- Gloves;
- Cloth or rag.
Step-by-Step Guide:
Step 1: Prepare your workspace and materials
Lay out all your materials on a flat surface covered with newspaper or a drop cloth to catch any spills or debris. Wear safety goggles and gloves to protect yourself while working with tiles and adhesives.
Step 2: Design your mosaic pattern
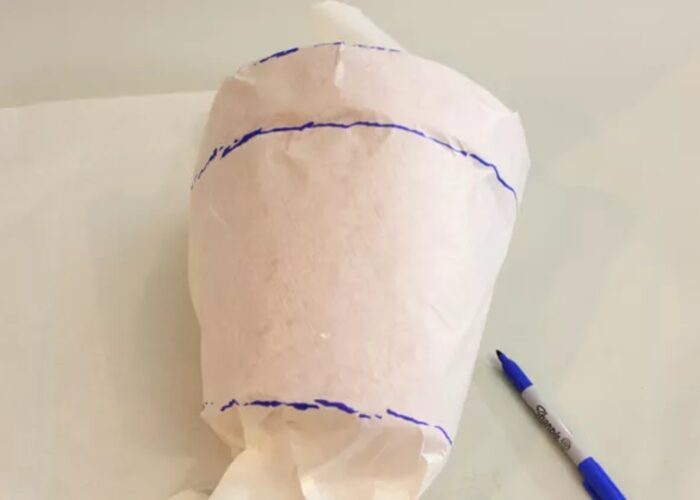
Plan your design before you start gluing the tiles by arranging them on a piece of paper to see how they will fit on the pot. Use tile nippers to cut the tiles into the desired shapes and sizes.
Step 3: Apply adhesive
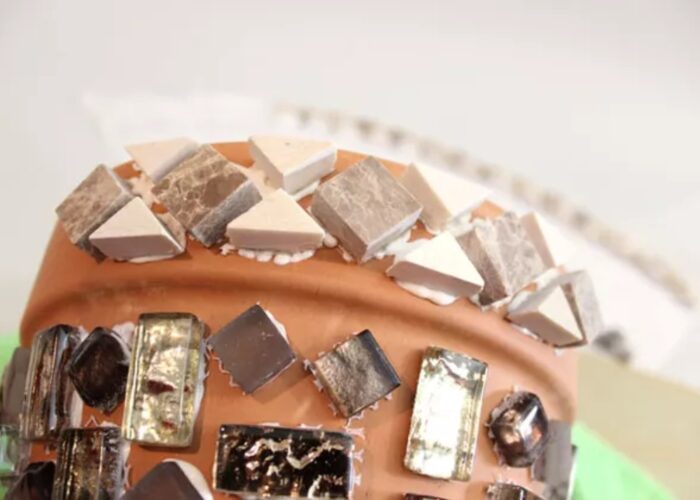
Apply a small amount of adhesive to the back of each tile piece. Start at the bottom of the pot and work your way up, pressing each tile firmly onto the terracotta pot. Leave small gaps between the tiles for the grout. Allow the adhesive to dry completely, which usually takes a few hours or as per the adhesive instructions.
Step 4: Grout the tiles
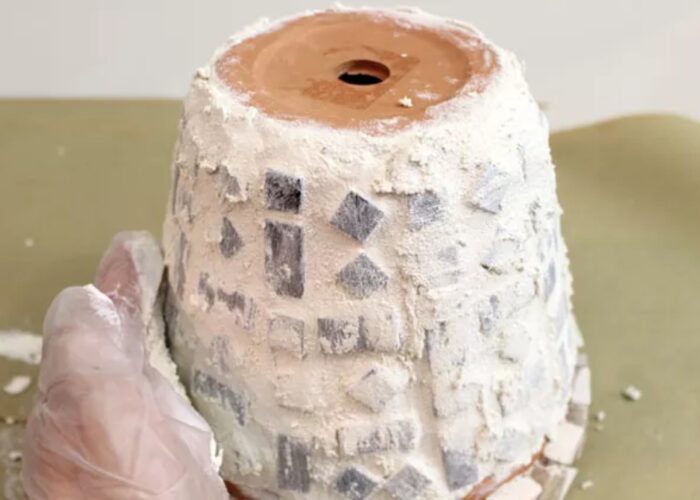
Once the adhesive is dry, it’s time to apply the grout. Mix the grout according to the manufacturer’s instructions until it reaches a peanut butter-like consistency. Spread the grout over the tiles using a grout float or your hands (wear gloves), making sure to press it into the gaps between the tiles.
Step 5: Clean excess grout
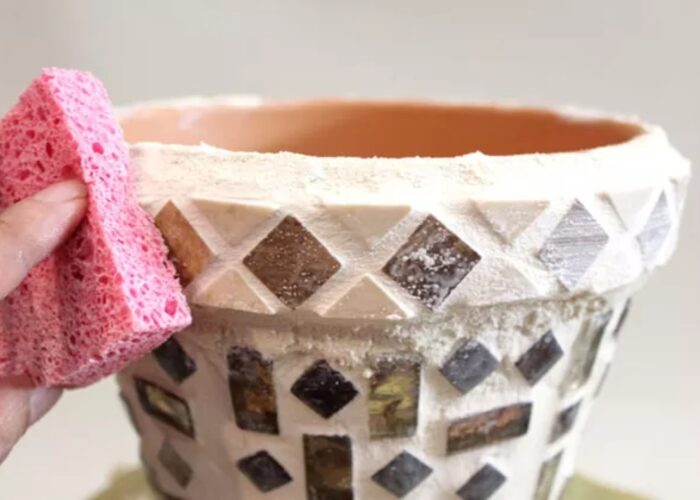
After applying the grout, wait about 15-20 minutes for it to set slightly. Then, use a damp sponge to gently wipe away excess grout from the surface of the tiles. Be careful not to remove grout from the gaps. Rinse the sponge frequently and continue wiping until the tiles are clean.
Step 6: Let the grout cure
Allow the grout to cure for 24 hours. After curing, you may notice a hazy film on the tiles. Use a dry cloth or rag to buff the tiles and remove any remaining haze.
Step 7: Seal the mosaic (optional)
To protect your mosaic plant pot and make it weather-resistant, apply a sealer over the entire surface. Follow the sealer manufacturer’s instructions for the best results.
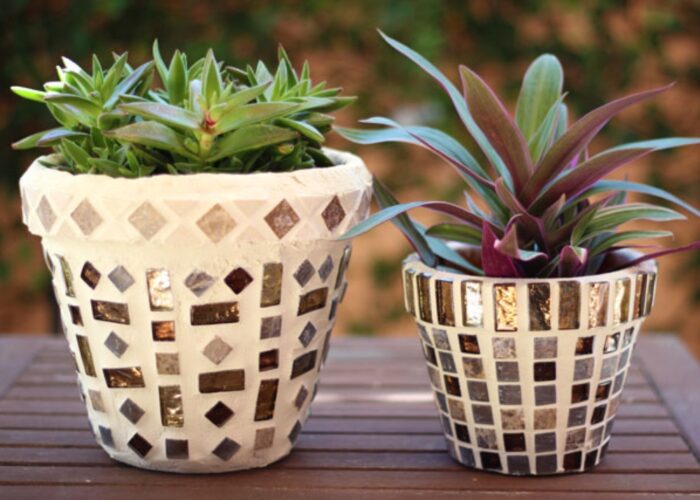
And there you have it! Your unique and beautiful mosaic plant pot is now ready to be displayed in your home or garden. Enjoy the vibrant addition to your décor and the satisfaction of having created it yourself.
2. FAQs
2.1 Can you mosaic plastic pots?
Yes, you can mosaic plastic pots. Mosaicking plastic pots is a creative way to personalize and add a decorative touch to your garden or indoor plants. To ensure a strong bond, use an adhesive that is suitable for plastic surfaces. Prepare the plastic surface properly by cleaning it thoroughly and, if needed, roughening it slightly with sandpaper to help the adhesive grip better.
Follow standard mosaic techniques for applying tiles and grout, adjusting as necessary for the plastic material to ensure a durable and attractive finish.
2.2 Can I use broken dishes or seashells for my mosaic?
Yes, you can use broken dishes or seashells for your mosaic project. Incorporating these materials can add a unique and artistic flair to your mosaic design. When using broken dishes, ensure that the sharp edges are smoothed and that the pieces are securely adhered to your surface with a suitable adhesive.
Seashells can also be used effectively, adding texture and a coastal theme to your mosaic. Just be sure to clean and dry the shells thoroughly before applying them to ensure they adhere well and maintain their natural beauty in your mosaic artwork.
2.3 Do I need to seal my mosaic planter pot?
Yes, it’s generally recommended to seal your mosaic planter pot after grouting. Sealing helps protect the grout and tiles from moisture, stains, and other environmental factors, ensuring that your mosaic remains durable and attractive over time.
Use a grout sealant suitable for your specific mosaic materials and follow the manufacturer’s instructions for application and drying times. This step will help preserve the appearance and longevity of your mosaic planter pot, especially if it’s exposed to outdoor elements.
3. Conclusion
Creating a DIY mosaic plant pot is not only a fulfilling artistic endeavor but also a practical way to enhance your garden or home décor. By following the detailed steps outlined in this guide, you can craft a personalized and visually stunning piece that reflects your unique style and creativity.
Your DIY mosaic plant pot will surely be a conversation starter and a cherished addition to your space for years to come.
If you have any further questions, don’t hesitate to send thanhcongcraft an email us at [email protected] or message us at WhatsApp: +84967485411. Hope to serve you soon! Best regard!


