Creating a stunning mosaic table top with broken tiles is not only a creative endeavor but also a rewarding one. Whether you’re a seasoned crafter or a newcomer to DIY projects, making a mosaic table top with broken tiles opens up a world of artistic possibilities. From transforming ordinary furniture into unique pieces to expressing your personal style through patterns and colors, this craft combines craftsmanship with ingenuity.
Let’s explore the how to make a mosaic table top with broken tiles into a beautiful mosaic that will breathe new life into your home decor.
1. How to make a mosaic table top?
Creating a mosaic table top can be a fun and rewarding project, allowing you to personalize your furniture with unique designs and colors. Here’s a step-by-step guide on how to make a mosaic table top:
Materials Needed:
- Table Base: Choose a sturdy table base that suits the size and shape you want.
- Tiles: Use ceramic or glass tiles in various colors. You can use whole tiles or break them into smaller pieces for a mosaic effect.
- Tile adhesive or thin-set mortar.
- Grout: Choose grout in a color that complements your tiles.
- Sealant: A sealant or varnish to protect the finished mosaic.
Step-by-Step Guide:
Step 1: Prepare the table base
Before you begin, ensure your table base is clean and smooth. Sand down any rough spots and wipe away dust or debris. A clean surface will ensure the tiles adhere properly.
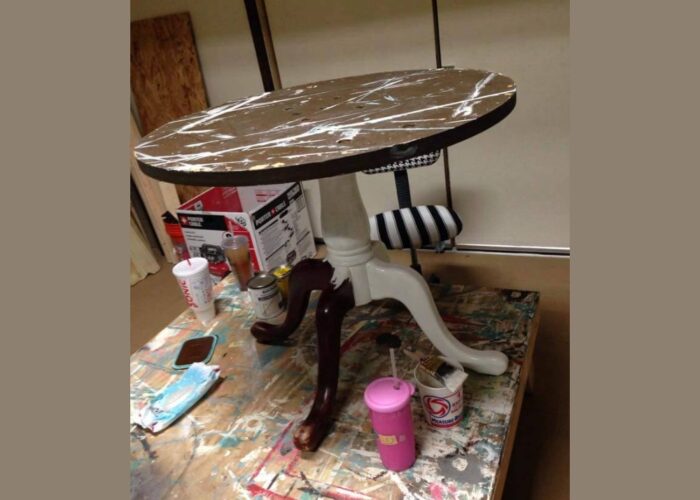
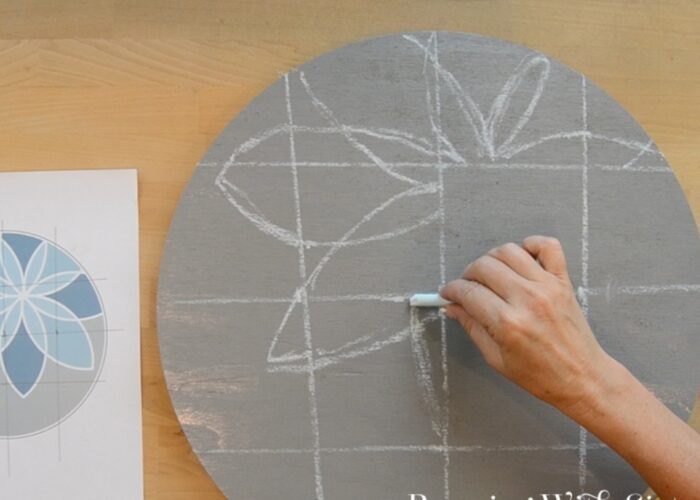
Step 2: Design and layout
Plan your mosaic design. You can sketch it directly onto the table top or work freehand as you place the tiles. Consider using different colors and shapes to create a visually appealing pattern.
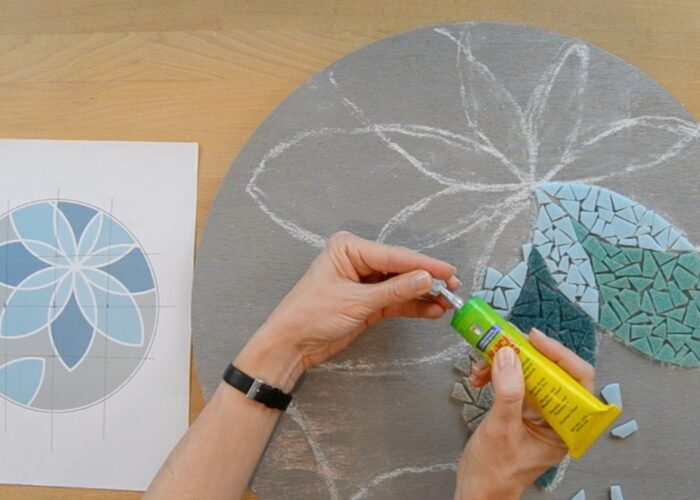
Step 3: Put mosaic tiles on table
To put mosaic tiles on table, apply adhesive to the tiles then place them according to your design. Leave a small gap between tiles for grout. Continue applying adhesive and placing tiles until the entire design is filled in. You may need to cut tiles to fit the edges or corners of the table top.
Step 4: Allow adhesive to cure
Let the adhesive cure according to the manufacturer’s instructions. This usually takes about 24 hours, but check the adhesive label for specific drying times.
Step 5: Apply grout
Once the adhesive is completely dry, mix grout according to the package instructions. Use a grout float to spread grout over the tiles, pressing it into the gaps between tiles. Work in small sections to ensure even coverage.
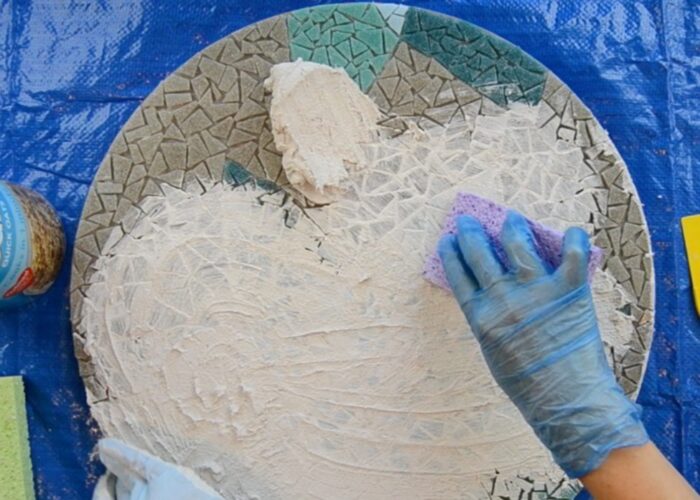
Step 6: Clean off excess grout
After about 15-20 minutes, when the grout begins to set, wipe off excess grout from the tiles using a damp sponge. Rinse the sponge frequently to avoid smearing grout over the tiles. Allow the grout to dry completely (usually another 24 hours). Once dry, buff the tiles with a soft cloth to remove any remaining grout haze.
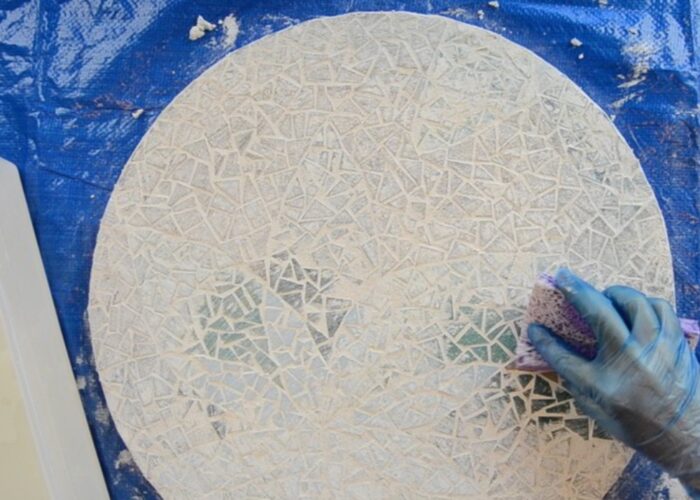
Your mosaic table top is now ready to be placed in its designated spot. Admire your handiwork and enjoy the unique addition to your home decor!
2. FAQs
2.1 What types of tables are suitable for creating a mosaic table top?
Various types of tables serve as excellent candidates for crafting mosaic table tops. Solid wood tables provide a sturdy base and can be prepared to ensure a smooth surface for adhering tiles. Metal tables, such as those made from iron or aluminum, offer durability and can be treated to prevent rust.
Tables with existing tile surfaces can be refreshed by integrating new mosaic designs, while outdoor tables made from weather-resistant materials require proper sealing for longevity. Whether repurposing old furniture or starting anew, selecting the right table base is crucial for achieving a beautiful and functional mosaic piece that enhances any space.
2.2 Can I use broken dishes or other recycled materials for my mosaic design?
Yes, you can definitely use broken dishes or other recycled materials for your mosaic design. Broken ceramic dishes, glass bottles, tiles, and even small stones can all be creatively incorporated into a mosaic. These materials not only add texture and uniqueness to your design but also promote sustainability by repurposing items that might otherwise be discarded.
When using recycled materials, ensure they are clean, free of sharp edges, and securely adhered to the table surface. With careful planning and creativity, recycled materials can result in a visually appealing and environmentally friendly mosaic table top.
2.3 What is the best base for an outdoor mosaic table?
The best base for an outdoor mosaic table is durable and weather-resistant, such as weather-resistant wood (teak or cedar), metal (wrought iron or aluminum), or concrete. These materials can withstand outdoor conditions, especially when properly sealed, ensuring your mosaic table remains both beautiful and functional over time.
2.4 How do I choose the right adhesive for my mosaic table top?
Choose an adhesive that matches the materials used in your mosaic (like ceramic or glass), adheres well to your table’s surface (wood, metal, concrete), and suits your project’s indoor or outdoor location. Opt for strong bonding strength, flexibility for varying conditions, and a suitable drying time for your mosaic table top.
3. Final thought
Making a DIY mosaic table top with broken tiles is a fulfilling and artistic project that transforms ordinary furniture into unique, personalized pieces. By selecting the right materials, carefully planning your design, and following the step-by-step process, you can breathe new life into your home decor with a beautiful mosaic table top.
So, grab your materials, enjoy the process, and proudly display your handcrafted masterpiece in any space. Happy crafting!
If you have any further questions, don’t hesitate to send thanhcongcraft an email us at [email protected] or message us at WhatsApp: +84967485411. Hope to serve you soon! Best regard!


