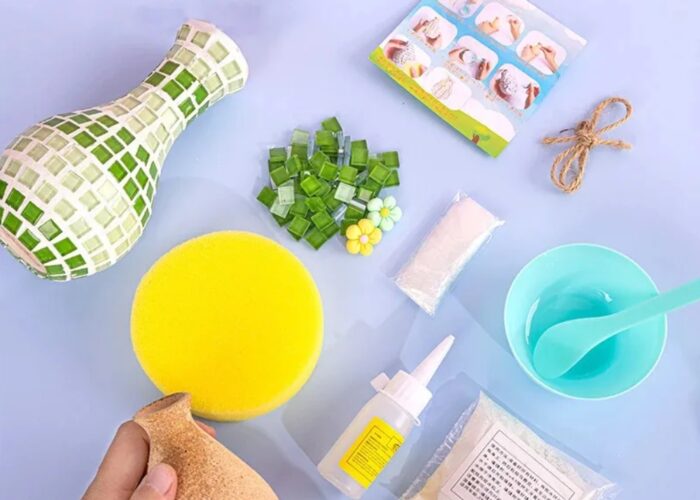
Creating a mosaic vase is a creative and fulfilling project that allows you to transform a plain vase into a work of art. Whether you’re a seasoned crafter or just starting, this DIY endeavor offers a wonderful opportunity to personalize your decor with vibrant colors and unique patterns.
In this guide, we’ll show you the how to make a mosaic vase guide, from choosing materials to applying grout, enabling you to create a stunning centerpiece that reflects your creativity and style. Have a read!
1. Steps to make a mosaic vase
Creating a mosaic vase is a creative and rewarding DIY project that allows you to personalize your home decor with a unique artistic touch. Here’s a step-by-step guide to help you get started:
Materials Needed:
- Plain glass or ceramic vase;
- Mosaic tiles (glass, ceramic, or other decorative materials);
- Tile adhesive suitable for glass or ceramic;
- Grout;
- Grout sealant;
- Tile nippers (for cutting tiles);
- Safety glasses;
- Gloves;
- Sponge;
- Soft cloth;
- Pencil and ruler;
- Optional: Mosaic design pattern or template.
Step-by-Step Instructions:
Step 1: Prepare your work area
Set up a clean and flat workspace. Protect the surface with a plastic sheet or newspaper. Wear safety glasses and gloves to protect yourself while handling tiles and tools.
Step 2: Design your mosaic
Use a pencil to lightly sketch your design on the vase. You can also use a pre-made mosaic design pattern or template for guidance. Plan the placement of your mosaic tiles to achieve a balanced and aesthetically pleasing design.

Step 3: Cut and arrange tiles
Use tile nippers to cut mosaic tiles to the desired size and shape, if necessary. Arrange the tiles on the vase according to your design, ensuring they fit well together and align with your pattern.
Step 4: Glue the tiles
Apply tile adhesive to the back of each tile using a small brush or spatula. Press the tiles firmly onto the vase, following your design. Leave a small gap between each tile for grouting.
Step 5: Apply grout
Once the adhesive has dried according to the manufacturer’s instructions, mix the grout to the desired consistency. Use a spatula or gloved fingers to spread the grout over the tiles, pressing it into the gaps. Wipe off excess grout with a damp sponge before it dries completely, being careful not to disturb the tiles.
Step 6: Clean and finish
After the grout has set but is still slightly wet, use a damp sponge to clean the tiles and remove any grout haze. Allow the grout to cure completely, typically for 24 hours.
Step 7: Seal the mosaic (optional)
Apply grout sealant to protect the grout and tiles from moisture and stains. Follow the manufacturer’s instructions for application and drying time.
Step 9: Final touches
Once the sealant has dried, buff the mosaic vase with a soft cloth to enhance its shine and remove any remaining residue.
By following these steps and using your creativity, you can create a beautiful and personalized mosaic vase that adds a touch of artistic flair to your home decor. Enjoy the process and admire your handmade masterpiece!
2. FAQs
2.1 Can you mosaic on a glass vase?
Yes, you can mosaic on a glass vase. Glass vases provide a smooth and transparent surface that can showcase mosaic tiles beautifully. It’s important to use a suitable adhesive designed for glass and follow proper techniques to ensure strong adhesion of the tiles.
Additionally, consider using mosaic tiles that are specifically made for glass surfaces to achieve the best results.
2.2 What adhesive is used for glass on glass mosaics?
For glass on glass mosaics, it’s recommended to use a clear silicone adhesive or a specific glass adhesive designed for mosaic art. These adhesives provide a strong bond specifically suited for glass surfaces, ensuring that the mosaic tiles adhere securely without affecting the transparency or appearance of the glass vase or project. Always follow the manufacturer’s instructions for application and drying times to achieve the best results.
2.3 How long does it take for the grout to dry?
The drying time for grout can vary depending on factors such as humidity levels, temperature, and the type of grout used. In general, grout typically takes about 24 hours to dry completely. It’s important to allow the grout to cure undisturbed during this time to ensure a strong and durable finish for your mosaic project.
2.4 Can I paint the grout after it dries?
Yes, you can paint the grout after it has dried completely. Painting the grout can help enhance the appearance of your mosaic by adding contrast or complementing the colors of the tiles. Use a grout paint or acrylic paint that is suitable for grout surfaces.
Ensure that the grout is clean and free of any residues before painting, and follow the paint manufacturer’s instructions for application and drying times for best results.
3. Conclusion
Creating a mosaic vase is a gratifying and artistic DIY project that can transform an ordinary vase into a stunning centerpiece. By following the step-by-step guide provided, you’ll not only develop new crafting skills but also produce a unique piece that reflects your personal style and creativity.
Whether you choose vibrant, colorful tiles or opt for a more subtle design, your mosaic vase will undoubtedly become a cherished addition to your home decor. Embrace the process, enjoy the creative journey, and take pride in your handmade masterpiece. Happy crafting!
If you have any further questions, don’t hesitate to send thanhcongcraft an email us at [email protected] or message us at WhatsApp: +84967485411. Hope to serve you soon! Best regard!


