Are you interested in how to make a mosaic wall art for beginners? Creating your own mosaic wall art can be a rewarding and creative project, even if you’re just starting out. Mosaic art allows you to blend colors and textures into unique designs that can add a personal touch to any space.
In this guide, we’ll walk you through the step-by-step process of creating a mosaic wall art piece, from gathering materials to finishing touches, making it accessible for those new to mosaic crafting. Have a read!
1. How to make a mosaic wall art step by step?
Creating mosaic wall art can be a fun and fulfilling project, allowing you to express your creativity through colors and patterns. Follow these steps to create your own mosaic masterpiece:
Materials Needed:
- Base: Wooden board or canvas;
- Tiles or Tesserae: Ceramic tiles, glass tiles, or other mosaic pieces;
- Adhesive: Weldbond adhesive or mosaic glue;
- Grout: Sanded grout (in a color of your choice);
- Sealant: Mosaic sealant or waterproofing sealer;
- Tools: Tile nippers, safety goggles, gloves, spatula or spreader, sponge, and water bucket.
Step-by-Step Instructions:
Step 1: Design your mosaic
Set up a clean and well-ventilated workspace. Cover your surface with newspaper or a drop cloth to protect it from adhesive and grout. Plan your design on paper or directly on the base. Consider colors, patterns, and placement of tiles to achieve the desired look.

Step 2: Prepare tiles and base
If using larger tiles, cut them into smaller pieces using tile nippers. Ensure all pieces fit together neatly.
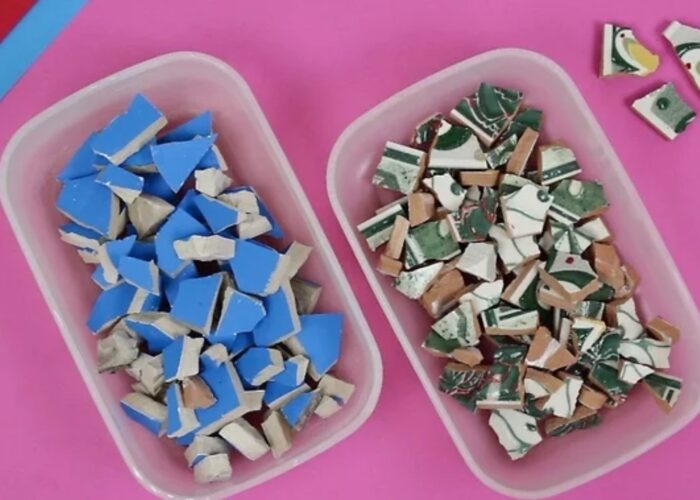
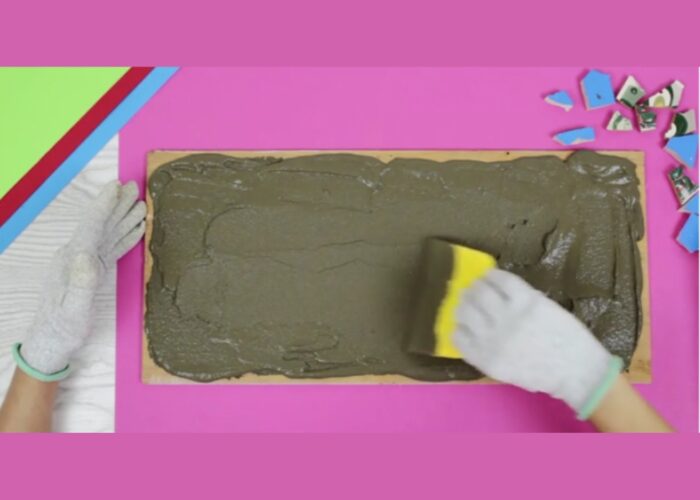
Step 3: Apply adhesive
Apply a thin layer of adhesive to a small section of the base using a spatula or spreader. Work in small areas to prevent the adhesive from drying out.
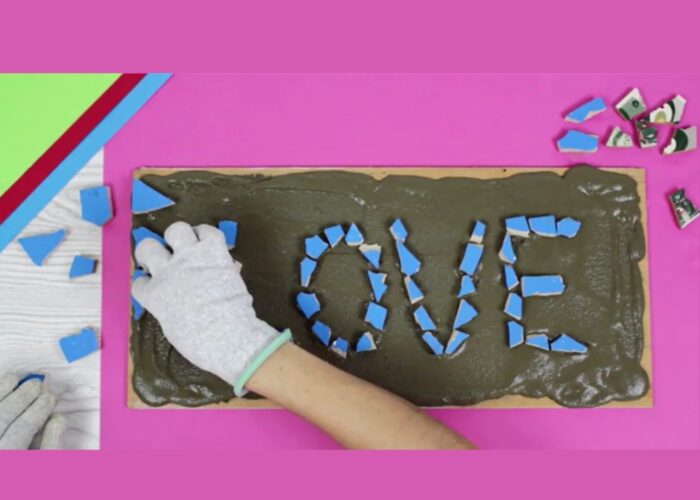
Step 4: Place tiles
Place each tile or tessera firmly into the adhesive, following your design. Leave a small gap between tiles for grout.
Step 5: Let It dry
Allow the adhesive to dry completely as per the manufacturer’s instructions. This typically takes 24 hours.
Step 6: Apply grout
Once the adhesive is dry, prepare the grout according to the instructions on the package. Using a spatula or spreader, spread the grout evenly over the tiles, pressing it into the gaps.
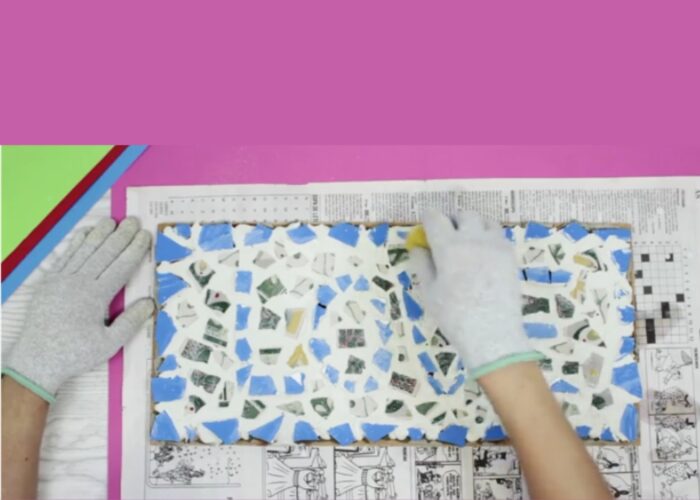
Step 7: Remove excess grout
After about 15-20 minutes, when the grout begins to set, use a damp sponge to wipe off excess grout from the tiles. Rinse the sponge frequently in clean water.
Step 8: Clean and polish
Continue wiping the tiles until they are clean and the grout lines are smooth. Let the grout dry completely, usually for 24-48 hours.
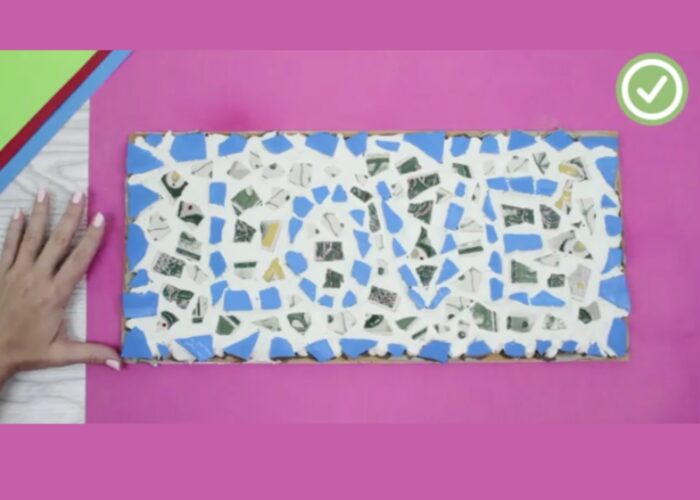
Step 9: Display your artwork
Once the grout is fully dry, apply a coat of mosaic sealant or waterproofing sealer over the entire piece. This helps protect the mosaic and enhances its colors. After the sealant has dried, your mosaic wall art is ready to be displayed! Mount it securely on a wall or place it in a frame for added protection.
2. FAQs
2.1 Can I use broken or mismatched tiles for mosaic art?
Yes, you can absolutely use broken or mismatched tiles for mosaic art! In fact, using these materials can add a unique and artistic flair to your mosaic projects. Broken tiles can be carefully arranged to create interesting patterns and textures, while mismatched tiles can contribute to a creative and eclectic design.
Just ensure that the tiles are clean, free of sharp edges that could be hazardous, and securely adhered to your base using mosaic adhesive. This approach not only reduces waste but also encourages creativity in mosaic artistry.
2.2 What surfaces are suitable for mosaic artwork?
Mosaic artwork can enhance various surfaces, ranging from wood and canvas to ceramic, glass, concrete, and metal. These surfaces provide versatile platforms for creating intricate designs that add color and texture to both indoor and outdoor spaces.
Whether decorating a wall, revamping furniture, or embellishing garden features, the choice of surface influences the durability and visual impact of mosaic art, encouraging creativity and personal expression in decorative projects.
2.3 What are the techniques for creating a mosaic?
Creating a mosaic combines artistic vision with practical skills. It begins with designing the pattern and cutting tiles to fit. Adhesive is applied to secure the pieces, followed by grouting to fill gaps and smoothing the surface. Cleaning off excess grout reveals the mosaic’s design, and sealing protects and enhances its durability and appearance over time.
If you have any further questions, don’t hesitate to send thanhcongcraft an email us at [email protected] or message us at WhatsApp: +84967485411. Hope to serve you soon! Best regard!


