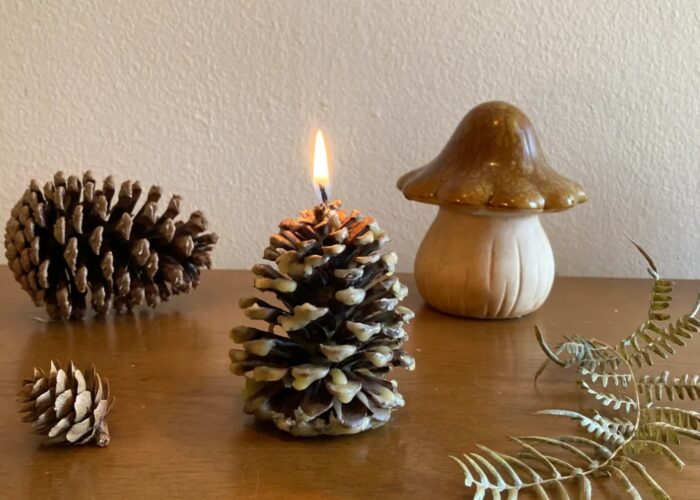
When winter arrives, there’s nothing cozier and more enjoyable than crafting your own pine cone fireplace to ward off the cold. This article will guide you through how to make a pine cone fire starter, not only providing practicality but also bringing a warm ambiance to your home.
With readily available materials and simple procedures, you’ll be able to generate a natural, environmentally friendly heat source that’s safe and efficient. Let’s explore how to transform ordinary pine cones into a warm fire for this winter season.
1. Steps to make to make a pine cone fire starter
Crafting your own pine cone fire starters is a rewarding and practical way to ignite fires with ease. Here’s how to do it:
Materials:
- Pine cones: Gather dry pine cones of various sizes.
- Wax: You can use old candles, paraffin wax, or beeswax.
- Double boiler or old pot and heat-safe container: For melting the wax.
- Wick or cotton twine: Optional, for added burn time.
Step by Step:
Step 1: Prepare the pine cones
Ensure the pine cones are clean and completely dry. Bake them in the oven at a low temperature (around 200°F or 93°C) for about 30 minutes to remove any moisture and open up the scales. Let them cool before handling.

Step 2: Melt the wax
If you’re using old candles, remove the wicks and break the wax into small pieces. Place the wax in a double boiler or a heat-safe container set in a pot of water. Heat gently over medium-low heat until the wax is completely melted.

Step 3: Dip the pine cones
Using tongs or a heat-safe glove, dip each pine cone into the melted wax, ensuring it’s fully coated. You can also use a brush to apply wax to the pine cones if dipping is too messy.

Step 4: Optional add a wick
If you want your fire starters to burn longer, you can insert a wick or a piece of cotton twine into the base of each pine cone before dipping. This will provide a longer, more controlled burn.

Step 5: Let cool and store them
Place the wax-coated pine cones on a sheet of wax paper or a wire rack to cool and harden. Allow sufficient time for the wax to set completely.
Once the wax has hardened, store your pine cone fire starters in a cool, dry place until you’re ready to use them. They can be stored in a basket near your fireplace or camping gear.
Step 6: Light and enjoy
To use the fire starters, simply place them underneath your firewood or charcoal and light the wick or directly light the wax-coated pine cone. The wax will act as a natural accelerant, helping to ignite the fire quickly and efficiently.

By following these steps, you can create your own pine cone fire starters to make lighting fires easier and more sustainable. They’re perfect for cozy evenings by the fireplace or for starting campfires while enjoying the great outdoors.
2. FAQs
2.1 How long do pine cone fire starters burn?
The burning duration of pine cone fire starters can vary depending on several factors such as the size of the pine cone, the amount of wax used, and environmental conditions. On average, a well-made pine cone fire starter can burn for approximately 10 to 20 minutes.
However, this duration can be extended by using larger pine cones, adding more wax for a thicker coating, or incorporating a wick or cotton twine for a slower, more controlled burn.
2.2 What is the best wax for pine cone fire starters?
The best wax for pine cone fire starters depends on personal preference and availability. However, some commonly used waxes include old candles, paraffin wax, and beeswax.
2.3 Can I use scented wax for pine cone fire starters?
While it’s technically possible to use scented wax for pine cone fire starters, it’s generally not recommended. Scented wax contains added fragrances that may release chemicals when burned, potentially producing unpleasant or even harmful fumes.
The scent may not complement the natural aroma of burning pine cones. For safety and simplicity, it’s best to stick to unscented wax, such as old candles, paraffin wax, or beeswax, when making pine cone fire starters. This ensures a clean burn and reduces the risk of inhaling harmful substances.
2.4 How many pine cone fire starters should I make for a camping trip?
The number of pine cone fire starters you should make for a camping trip depends on various factors such as the duration of your trip, the frequency of fires you plan to build, and the availability of alternative fire-starting methods. As a general guideline, it’s a good idea to have at least one pinecone fire starter per fire you anticipate lighting.
2.5 Is it safe to use pine cones as a fire starter?
Yes, it is generally safe to use pine cones as a fire starter. Pine cones are naturally occurring materials that are commonly used in fire starting due to their flammable properties. However, it’s important to ensure that the pine cones you use are clean, dry, and free from any moisture or contaminants that could produce excessive smoke or unpleasant odors when burned.
If you’re using pine cones coated with wax or other accelerants, it’s essential to follow proper safety precautions and use them in a well-ventilated area to avoid inhaling any fumes.
3. Conclusion
Making your own pine cone fire starters is not only a cost-effective and practical solution for lighting fires but also a fun and rewarding DIY project. By following the simple steps outlined, from preparing the pine cones and melting the wax to dipping the cones and optionally adding a wick, you can make efficient and aesthetically pleasing fire starters.
These homemade fire starters can be conveniently stored and used whenever needed, making them perfect for both home fireplaces and outdoor adventures. Enjoy the satisfaction of making something useful while ensuring a quick and easy fire-starting experience every time.
If you have any further questions, don’t hesitate to send thanhcongcraft an email us at [email protected] or message us at WhatsApp: +84967485411. Hope to serve you soon! Best regard!


