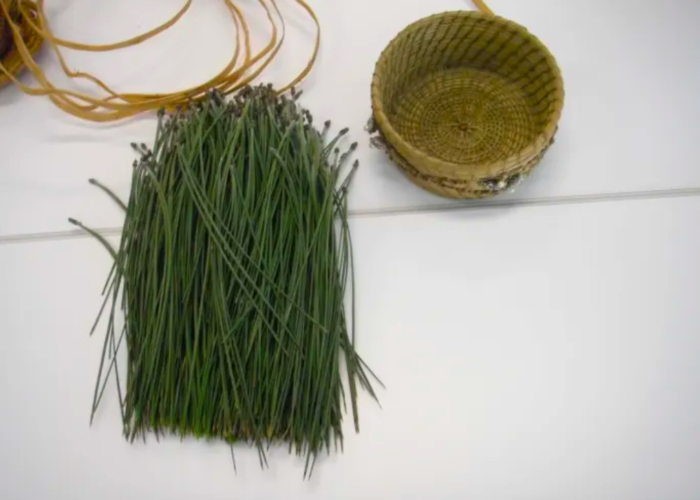
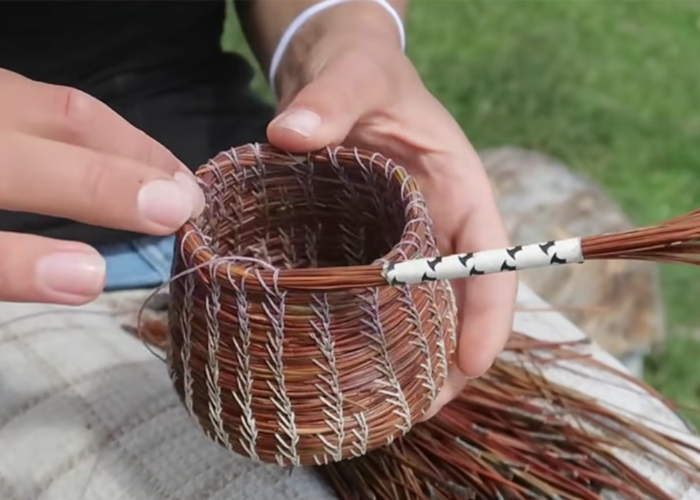
Making a pine needle basket is not only a lesson in the art of handicraft but also a journey of exploration into culture and tradition. From selecting the freshest pine needles to intricately connecting each needle, every step requires patience and creativity.
This article will guide you through how to make a pine needle basket create a beautiful, durable, and uniquely personalized pine needle basket. It’s not just an enjoyable recreational activity but also an opportunity to connect with nature and develop your crafting skills. Have a read!
1. Steps to make a pine needle basket
Weaving a pine needle basket is a rewarding and creative endeavor that connects you with nature and traditional craftsmanship. By following these step-by-step instructions, you can create a beautiful and durable basket using simple materials and techniques.
Step 1: Gather materials
Prepare pine needles for basket weaving, preferably from longleaf pine or another suitable species. Prepare a strong thread or waxed linen thread for stitching. Obtain a curved needle, scissors, and a small container of water.

Step 2: Prepare pine needles
Soak the pine needles in water for several hours to soften them, making them more flexible for weaving. How long to soak pine needles for baskets? Remove any debris or excess bark from the needles. Sort the needles by size to ensure uniformity in your basket’s appearance.
Step 3: Secure the pine needles
Use waxed polyester thread to secure the pine needles. Insert the pine needles into a plastic straw, ensuring a snug fit while allowing room for the straw to move. This will serve as your size gauge.

Step 4: Create the base for the basket
Wrap the pine needles with your string, then thread the needle through the coil you just made to create the middle base of your basket. Continue this process as you move around in a circle. You may need to use pliers to pull the needle through the thread on the other side.
Step 5: Fix the basket structure
Once you have a solid middle base, begin stitching the needle through the previous section, weaving it over the pine needles. Stitch approximately every 3 mm to secure the structure.
Step 6: Weave the basket
To weaving the walls of the basket, stack the pine needles on top of each other, gradually increasing the height as you continue stitching.

Step 7: Final touches
Once the basket is complete, allow it to dry thoroughly to set the shape and strengthen the stitches. Optionally, apply a protective sealant or varnish to enhance durability and preserve the natural beauty of the pine needles.
2. FAQs
2.1 What kind of thread do you use for pine needle baskets?
For pine needle baskets, it’s common to use waxed polyester thread. This type of thread provides durability and strength, making it suitable for securing the pine needles together while weaving the basket.
2.2 What are the best needles for pine needle baskets?
The best needles for pine needle baskets are typically longleaf pine needles due to their length, flexibility, and durability. These needles are often preferred for their ease of use and ability to create sturdy baskets.
2.3 How do you dry pine needles for basket weaving?
To dry pine needles for basket weaving, start by collecting fresh needles and cleaning them of any debris. Lay them out in a single layer on a clean, dry surface in a well-ventilated area away from direct sunlight. Allow them to air dry for several days to a week, turning them occasionally to ensure even drying. Once they snap easily when bent and feel dry to the touch, they are ready to be stored in a breathable container until needed for weaving.
2.4 What plants are pine needles good for?
Pine needles, often available in abundance from fallen pine tree foliage, can be a valuable mulch for various plants in gardens and flowerbeds. They are particularly beneficial for acid-loving plants due to their slightly acidic nature when fresh, which becomes neutral as they decompose. Plants such as azaleas, rhododendrons, and blueberries thrive with pine needle mulch, as it helps maintain the acidic soil conditions these species favor. Additionally, pine needles can be used in vegetable gardens and around perennials to protect them over winter, thanks to their insulating properties.
3. Final thought
Creating a pine needle basket is a delightful journey of craftsmanship and creativity. By following these step-by-step instructions, you can craft a unique and functional basket that reflects your personal style and connection to nature. Enjoy the process and cherish the beauty of your handmade creation.
If you have any further questions, don’t hesitate to send thanhcongcraft an email us at [email protected] or message us at WhatsApp: +84967485411. Hope to serve you soon! Best regard!


