Creating a pinecone wreath on a wire frame is a delightful and rewarding craft project that brings the rustic charm of nature into your home decor. Whether you’re looking to adorn your front door, fireplace mantle, or any space that needs a touch of seasonal elegance, a pinecone wreath is a versatile and beautiful addition. This guide will help you learn how to make a pinecone wreath on a wire frame, from gathering materials to assembling your wreath, ensuring you achieve a stunning, handmade decoration that you can enjoy year-round.
Let’s get started on crafting your unique pinecone wreath!
1. Steps to make a pinecone wreath on a wire frame
To create a pinecone wreath on a wire frame, you will need the following materials:
Materials:
- Bypass pruners (or other sturdy hand shears)
- Roll of paddle wire (I suggest 22 gauge)
- Wire snips
- Wire wreath frame
- Your favorite greens and foliage
- Ribbon or bow: Optional, for decoration.
Step-by-Step Guide:
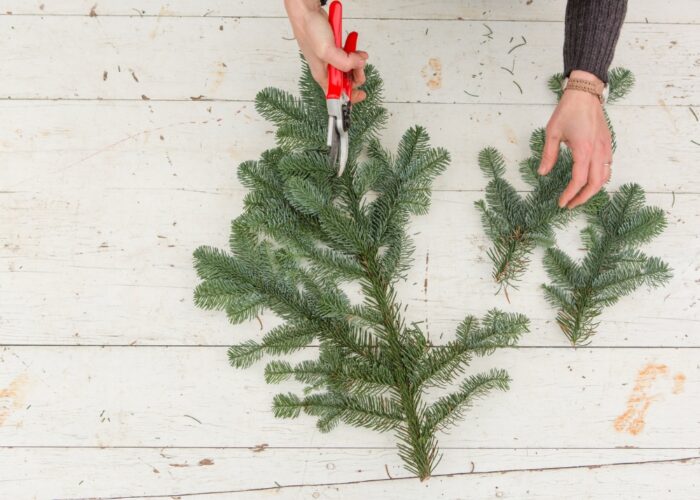
Step 1: Prepare wreath material
For a structured, symmetrical wreath, aim to trim your branches into 4- to 6-inch segments. If you prefer a wilder, more “natural-looking” wreath, cut your branches into various pieces ranging from 4 to 8 inches. Sorting your pieces into piles by type will keep you organized during assembly.

Step 2: Reinforce with wire or twine (optional)
For added stability, you can wrap floral wire or twine around the pinecones and the wire frame, securing them tightly in place. This step is particularly helpful if you plan to hang the wreath outdoors where it might be exposed to wind or other elements.

Step 2: Add materials to frame
Begin by selecting a branch of each ingredient and creating a small “bouquet” in your hand. Place your “bouquet” on the wire frame, then wrap the paddle wire around the bunch three to five times. With each wrap, apply significant tension to the wire, ensuring a secure hold. Continue adding bunches and wrapping in this manner as you progress.

Step 3: Finish wreath by tying it off
To finish your wreath, wrap the wire around the frame two to three more times. Use wire cutters (or pruners with a wire notch) to clip the wire. Then, flip the wreath over and thread the wire end through the frame, wrapping the slack around a metal piece. Secure by tucking the end towards the greens to avoid scratching your door or wall.

Step 4: Add decorative touches
Enhance your wreath with pine cones, bows, dried flowers, or ornaments to achieve your desired aesthetic.
2. FAQs
2.1 How to attach pinecones to a foam base?
Using a hot glue gun or a strong adhesive suitable for foam, apply a generous amount of glue to the bottom of each pinecone, then firmly press them onto the foam base, filling any gaps as you go. Allow the glue to dry completely before moving or hanging your pinecone wreath. This method ensures that your pinecones are securely attached to the foam base, creating a stunning and durable decoration for your home.
2.2 How many pine cones to make a wreath?
The number of pinecones needed to make a wreath depends on the size of the wreath and the size of the pinecones. On average, you may need anywhere from 50 to 100 pine cones for a standard-sized wreath. However, if you prefer a fuller wreath or if you’re using smaller pinecones, you may need more.
It’s a good idea to gather a few extra pinecones to account for any gaps or to adjust the density of your wreath according to your preference.
2.3 What do you spray on pine cones to preserve them?
To preserve pine cones, a common method is to use a transparent coating such as acrylic spray paint, polyurethane, or varnish spray. Firstly, the pine cones need to be thoroughly cleaned, removing any insects and fully opened after being completely dry. Then, spray a thin and even layer over the entire surface of the pine cone, including underneath, to create a protective coating.
Allow the coating to dry for about 10 minutes before flipping the pine cones and spraying the remaining surface. Let the sealer dry for at least half an hour before applying additional coats if necessary.
2.4 How long will my pinecone wreath last?
The lifespan of your pinecone wreath depends on several factors such as how well it’s preserved, where it’s displayed, and environmental conditions. With proper preservation and care, including sealing the pinecones to prevent them from drying out, your wreath can last for several years.
However, if exposed to moisture or extreme temperatures, it may deteriorate more quickly. Regularly inspecting and touching up any areas that show signs of wear can help prolong its lifespan.
3. Conclusion
With these simple steps, you can create a pinecone wreath that is both beautiful and unique. Whether you prefer a more polished look or a rustic, natural style, this DIY project allows for plenty of creative freedom. Enjoy the process of crafting your wreath, and take pride in the lovely decoration you’ve made to celebrate the season.
If you have any further questions, don’t hesitate to send thanhcongcraft an email us at [email protected] or message us at WhatsApp: +84967485411. Hope to serve you soon! Best regard!


