How to make a stained glass mosaic stepping stone? The art of creating a stained glass mosaic stepping stone is a journey that harmonizes the vibrancy of glass with the enduring solidity of stone. If you’re seeking to infuse your garden or pathway with artistic flair, mastering how to make a stained glass mosaic stepping stone can elevate any outdoor space into a vivid mosaic masterpiece.
This guide will lead you through the step-by-step process of transforming ordinary concrete into striking stained glass mosaic stepping stones that are sure to make a lasting impression. Have a read!
1. Steps to make a stained glass mosaic stepping stone
Creating a stained glass mosaic stepping stone is a rewarding craft that combines the beauty of glass with the functionality of a garden stepping stone. Here’s how you can make your own:
Materials Needed:
- Concrete Stepping Stone Mold: Choose a mold of your desired shape and size.
- Stained Glass: Select colored stained glass pieces or glass tiles.
- Glass Cutter: For cutting stained glass into desired shapes.
- Adhesive: Waterproof adhesive suitable for glass and outdoor use.
- Grout: Outdoor grout in a color of your choice.
- Protective Gear: Gloves, safety glasses, and a dust mask.
- Mixing Tools: Mixing container, spatula, and water.
Step-by-Step Guide:
Creating a stained glass mosaic stepping stone is a creative and rewarding project that adds a decorative touch to your garden or pathway. Here’s a detailed guide on how to make your own:
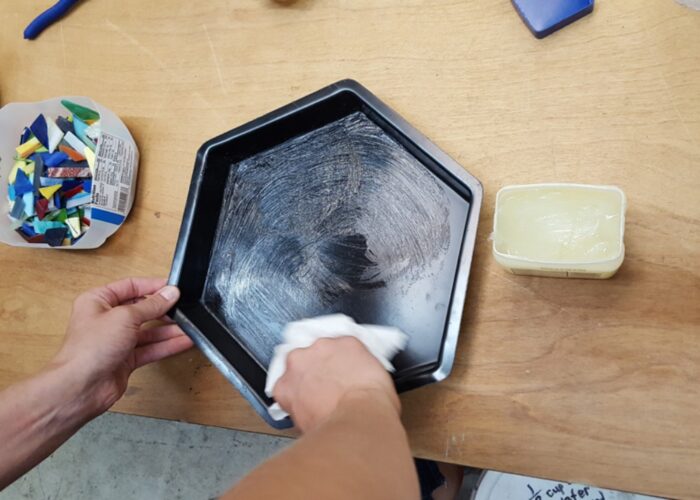
Step 1: Prepare the concrete mold
Mix concrete according to the manufacturer’s instructions and pour it into your chosen stepping stone mold. Tap the mold gently to remove air bubbles and ensure the concrete settles evenly. Allow the concrete to partially set until it’s firm but still workable.
Step 2: Design your mosaic
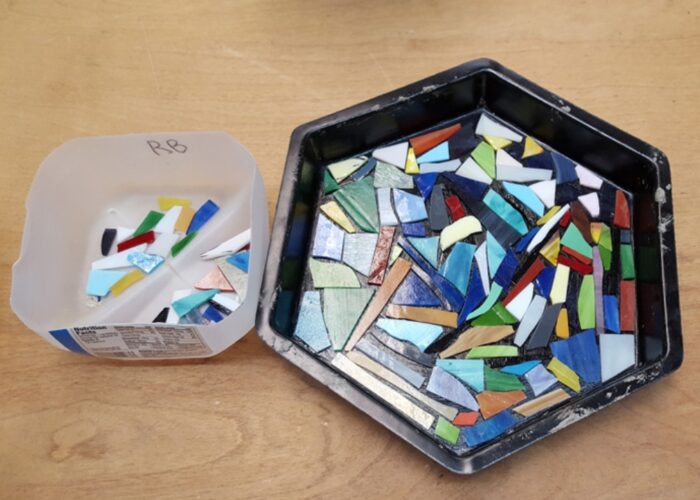
Arrange stained glass pieces or glass tiles on the partially set concrete surface to create your desired mosaic design. Cut the glass pieces as needed using a glass cutter to fit the design and shape of your stepping stone.
Step 3: Adhere the glass
Apply waterproof adhesive to the back of each glass piece or tile and press them firmly onto the concrete surface. Leave a small gap between glass pieces for grout, ensuring each piece is securely adhered to the concrete.
Step 4: Let the adhesive cure
Allow the adhesive to dry and cure completely according to the adhesive manufacturer’s instructions. This typically takes around 24 hours, during which time ensure the mosaic is undisturbed.
Step 5: Apply grout
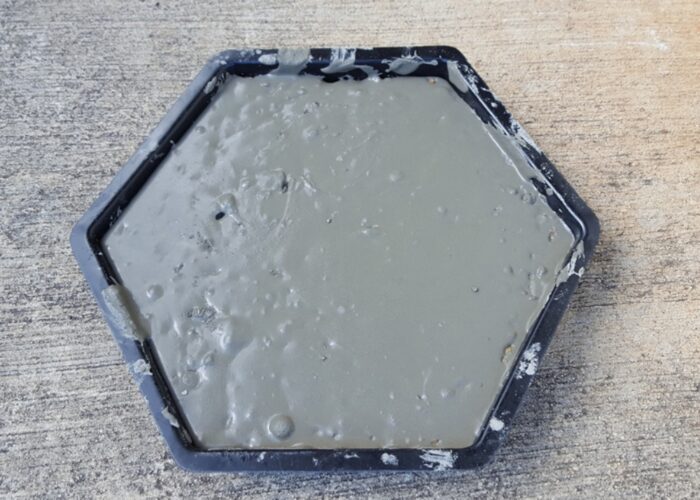
Mix outdoor grout to a thick, paste-like consistency. Using a grout float, spread the grout over the entire surface of the mosaic, pressing it into the gaps between the glass pieces. Work in sections to ensure thorough coverage.
Step 6: Clean off excess grout
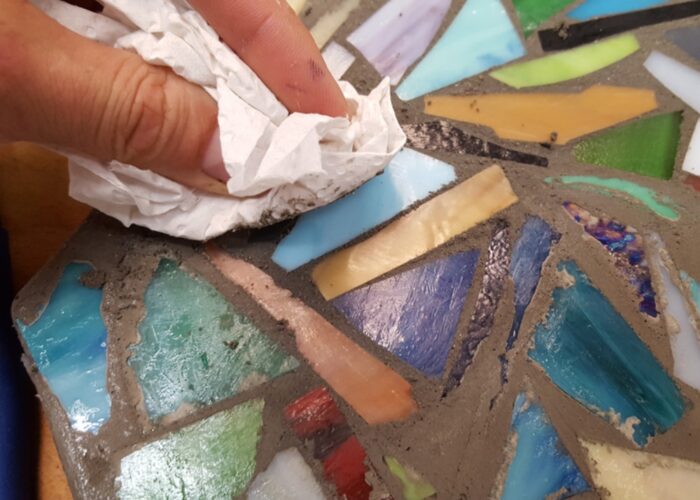
After about 15-20 minutes, when the grout begins to set but is still soft, use a damp sponge to wipe off excess grout from the surface of the glass pieces. Rinse the sponge frequently to avoid smearing grout over the glass.
Step 7: Cure and place
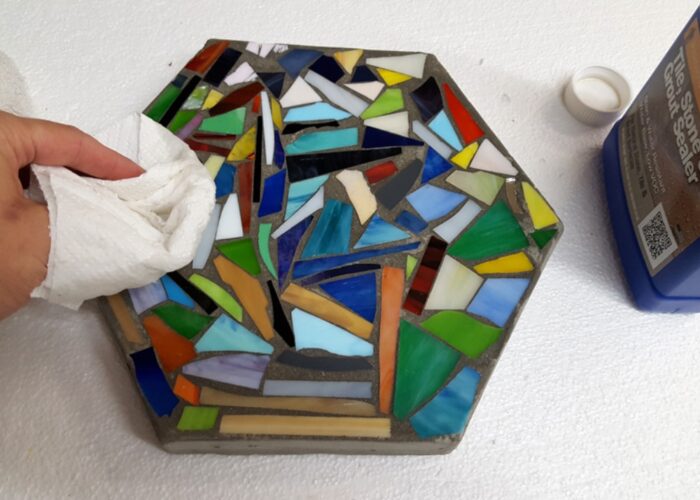
Allow the grout to dry completely, usually after 24 hours. Once dry, buff the glass pieces with a soft cloth to remove any grout haze and enhance their shine. Finally, allow the stained glass mosaic stepping stone to cure for a few days before placing it in your garden or pathway.
2. FAQs
2.1 How do you seal stained glass stepping stones?
Sealing stained glass stepping stones is crucial to preserve their beauty and durability outdoors. Once the adhesive and grout have fully cured, typically after 24-48 hours, choose a clear, waterproof sealant suitable for outdoor use, such as polyurethane or acrylic-based sealants.
Apply the sealant evenly over the entire surface of the stepping stone, including the glass pieces and grout lines, using a brush or roller. Allow each coat of sealant to dry completely before applying additional coats for enhanced protection.
Once the final coat has cured for at least 24 hours, your stained glass stepping stone will be ready to withstand the elements and enhance your garden or pathway with its vibrant colors and intricate design.
2.2 Where can I find stained glass supplies?
Online retailers like Amazon, Etsy, and dedicated stained glass supply websites provide convenient access to a broader selection of products that can be shipped directly to your location.
You can also find stained glass supplies from a variety of sources both online and locally. Local craft stores and specialty glass shops typically offer a range of materials such as glass sheets, cutters, soldering tools, and copper foil.
2.3 Can I use recycled glass for my project?
You can totally use recycled glass for your stained glass project. Recycled glass, such as old glass bottles or jars, can be melted down and reshaped into new sheets or cut into smaller pieces for mosaic designs. This eco-friendly approach not only reduces waste but also adds a unique character to your stained glass artwork.
Ensure the recycled glass is clean, free of contaminants, and suitable for the techniques you plan to use, such as cutting or melting.
2.4 How long does it take for the adhesive and grout to dry?
The drying time for adhesive used in stained glass projects is generally around 24 hours for full curing. Grout, applied to fill gaps between glass pieces, sets in approximately 15-20 minutes and requires an additional 24 hours to fully dry and harden before sealing or handling the project.
3. Final thought
Creating a stained glass mosaic stepping stone requires patience and attention to detail, but the end result is a beautiful and durable piece of art that enhances your outdoor space with color and creativity.
If you have any further questions, don’t hesitate to send thanhcongcraft an email us at [email protected] or message us at WhatsApp: +84967485411. Hope to serve you soon! Best regard!


