Creating a charming willow arch for your garden is a delightful way to enhance its beauty and add a touch of natural elegance. A willow arch not only serves as a picturesque focal point but also provides a living structure that can thrive and evolve with time. How to make a willow arch for garden?
In this article, we will guide you on how to make a living willow arch using just a few simple tools and materials. Let’s explore!
Contents
- 1. How to make a willow arch?
- Step 1: Choose the location and size for the willow arch
- Step 2: Prepare the live willow trees
- Step 3: Dig holes for planting the willow trees
- Step 4: Plant the live willow trees in the dug holes
- Step 5: Bend the willow trees to create a curved shape for the arch
- Step 6: Secure the willow trees together
- Step 7: Decorate the willow arch as desired
- 2. FAQs
- 3. Conclusion
1. How to make a willow arch?
Creating a willow arch is a rewarding and natural way to add a touch of beauty to your garden. Here’s a step-by-step guide on how to make a willow arch:
Materials Needed:
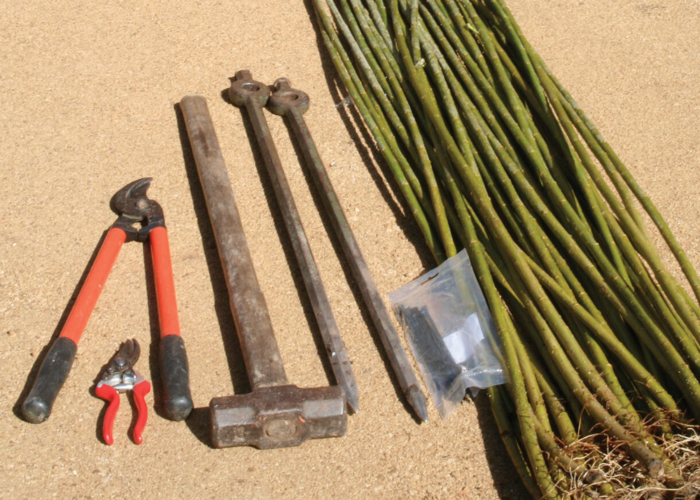
- Live willow trees or long, flexible willow branches;
- Garden stakes or wooden posts;
- Hammer;
- Twine, wire, or nylon rope;
- Pruners for gardening shears.
Steps:
Step 1: Choose the location and size for the willow arch
Select a spot with moist and soft soil, free of tree roots or obstacles. Determine the desired height and width for the willow arch.
Step 2: Prepare the live willow trees
Choose willow trees with a diameter of about 2-3 cm and a length of about 2-3 meters. Opt for trees with green, healthy foliage, avoiding dry or brittle branches. You’ll need around 8-10 willow trees to create an arch.
Step 3: Dig holes for planting the willow trees
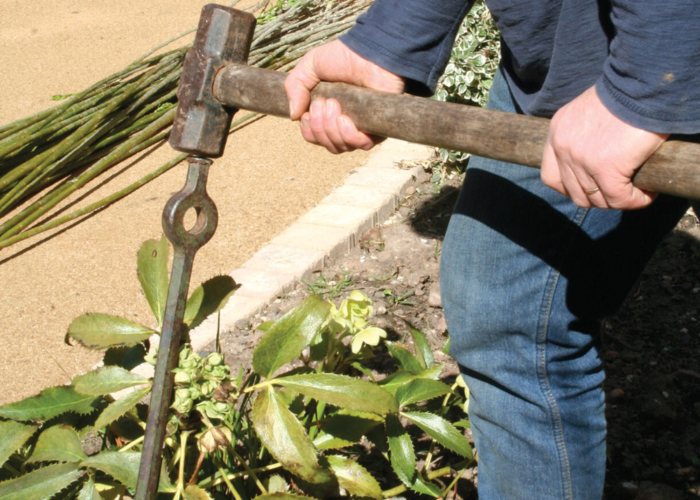
Dig holes approximately 30-40 cm deep, spaced about 50-60 cm apart, in a U-shaped pattern. Dig holes on both sides of the intended location for the willow arch to create two parallel rows of willow trees.
Step 4: Plant the live willow trees in the dug holes
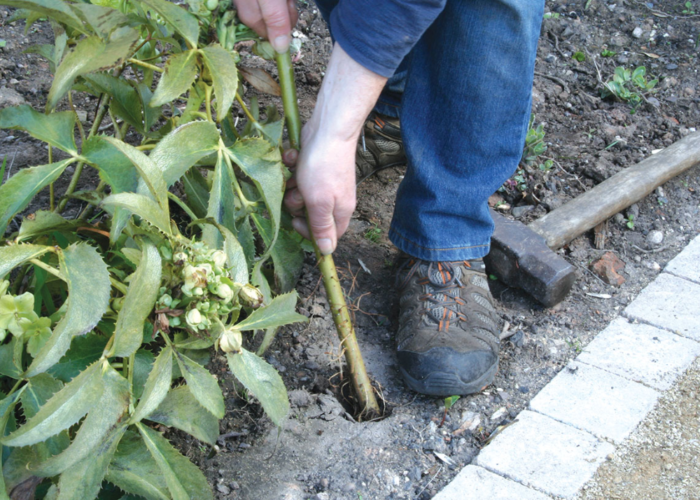
Plant the willow trees with the root end facing inward and the top end outward. Ensure the trees are securely planted in the holes, and add soil to stabilize them.
Step 5: Bend the willow trees to create a curved shape for the arch
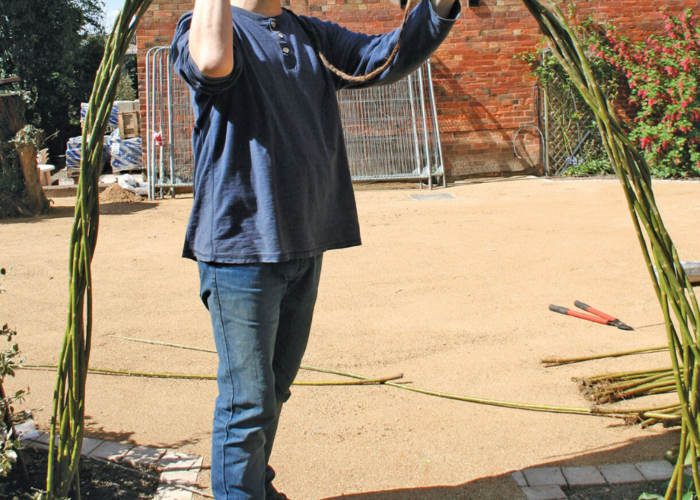
Gently bend the willow trees from the two parallel rows toward the center to form an arch. Bend them in a way that the tops of the trees intersect at the middle, creating a focal point.
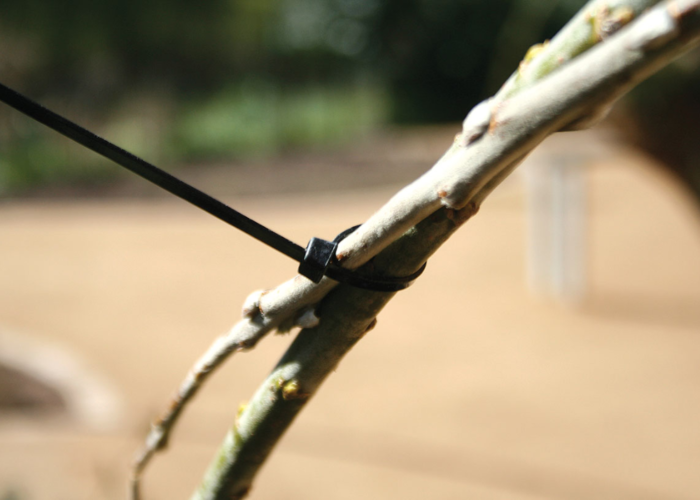
Step 6: Secure the willow trees together
Use twine, steel wire, or nylon rope to tightly tie the intersecting points of the willow trees. Tie them securely and aesthetically, concealing any excess ends.
Step 7: Decorate the willow arch as desired
Enhance the willow arch with flowers, leaves, lights, or other decorations to add vibrancy and harmony to your garden.
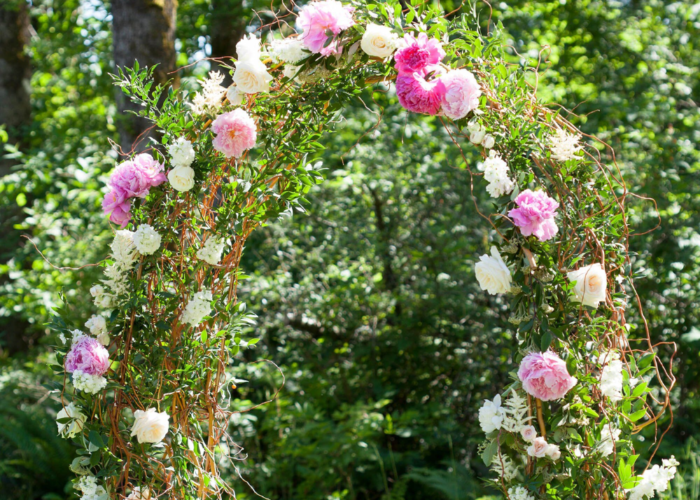
If you want to make a willow arch for wedding, consider a blend of floral arrangements, greenery, and ribbons for a charming touch. Weave fresh flowers like roses or lilies amidst the willow branches, intertwining them with ivy or eucalyptus for texture.
Soft ribbons in coordinating hues can be tied delicately around the arch, fluttering in the breeze. Adding string lights or fairy lights will infuse a magical ambiance, especially for evening affairs.
To complete the enchanting setup, consider adding a congratulatory sign or the names of the bride and groom in the center of the willow arch, imparting a romantic and memorable touch to the wedding ambiance. This simple yet creative process allows for personalization, ensuring a unique and beautiful willow arch for the special day. Best wishes for a successful and picturesque wedding celebration!
2. FAQs
2.1 How do you bend willow branches?
To bend willow branches, you need to prepare some tools such as pruners, twine, a bamboo stick, and a warm water tub. Choose soft, flexible, and not overly thick willow branches for easy bending. Next, trim off the leaves and small twigs from the willow branches and soak them in the warm water tub for approximately 30 minutes to soften the wood fibers. Once the willow branches are pliable enough, you can bend them into the desired shapes, such as circles, hearts, or flower patterns.
Use twine to securely tie the junction points on the willow branches, and employ a bamboo stick to maintain the desired shapes and prevent deformation. Allow the willow branches to air-dry completely for about a week before using them or incorporating them into decorations.
2.2 How to make a willow arch not grow?
To create a non-sprouting willow gate, you need to regularly prune the willow branches and eliminate any young shoots. Additionally, you can wrap the willow branches with fabric or plastic to prevent sunlight exposure and direct contact with air.
A non-sprouting willow gate will maintain its shape and durability longer than a naturally growing one. However, it’s advisable to inspect the willow gate regularly to detect and repair any cracks or damage.
2.3 How do you maintain a willow arch?
Maintaining a willow arch involves regular pluck up weeds around bases, trimming to shape the branches, and ensuring adequate watering and fertilization for healthy growth. By following these simple steps, your arch can remain an enchanting centerpiece for weddings and other events, adding natural beauty to any setting.
2.4 What dimensions should a wedding arch be?
When considering the dimensions of a wedding arch, you need to take into account factors such as height, width, curvature, and style. Some general principles include:
- The height of the arch should be taller than the height of the bride and groom, creating a picturesque frame without overshadowing those standing beneath it.
- The width of the arch should be broader than the width of the aisle, providing a spacious and unrestrictive passage for those walking through.
- The curvature of the arch should align with the wedding style and significance. Some arches exhibit gentle curves, evoking a sense of delicacy and elegance, while others feature more pronounced curves, creating a warm and romantic ambiance.
An example of wedding arch dimensions could be: a height of 2.5 meters, a width of 3 meters, a curvature of 1.5 meters, and a circular design. You can explore images and videos online to gather more ideas about various dimensions and styles of wedding arches.
3. Conclusion
In conclusion, crafting a willow arch for your garden is not only a creative endeavor but also a rewarding one, enhancing the natural beauty of your outdoor space. By following the step-by-step guide provided, you can create a picturesque focal point that adds charm and elegance to any garden setting.
Whether for a wedding celebration or simply to beautify your surroundings, a willow arch offers a living structure that evolves with time, providing endless opportunities for personalization and creativity.
Remember to maintain your arch with care to ensure its longevity and continued beauty.
If you have any further questions, don’t hesitate to send thanhcongcraft.com an email us at [email protected] or message us at WhatsApp: +84967485411.


