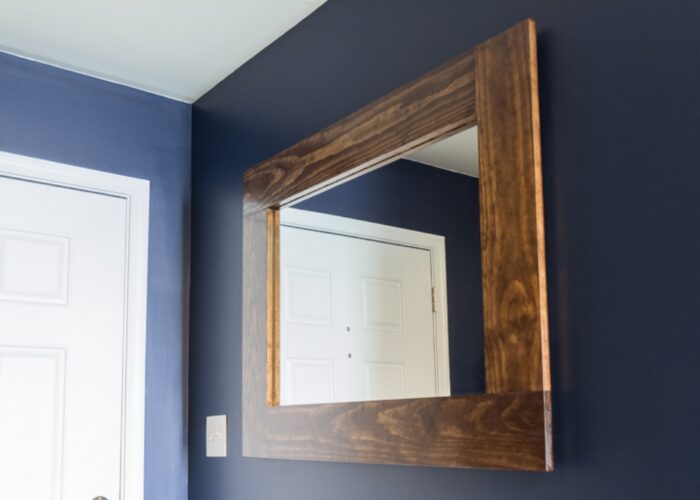
Creating a custom wood frame for a mirror is a rewarding DIY project that can add a touch of elegance and personal style to any room. In this guide, we will walk you through the steps on “how to make a wood frame for a mirror” from selecting the right materials to adding the finishing touches.
Whether you’re looking to enhance the aesthetic of a plain mirror or want to create a unique piece for your home, this project is both practical and creative, allowing you to showcase your craftsmanship while improving your home decor.
1. How to make a wood frame for a mirror?
Making a wood frame for a mirror is a satisfying project that can elevate the look of any space. Here’s a comprehensive guide on how to craft your own wood frame:
Materials Needed:
- Wood: Choose a wood type that complements your decor and fits the size of your mirror. Common options include pine, oak, or walnut.
- Mirror: Ensure the mirror is the size you desire for your project.
- Measuring Tape and Pencil: Essential for measuring and marking the wood.
- Saw: A miter saw or hand saw will be needed for cutting the wood to size.
- Wood Glue: To securely join the pieces of the frame together.
- Clamps: Helpful for holding the frame pieces in place while the glue dries.
- Sandpaper: For smoothing rough edges and surfaces.
- Stain or Paint: Optional for finishing the wood frame to match your decor.
- Brushes or Rags: For applying the stain or paint.
- Mounting Hardware: Depending on how you plan to hang the mirror, you may need hooks, screws, or wire.
Step-by-Step Instructions:
Step 1: Measure and cut the wood
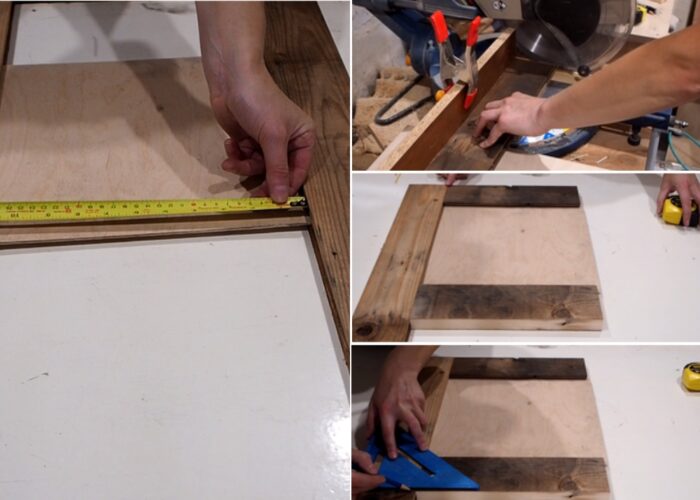
Measure the dimensions of your mirror, accounting for any desired overlap of the frame. Use the measuring tape and pencil to mark the wood accordingly. Carefully cut the wood pieces to size using a saw. For a seamless look, cut the ends at 45-degree angles (miter cuts) for each corner.

Step 2: Assemble the frame
Apply wood glue to the mitered edges of the wood pieces. Join the pieces together to form the frame, ensuring the corners are aligned perfectly. Use clamps to hold the frame securely in place while the glue sets. Wipe away any excess glue with a damp cloth.

Step 3: Sand and smooth
Once the glue has dried, use sandpaper to smooth any rough edges or surfaces of the frame. This will ensure a clean finish and remove any imperfections.
Step 4: Finish the frame (optional)
If desired, apply a stain or paint to the wood frame to match your decor style. Allow the stain or paint to dry completely before proceeding.

Step 5: Attach the mirror
Carefully position the mirror within the frame, ensuring it is centered and secure. Use mounting hardware to attach the mirror to the frame. Depending on the weight of the mirror, you may need to use screws, hooks, or wire.

Step 6: Hang the mirror
Once the mirror is securely attached to the frame, use appropriate mounting hardware to hang it on the wall. Ensure it is level and securely anchored.

2. FAQs
2.1 How do you hold a mirror in a wood frame?
To hold a mirror in a wood frame, you can use various methods. A common approach is to use specialized adhesive to attach the mirror to the frame. You can apply a zig-zag line of adhesive along the back surface of the wood frame and then place the mirror on top.
Ensure that you have measured the dimensions of the mirror and wood frame to fit before cutting and installing. Some people also use metal clips or magnets to hold the mirror securely in the frame, creating a solution that doesn’t require the use of adhesive or other sticky materials.
Additionally, you can use mirror clamps or silicone adhesive to ensure the mirror is firmly held in the wood frame. Each method has its own advantages and disadvantages, so choose the one that best fits your needs and skills.
2.2 How to glue a wood frame to a mirror?
To glue a wood frame to a mirror, start by ensuring both surfaces are clean and dry. Then, apply a thin, even layer of adhesive along the back edge of the frame. Carefully position the frame onto the mirror, aligning it properly, and apply gentle pressure to ensure good contact. Secure the frame in place with painter’s tape or clamps while the adhesive sets.
Once cured, wipe away any excess adhesive and allow it to fully dry before handling or mounting the mirror. This process creates a strong and durable bond, enhancing the appearance of the mirror while adding a decorative touch to any space.
2.3 What type of wood is best for making a mirror frame?
The choice of wood for making a mirror frame depends on factors such as durability, aesthetics, and budget.
- Hardwoods like oak, maple, cherry, and walnut are popular choices for their durability and beautiful grain patterns, adding warmth and character to the frame.
- Softwoods such as pine, cedar, and fir are more affordable and offer versatility in staining or painting to achieve various finishes.
- Exotic woods like mahogany, teak, and ebony provide unique grain patterns and colors, lending a luxurious touch to the frame but may come at a higher cost.
Ultimately, selecting the best wood type involves considering personal preference, the desired style, and the intended use of the mirror frame.
3. Final thought
Step back and admire your newly crafted wood frame mirror! Enjoy the personalized touch it adds to your space. With these step-by-step instructions and the right materials, you can create a beautiful wood frame for your mirror that enhances the style and ambiance of any room in your home.
If you have any further questions, don’t hesitate to send thanhcongcraft an email us at [email protected] or message us at WhatsApp: +84967485411. Hope to serve you soon! Best regard!


