Are you looking for a creative and rewarding DIY project that will add a splash of color and artistic flair to your garden or home decor? Look no further than making mosaic rocks art! This delightful craft allows you to transform ordinary stones into stunning pieces of art that can brighten up any space.
In this step-by-step guide, we will guide you how to make mosaic rocks art. From selecting the perfect materials to adding the final touches, you’ll learn everything you need to know to start creating beautiful mosaic art. Have a read!
1. How to make mosaic rocks?
Creating mosaic rocks is a creative and enjoyable DIY project that allows you to transform ordinary stones into unique pieces of art. Here’s a step-by-step guide to get you started:
Materials Needed:
- Mosaic rock art kit (includes stones, adhesive, grout, and tools);
- Safety glasses;
- Gloves;
- Sponge;
- Soft cloth;
- Optional: Additional decorative materials like glass pieces or ceramic shards.
Step-by-Step Instructions:
Step 1: Prepare your workspace
Set up a clean and flat workspace, protecting the surface with a plastic sheet or newspaper. Wear safety glasses and gloves to protect yourself while handling stones and tools.
Step 2: Design your mosaic
Plan your mosaic design on the rocks using a pencil or marker. You can use a pre-designed template or create your own pattern.
Step 3: Apply adhesive
Use the adhesive provided in the mosaic rock art kit to apply a thin layer onto the surface of each stone.
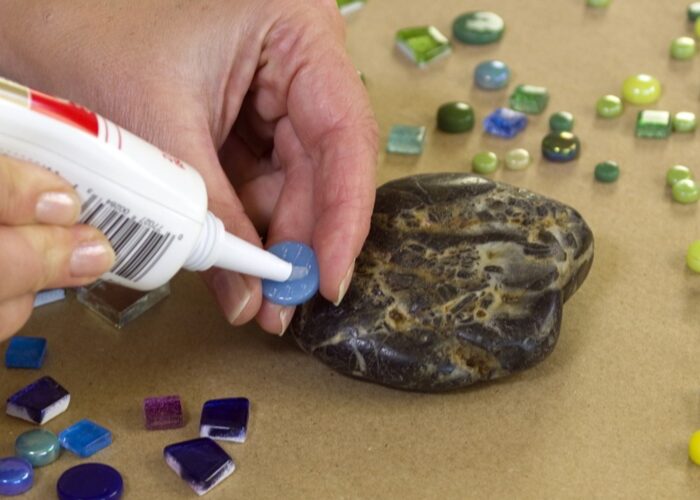
Step 4: Arrange mosaic pieces
Place the mosaic pieces (such as glass, ceramic, or other decorative materials) onto the stones according to your design. Press them firmly into the adhesive.
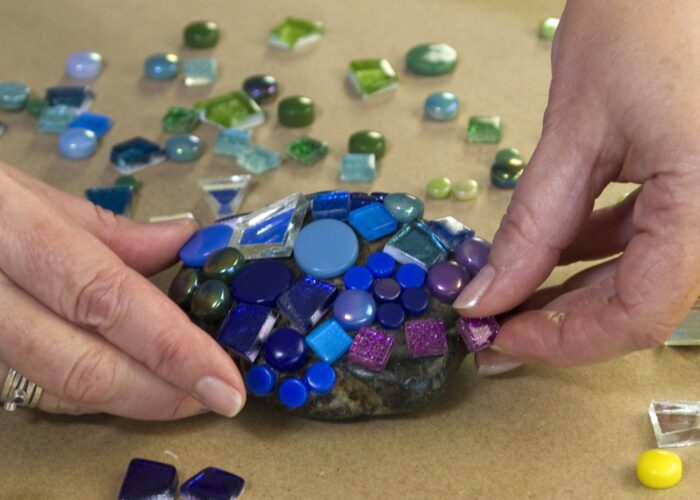
Step 5: Grout the mosaic
Once the adhesive has dried completely, mix the grout according to the package instructions. Apply the grout over the mosaic stones using a spatula or gloved fingers, pressing it into the gaps between the pieces.
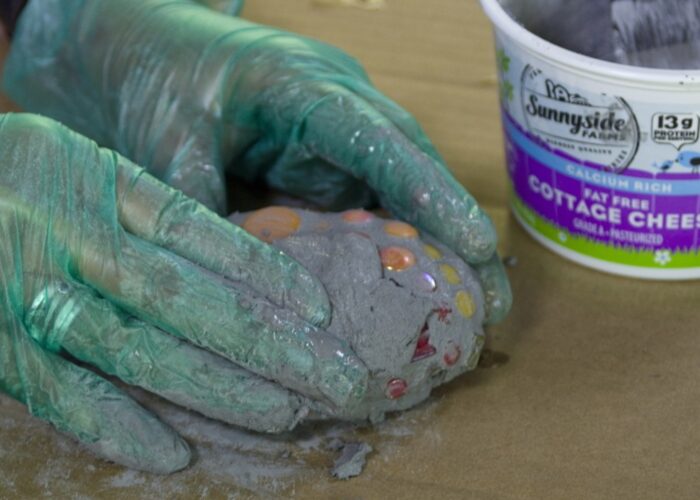
Step 6: Clean off excess grout
Wipe off excess grout with a damp sponge before it dries completely. Clean the stones gently to avoid disturbing the mosaic pieces.
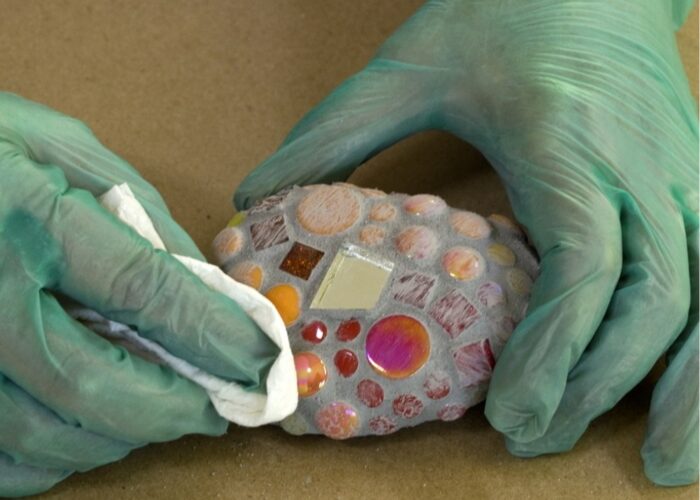
Step 7: Finish and seal (optional)
Once the grout has set and dried, buff the mosaic rocks with a soft cloth to remove any remaining grout haze and enhance the shine. Optionally, apply a grout sealant to protect the mosaic from moisture and stains. Follow the manufacturer’s instructions for application and drying times.
Step 8: Display your artwork
Allow your mosaic rocks to fully cure and dry before displaying them in your garden, home, or giving them as unique gifts.
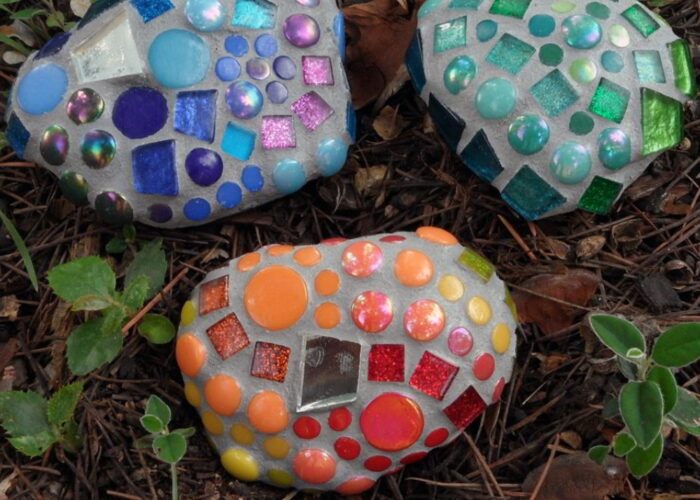
By following these steps and using a mosaic rock art kit, you can create beautiful and personalized mosaic rocks that showcase your creativity and artistic flair. Enjoy the process of transforming simple stones into colorful and expressive pieces of art!
2. FAQs
2.1 Are mosaic rocks suitable for beginners?
Yes, mosaic rocks are suitable for beginners. Creating mosaic rocks is a beginner-friendly DIY project that allows individuals to explore their creativity with relatively simple materials and techniques. Using a mosaic rock art kit provides structured guidance and all necessary materials, making it easier for beginners to achieve satisfying results.
With patience and attention to detail, beginners can create beautiful and personalized mosaic rocks that showcase their artistic talents and enhance their outdoor or indoor spaces.
2.2 What is the best grout for stone mosaic?
The best grout for stone mosaic typically depends on the size of the gaps between your stones. For smaller gaps (less than 1/8 inch), unsanded grout is generally recommended as it provides a smoother finish and won’t scratch delicate stones. For larger gaps (1/8 inch or more), sanded grout is preferable because it offers better strength and durability.
Always choose a grout color that complements your stone mosaic design and follow the manufacturer’s instructions for mixing and application to achieve the best results.
2.3 Can pebbles be used in mosaic?
Yes, pebbles can be used in mosaic art. Pebbles provide a natural and textured element that adds depth and interest to mosaic designs. They can be arranged creatively to create patterns, images, or abstract designs, enhancing the overall aesthetic of the artwork.
When using pebbles in mosaic, ensure they are clean and dry before applying adhesive to ensure a strong bond. Additionally, consider using a suitable grout to fill gaps and secure the pebbles in place, enhancing the durability and longevity of your mosaic creation.
2.4 How do I seal mosaic rocks for outdoor use?
To seal mosaic rocks for outdoor use, ensure the grout is fully cured, then clean the surface thoroughly. Choose a clear, waterproof outdoor sealer and apply it evenly over the mosaic rocks and grout lines using a paintbrush or roller.
Allow the sealer to dry completely according to the manufacturer’s instructions before exposing the mosaic to outdoor elements. Multiple coats may be needed for optimal protection. This process helps preserve the colors and durability of your mosaic rocks against weather and UV exposure.
3. Final thought
Creating mosaic rocks is a delightful and rewarding DIY project that can add a vibrant touch of artistic flair to your garden or home decor. With just a few materials and some creativity, you can transform ordinary stones into unique pieces of art that showcase your personal style and brighten up any space.
By following the step-by-step instructions in this guide, you have all the tools and knowledge needed to start making beautiful mosaic rocks. Happy crafting!
If you have any further questions, don’t hesitate to send thanhcongcraft an email us at [email protected] or message us at WhatsApp: +84967485411. Hope to serve you soon! Best regard!


