Rattan is a natural, durable and beautiful material, widely used in furniture. One of the ways to use rattan is to make rattan cabinet doors. Rattan cabinet doors not only create a cozy and eco-friendly appearance, but also increase the storage space and ventilation for the cabinet.
In this article, we will guide you how to make rattan cabinet doors / cupboard doors DIY at home with some simple steps. Have a read!
1. How to make rattan cabinet doors?
Rattan is a natural, durable and beautiful material, often used to make furniture such as cabinets, tables, chairs, beds, etc. Rattan can be bent into many different shapes, creating unique and impressive cabinet doors.
To make cabinet doors/ cupboard doors with rattan sheets, you need to prepare the following tools and materials:
- Wooden or metal cabinet frame;
- Rattan sheets;
- Scissors, knife, hammer, nails, glue;
- Paint or wax to protect rattan.
The steps in diy rattan cabinet door are as follows:
Step 1: Measure the cabinet door frame and prepare the rattan sheet
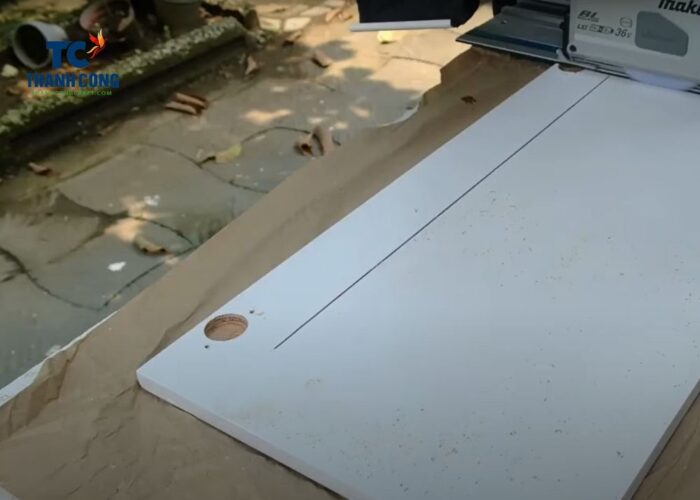
Measure the size of the cabinet frame and cut the rattan sheet to fit. You can choose rattan in stick form to create square or diagonal cells on the cabinet door, or rattan in wire form to create spiral, circular, floral patterns, etc.

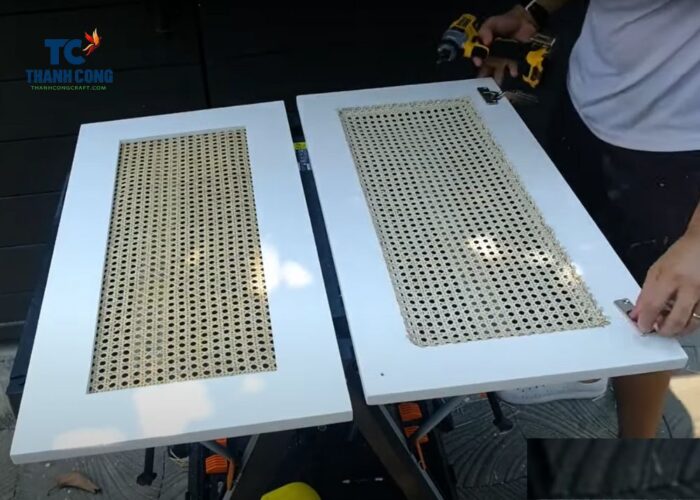
Step 2: Fix the rattan panel to the door frame
Use glue to stick the rattan sheet onto the cabinet frame, or use nails to secure it. You should align the rattan so that it is evenly distributed and not warped.

Step 3: Cut off the excess rattan
After the glue has dried, you can cut off the excess rattan at the edges of the wooden frame. You should cut the rattan so that it is flush with the edge of the wooden frame, not protruding.

Step 4: Paint or wax the rattan sheet
After the rattan has been attached to the cabinet door frame, you can paint or wax the surface to protect the rattan from moisture and termites. You should choose a paint or wax color that matches the color of your furniture.
Step 5: Let the paint dry, then attach the doors to the hinges
Finally, install the cabinet door into the cabinet and enjoy the result.

2. FAQs
2.1 How do you attach cane webbing to cabinet doors?
Attaching cane webbing to cabinet doors is a simple yet effective process that enhances the aesthetic appeal of furniture. To begin, measure the dimensions of the cabinet door and cut the cane webbing sheet accordingly, allowing for a slight overlap. Soak the cane in water for around 20 to 30 minutes to make it more pliable.
Next, lay the cabinet door flat and apply a thin, even layer of wood glue or adhesive to the surface where the cane webbing will be attached. Carefully place the soaked cane onto the glued surface, ensuring it covers the entire door, and smooth out any wrinkles or bubbles using a soft cloth or rubber roller.
Secure the edges of the cane webbing to the backside of the cabinet door using small nails or staples, spaced evenly along the perimeter. Trim any excess cane material with a sharp utility knife for a neat finish. Allow the adhesive to dry completely, following the recommended drying time.
If desired, you can further enhance the cabinet door’s appearance by staining, painting, or finishing it to complement the overall aesthetic. This method not only adds a classic and visually appealing touch to cabinet doors but also introduces a natural texture with the incorporation of cane webbing.
2.2 How do you stick rattan to wood, glass?
To adhere rattan to wood or glass, you’ll need a specialized adhesive suitable for these materials. You can use epoxy glue, silicone glue, or heat-activated glue to bond rattan to wood or glass. After selecting the appropriate type of glue, it’s essential to clean the surfaces of the wood, glass, and rattan, removing any dust and grease.
Polish the wood and glass surfaces to enhance the adhesive’s bonding capability. Cut the rattan to the desired size and arrange it on the wood or glass to preview the result. Then, apply the glue to the surfaces of the wood, glass, and rattan following the manufacturer’s instructions.
Apply gentle pressure to ensure even distribution and prevent leakage. Allow the glue to dry completely for the specified time before using or hanging the product.
2.3 How do you protect cane webbing?
To ensure the longevity and pristine condition of cane webbing, it is essential to adopt proper care practices. Regular cleaning is fundamental; use a soft brush or a vacuum cleaner with a brush attachment to gently remove dust and debris.
Avoid exposing cane webbing to excessive moisture, as damp conditions can lead to damage. Ensure the storage environment is dry and refrain from placing furniture or items with cane webbing in areas with high humidity.
Additionally, prevent prolonged exposure to direct sunlight, as this can cause the cane to lose its natural elasticity and become brittle. When incorporating cane webbing into furniture, consider using cushions or padding to distribute weight evenly and reduce stress on the cane.
Periodically apply a thin layer of furniture wax or oil to keep the cane moisturized, preventing it from drying out and becoming brittle. Be sure to choose a product suitable for natural materials.
Regularly inspect the cane webbing for any signs of damage, such as loose strands or breakage. Promptly address any issues to prevent further deterioration. When storing items with cane webbing, choose a cool and dry storage space, avoiding areas prone to temperature fluctuations and extreme conditions.
If you have any further questions, don’t hesitate to send thanhcongcraft an email us at [email protected] or message us at WhatsApp: +84967485411. Hope to serve you soon! Best regard!


