Making a concrete bird bath for your garden is easier than you might think. In this guide, we’ll walk you through the steps on how to mosaic a bird bath DIY from cement. Whether you’re an experienced crafter or a beginner, this project offers a rewarding way to add a splash of color and personality to your outdoor space.
By following these following simple instructions, you’ll transform a plain concrete bird bath into a beautiful work of art that attracts feathered friends and adds charm to your garden.
1. How to mosaic a bird bath for beginners?
Creating a mosaic bird bath is a rewarding and enjoyable DIY project, perfect for adding a splash of color and personality to your garden. With a DIY mosaic bird bath kit and a little patience, even beginners can achieve beautiful results.
Here’s a step-by-step guide to get you started:
Materials Needed:
- Cement mix: For creating the bird bath base.
- A moderate depth terracotta plate.
- Mosaic tiles: Ceramic, glass, or any durable materials.
- Tile adhesive: To stick the tiles onto the cement.
- Grout: To fill in the gaps between the tiles.
- Tile nippers: For cutting tiles to fit.
- Sponges: For cleaning grout off the tiles.
- Protective gloves and mask: For safety while working with cement and grout.
- Paintbrush: For applying adhesive and grout.
- Bucket and mixing tools: For mixing cement and grout.
- Water: To mix with cement and grout.
Step-by-Step Instructions:
Step 1: Prepare your work area
Set up a clean, flat workspace. Lay down some old newspaper or a plastic sheet to catch any spills or debris.
Step 2. Prepare the mosaic tiles
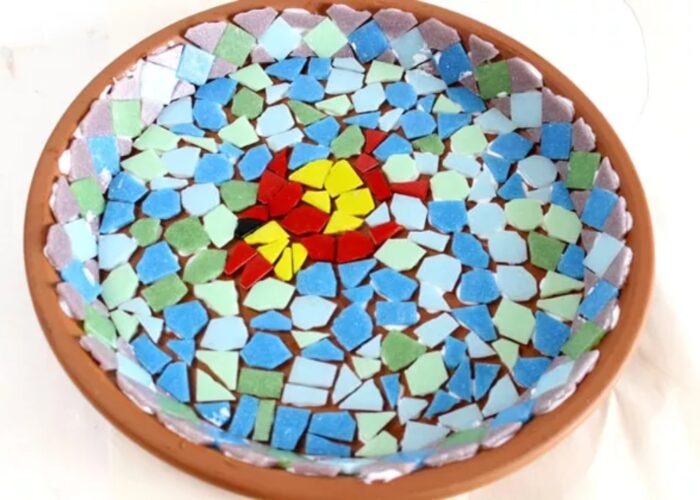
Use tile nippers to cut the mosaic tiles into desired shapes and sizes. This is particularly important if you have a complex design.
Lay out your tiles on the cement base to visualize the design. Adjust as needed before applying adhesive.
Step 3. Apply tiles
Spread tile adhesive onto small sections of the cement base. Press the tiles into the adhesive, following your planned design. Leave small gaps between the tiles for grout.

Step 4. Pour the cement mixture
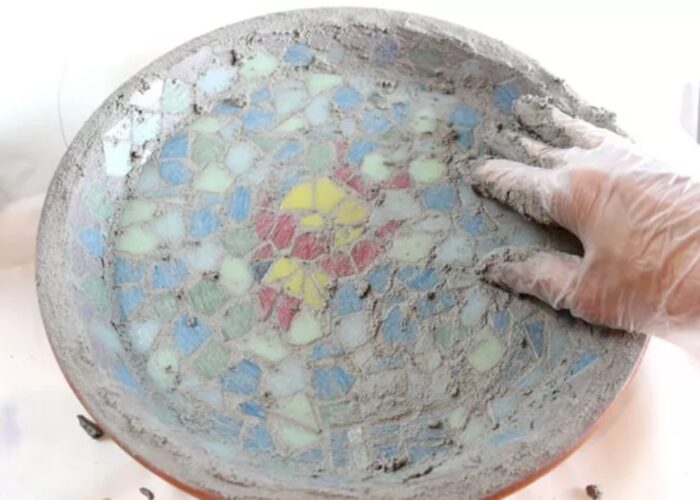
Mix cement with water until you achieve a smooth consistency. Pour the cement mixture into the plate and let it set according to the instructions (usually 24-48 hours). If desired, sand the surface to smooth it out.

Step 5. Grouting
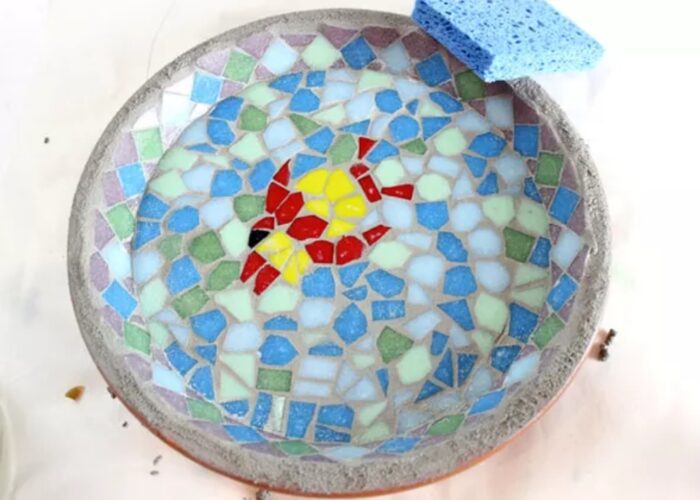
Prepare grout according to the package instructions. Spread grout over the tiles using a grout float, pressing it into the gaps. Wipe off excess grout from the tile surfaces with a sponge. After the grout has set (but before it’s fully hardened), clean any remaining grout from the tile surfaces using a damp sponge.

Step 6. Sealing
Once the grout is fully dry (usually 24 hours), apply a grout sealer to protect the grout from moisture and staining.
Step 7. Final touches
Check for any grout haze or imperfections and clean them off if necessary. Allow the bird bath to cure for at least a week before use.
Tips for Success:
- Start with a simple design if you’re a beginner to build your confidence.
- Take your time with each step to ensure a high-quality finish.
- Wear safety glasses and gloves when cutting tiles to protect yourself from sharp edges.
By following these steps and using a DIY mosaic bird bath kit, you can create a beautiful and unique bird bath that will add charm to your garden and attract birds for years to come. Enjoy the process and take pride in your handmade creation!
Check more: diy hummingbird mister
2. FAQs
2.1 Can I use broken dishes for a mosaic birdbath?
Yes, you can use broken dishes for a mosaic birdbath. Broken dishes can add a unique and colorful touch to your mosaic design. Just make sure to use pieces that are safe to handle, and smooth any sharp edges to avoid injury. This is a great way to recycle and create a beautiful, personalized birdbath.
2.3 Do I need to seal the mosaic after grouting?
Yes, it is important to seal the mosaic after grouting. Sealing helps protect the grout and tiles from moisture, stains, and other damage, ensuring the longevity and durability of your mosaic project. Be sure to follow the sealant manufacturer’s instructions for proper application and drying time.
2.4 What kind of glue should I use for a mosaic birdbath?
For a mosaic birdbath, you should use a waterproof adhesive that is suitable for outdoor use. Polyurethane adhesives or mosaic tile adhesives are commonly recommended for bonding tiles and other materials to concrete or ceramic surfaces.
These adhesives provide strong, durable bonds that can withstand exposure to water and outdoor elements. It’s important to follow the adhesive manufacturer’s instructions for proper application and drying times to ensure a secure and long-lasting mosaic birdbath.
2.5 How do I keep my mosaic birdbath clean?
To keep your mosaic birdbath clean, regularly remove debris such as leaves and bird droppings using a soft brush or cloth. Avoid using harsh chemicals or abrasive cleaners, as these can damage the mosaic tiles or sealant. Periodically rinse the birdbath with water and gently scrub with a mild soap solution if needed.
Applying a fresh coat of grout sealant annually can also help maintain the birdbath’s appearance and protect it from stains and moisture.
3. Conclusion
Creating a mosaic bird bath from cement is a fulfilling and enjoyable DIY project that brings a touch of creativity and charm to any garden. Not only does a mosaic bird bath add visual appeal, but it also serves as a functional feature that attracts a variety of birds, enriching your garden’s ecosystem.
By following the outlined instructions and employing the recommended materials, you ensure that your creation is both beautiful and durable, capable of withstanding the elements for years to come. Embrace the creativity, take your time with each step, and enjoy the process of making your garden a more colorful and lively place. Happy crafting!
If you have any further questions, don’t hesitate to send thanhcongcraft an email us at [email protected] or message us at WhatsApp: +84967485411. Hope to serve you soon! Best regard!


