
Custom coasters are an ideal way to add personality and flair to any table setting. Whether you’re entertaining guests or just enjoying a morning coffee, custom art coasters serve both practical and decorative purposes. In this guide, you’ll discover how to create your own one-of-a-kind coasters using simple materials and a few easy techniques. From choosing the right base to adding your personal artistic touch, this DIY project allows you to craft coasters that reflect your unique aesthetic. Let’s dive into five easy steps to create stunning, handmade pieces that will elevate your space.
Contents
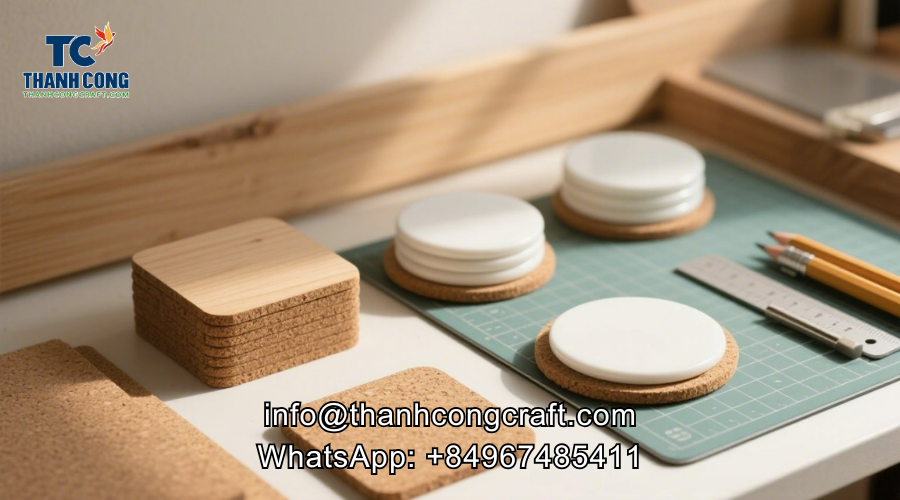
1. Select the Right Base Material for Your Custom Coasters
Custom coasters start with a strong foundation. Choosing the right base material is crucial for both durability and aesthetics. Common materials include cork, wood, ceramic, resin, and even recycled fabric. Each has its benefits depending on your desired finish and use-case.
Wooden bases, for example, offer a natural look and are easy to paint or stain. Ceramic coasters work well for those who want a glossy finish and water-resistant surface. Cork is lightweight and affordable, making it great for bulk projects.
When choosing your base, consider the following:
- Absorbency: Cork and fabric absorb moisture better than ceramic or wood.
- Durability: Ceramic and resin are more scratch-resistant.
- Customization options: Wood and resin offer more versatility for custom art coaster designs.
To explore how other handmade products are crafted, check out our DIY bamboo lamp guide.
Read more on: How to Clean Mother of Pearl Coasters Without Damaging the Inlay
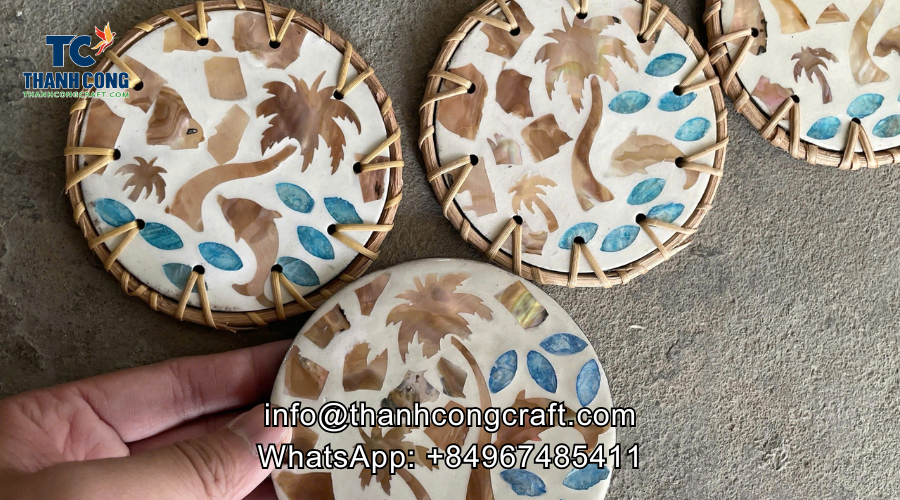
2. Design and Plan Your Custom Art Coasters
Custom coasters offer a blank canvas to showcase your creativity. At this stage, sketch your ideas or use digital tools to visualize your final product. Are you going for minimalist line art, colorful abstract swirls, vintage typography, or nature-inspired motifs? This is where your personal style comes to life.
Popular custom art coaster design techniques include:
- Acrylic or watercolor painting
- Alcohol ink for abstract effects
- Decoupage using printed napkins or magazine cutouts
- Woodburning (pyrography) for rustic charm
- Hand-lettering with oil-based paint markers
To ensure visual balance, use circular or grid templates. Symmetry tends to work well on round coasters, while a center-focused motif complements square ones. Don’t forget to test color combinations on a sample surface before applying to your actual coaster base.
3. Apply the Artwork to Your Custom Coasters
Now it’s time to bring your ideas to life. Start by prepping your surface: sand wooden bases for smoothness or clean ceramic ones with alcohol wipes to remove dust and oils.
Depending on the medium you’ve chosen, here’s how to proceed:
- Painting: Use fine brushes for detail and allow each layer to dry before adding another.
- Alcohol Ink: Drop inks onto the surface and tilt the coaster to create organic patterns.
- Decoupage: Apply a thin layer of Mod Podge, place your cutout, and seal with additional layers.
- Woodburning: Trace your design in pencil, then burn over it slowly with a pyrography pen.
Make sure to work in a well-ventilated area, especially when using paints or resins.
Custom coasters aren’t just for home decor—they also make excellent handmade gifts. You can explore gift packaging ideas in our rattan gift box collection.
Read more on: Top 8 Mother-of-Pearl Gifts Tourists Should Buy When Visiting Vietnam
 .
.
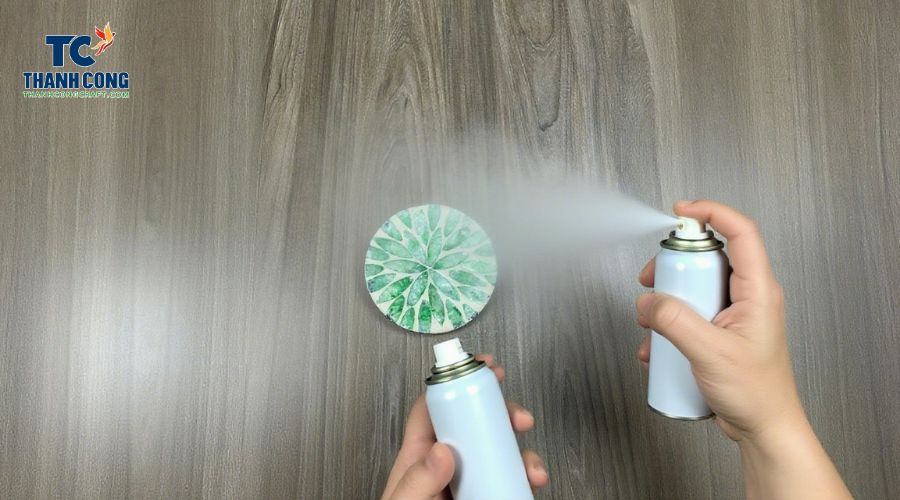
4. Seal and Protect Your Coasters
Custom coasters need proper sealing to maintain longevity. Once your artwork is fully dry, apply a sealant to protect from water damage, stains, and daily wear.
Recommended sealants include:
- Clear acrylic spray for quick and even coverage
- Resin for a thick, glass-like protective layer
- Mod Podge Dishwasher Safe for light daily use
Apply the sealant in a dust-free environment. For spray sealants, use sweeping motions and apply multiple light coats. Let each layer dry completely before applying the next.
This step is essential not only for durability but also for enhancing the color and depth of your custom art coaster design.
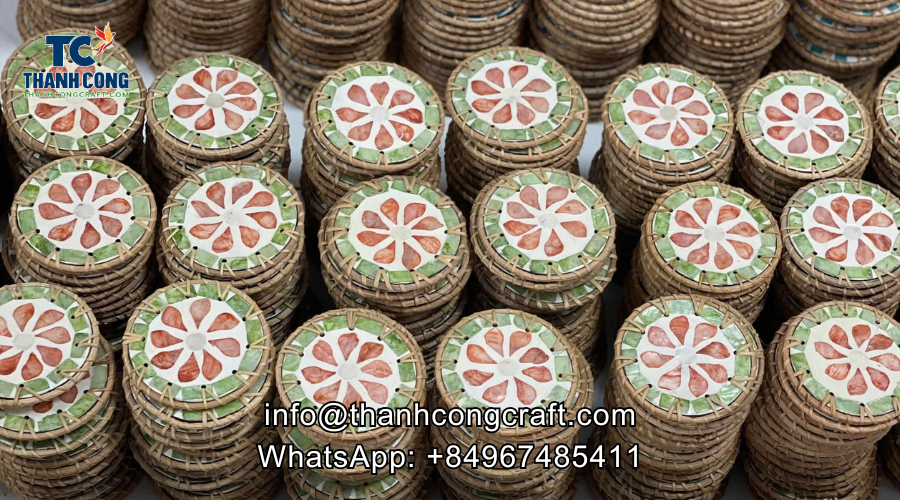
5. Add Backing and Finishing Touches
To complete your custom coasters, add a non-slip backing. Options include felt pads, adhesive cork, or silicone dots. This protects surfaces and ensures stability when in use.
Additional finishing tips:
- Sand coaster edges for a smooth, polished look
- Package sets in eco-friendly wrapping for gifting
- Add branding tags or handwritten notes if selling your coasters
For those looking to scale their designs into small-batch production or boutique offerings, consistent quality and professional finishing are key. You might even collaborate with suppliers of natural materials, like our bamboo basket wholesale collection.

Reach out to us today to learn more about our products or to place a wholesale order. We look forward to connecting with you!
- Thanh Cong Handicraft Co., Ltd
- Email: [email protected]
- Tel/WhatsApp: +84967485411
Explore our Products Collection for more choices!
Contact Us!
