
If you’re looking to refresh your bedroom with a personal touch, a DIY rattan headboard is the perfect weekend project. Rattan is lightweight, sustainable, and radiates warmth, making it ideal for adding character to your sleeping space. In this guide, you’ll learn how to create a custom rattan headboard from scratch using simple tools and accessible materials. Plus, you’ll discover various ways to style and maintain your handmade piece so it remains timeless.
Contents
1. Why Choose a DIY Rattan Headboard?
DIY rattan headboard projects are trending thanks to the global shift toward natural materials and slow living. Not only do they offer a boho-chic look, but they also support eco-conscious values.
More importantly, by making your own headboard, you gain full control over the design—size, shape, pattern, and finish. Whether you prefer a minimalist arch, a vintage fan shape, or a geometric grid, rattan is remarkably adaptable.
Furthermore, choosing to go the DIY route allows you to save significantly compared to store-bought options. Handmade rattan furniture is often expensive due to its artisanal nature. Instead, with a few simple steps, you can create your own headboard for a fraction of the cost.
Related: 7 experiences in choosing rattan furniture for hotels, restaurants, and cafes
2. Tools and Materials Needed
Before diving into your DIY rattan headboard project, gather all the necessary materials. Most are easy to find online or at local hardware stores.
2.1. Essential Tools:
-
Measuring tape
-
Pencil and ruler
-
Utility knife or pruning shears
-
Hot glue gun or wood glue
-
Staple gun
-
Scissors
-
Sandpaper
-
Drill (if mounting)
2.2. Materials:
-
Rattan webbing (open cane, closed weave, or mixed)
-
Wooden frame or plywood base
-
MDF or wood battens (optional, for support)
-
Natural oil or clear varnish
-
Screws and mounting brackets (if wall-mounted)
3. Step-by-Step Instructions
Now let’s move on to the fun part—creating your DIY rattan headboard from start to finish. The entire process typically takes 2–4 hours depending on size and intricacy.
Step 1: Measure and Cut
Firstly, measure your bed’s width and desired height for the headboard. Then, using a pencil and ruler, mark and cut the wooden board or frame. Be sure to add extra space if you want the headboard to extend beyond the mattress edges.
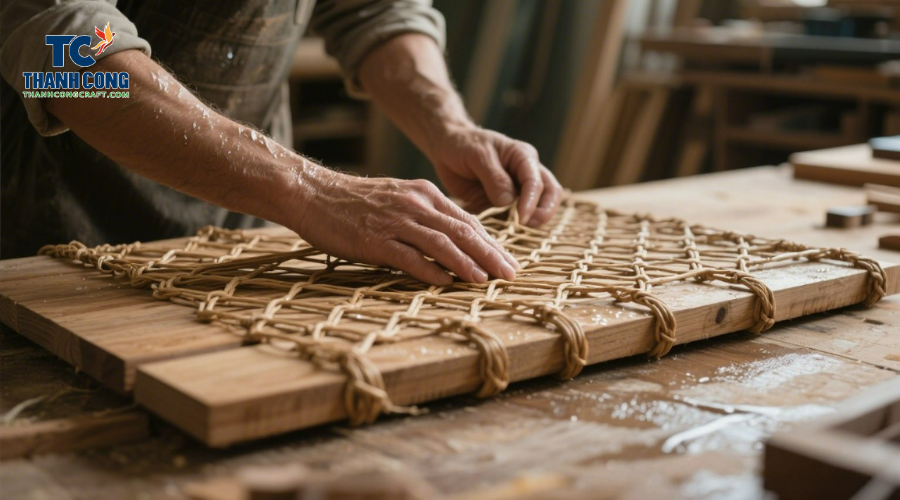
Step 2: Prepare the Rattan
Secondly, soak the rattan webbing in warm water for 30 minutes. This step helps the rattan become more pliable and easier to work with. After soaking, gently pat it dry with a towel.
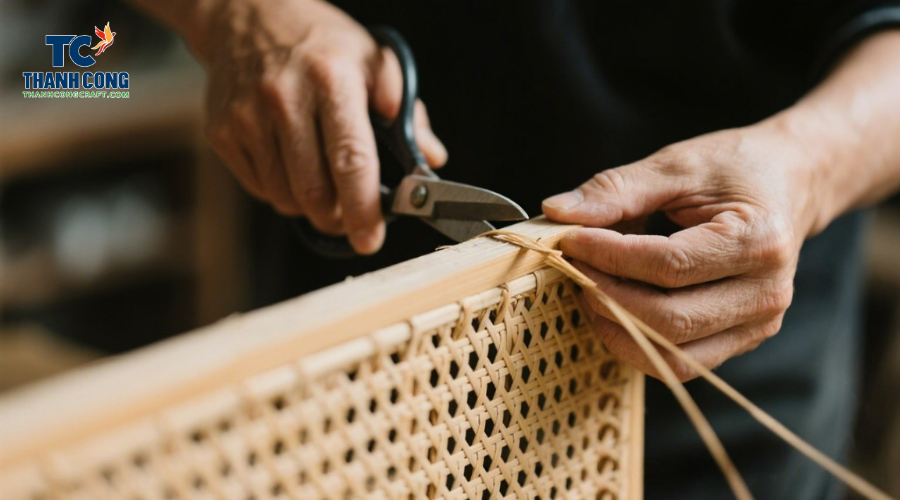
Step 3: Attach the Rattan
Next, lay the webbing flat over the board. Start stapling or gluing it from the center outward, keeping it taut. Smooth any wrinkles as you go to ensure a clean finish.
Step 4: Trim and Tidy
Once the rattan is secure, use scissors or a utility knife to trim off excess edges. Sand any rough corners or splinters to create a smooth outline.
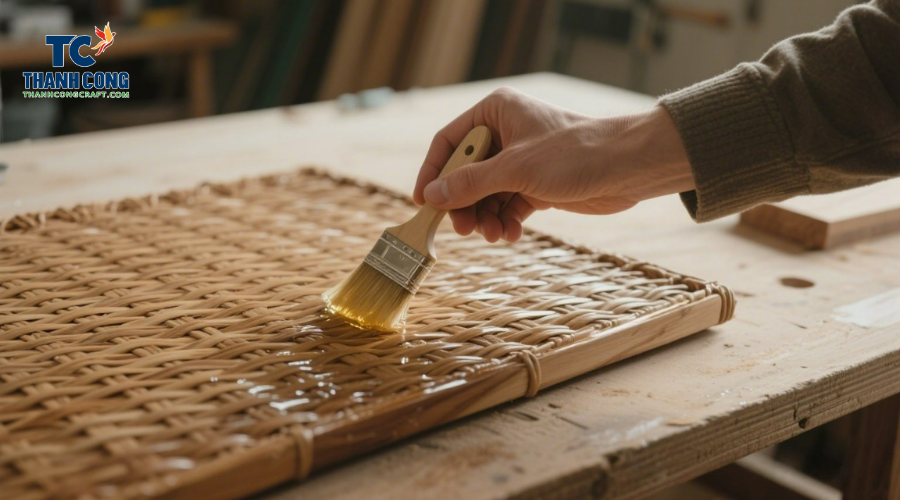
Step 5: Add Finishing Touches
After trimming, apply a thin coat of natural oil or clear varnish. This will enhance the rattan’s color and add durability. Let it dry fully before mounting or placing it behind the bed.
4. Creative Design Variations
The beauty of a DIY rattan headboard lies in its customizability. Here are a few ideas to inspire your personal design:
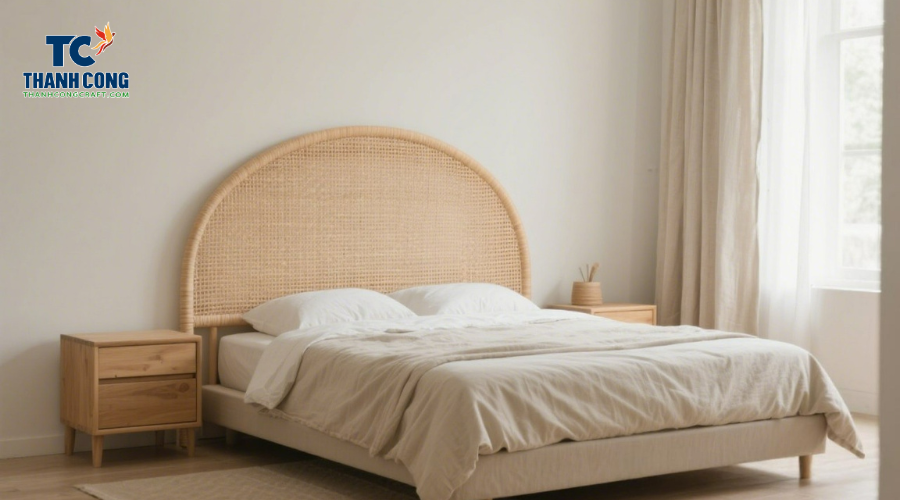
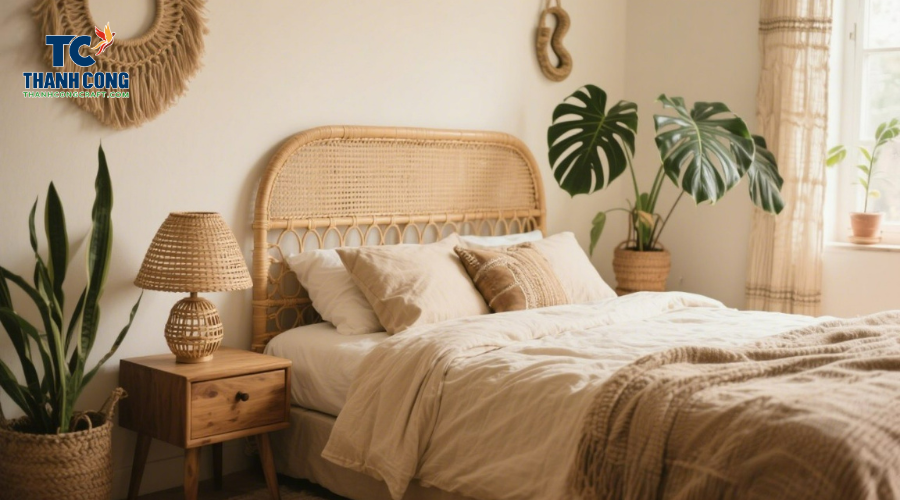
4.1. Arch Shape
Meanwhile, a smooth and gentle arched rattan headboard fits perfectly with minimalist or Japandi interiors.
4.2. Fan Design
For a nostalgic touch, create a radial pattern using curved rattan strips to mimic a vintage hand fan—ideal for retro or eclectic bedrooms.
4.3. Grid Panel
Alternatively, stick with a square or rectangular frame and fill it with tightly woven closed cane webbing for a more structured look.
4.4. Half-Moon
To modernize the design, place the rattan on a semi-circular backing and highlight the edge with rope.
Alt text: Arched DIY rattan headboard in Japandi-style minimalist bedroom
5. Mounting Options
Once your DIY rattan headboard is ready, you have several ways to install it:
5.1. Wall-Mounted
Drill the headboard directly into the wall using brackets. This method keeps your bed frame free and works well for small bedrooms.
5.2. Bed Frame Attached
If your bed allows, screw the headboard directly into the metal or wood frame. It’s stable and secure.
5.3. Freestanding
Use support legs or simply lean the headboard against the wall. This allows for easy repositioning later.
See also: How to Choose Quality Bamboo and Rattan Lamps, Suitable for Every Space
6. Styling and Maintenance Tips
Ultimately, to complete your bedroom transformation, consider how you’ll style your new DIY rattan headboard.
6.1. Styling:
-
Pair it with linen bedding in earthy tones.
-
Add macramé or cotton wall hangings nearby.
-
Use neutral or natural fiber rugs for harmony.
-
Complement with bamboo or wooden nightstands.
6.2. Maintenance:
-
Dust regularly using a soft brush or microfiber cloth.
-
Avoid direct sunlight to prevent fading.
-
Every few months, apply lemon oil to keep the rattan supple.
-
Never soak in water—wipe spills immediately.
7. Where to Source Materials
You can find rattan webbing and supplies online or through specialty interior craft stores. For bulk purchases or sustainable, ethically-sourced materials, Thanh Cong Handicraft offers a wide variety of natural rattan, bamboo, and hyacinth weaving materials.
In fact, many handmade pieces on the site serve as perfect inspiration for your next DIY project.
Reach out to us today to learn more about our products or to place a wholesale order. We look forward to connecting with you!
- Thanh Cong Handicraft Co., Ltd
- Email: [email protected]
- Tel/WhatsApp: +84967485411
Explore our Products Collection for more choices! Contact Us!
