
Creating a luxurious mother of pearl tray requires more than simple assembly. In fact, to begin with, skilled artisans patiently and carefully follow a meticulous process. Step by step and through multiple careful stages, this journey eventually and gradually transforms raw shells into truly stunning and highly functional pieces of art.
🔗 Related reading: How to Clean Mother of Pearl Coasters Without Damaging the Inlay
Contents
- 1. Why Understanding Artisan Craftsmanship Matters
- 2. Essential Materials and Tools for Handcrafting Mother of Pearl Trays
- 3. Step-by-Step Guide: How Artisans Handcraft a Mother of Pearl Tray
- 4. Challenges When You Handcraft a Mother of Pearl Tray and How Artisans Solve Them
- 5. Finishing Touches and Quality Enhancement in Handcrafted Mother of Pearl Trays
- 6. Visual Guide – From Raw Shells to Finished Tray
1. Why Understanding Artisan Craftsmanship Matters
When you handcraft a mother of pearl tray, every detail reflects artistry. This is because artisans shape each shell piece by hand, which means that the final product carries uniqueness and durability that machines can’t replicate. Moreover, as a result, handcrafted trays often last longer, resist fading, and hold higher decorative value in homes and luxury dining setups.
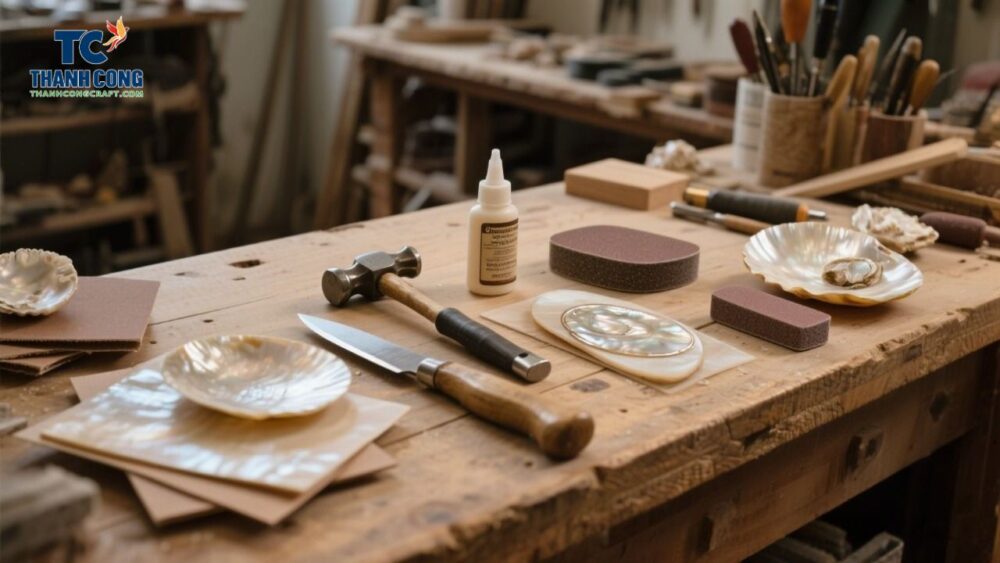
2. Essential Materials and Tools for Handcrafting Mother of Pearl Trays
To handcraft a tray, artisans prepare:
-
Mother of Pearl Shells: Selected for natural luster and thickness.
-
Wooden Tray Base: Smooth, durable foundation for inlay work.
-
Carving Tools: Small knives and chisels for shaping shell pieces.
-
Adhesive & Lacquer: Natural resin glue and protective coatings.
-
Polishing Tools: Sandpaper, cotton pads, and polishing wax.
🔗 Explore related product: Mother of Pearl products from Thanh Cong Craft
3. Step-by-Step Guide: How Artisans Handcraft a Mother of Pearl Tray
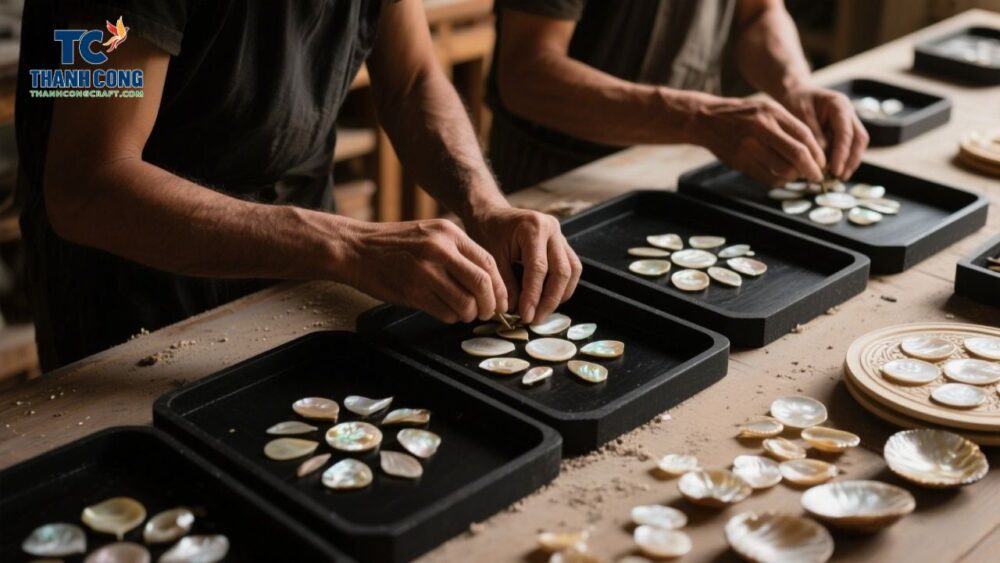
3.1 Selecting and Preparing Shells
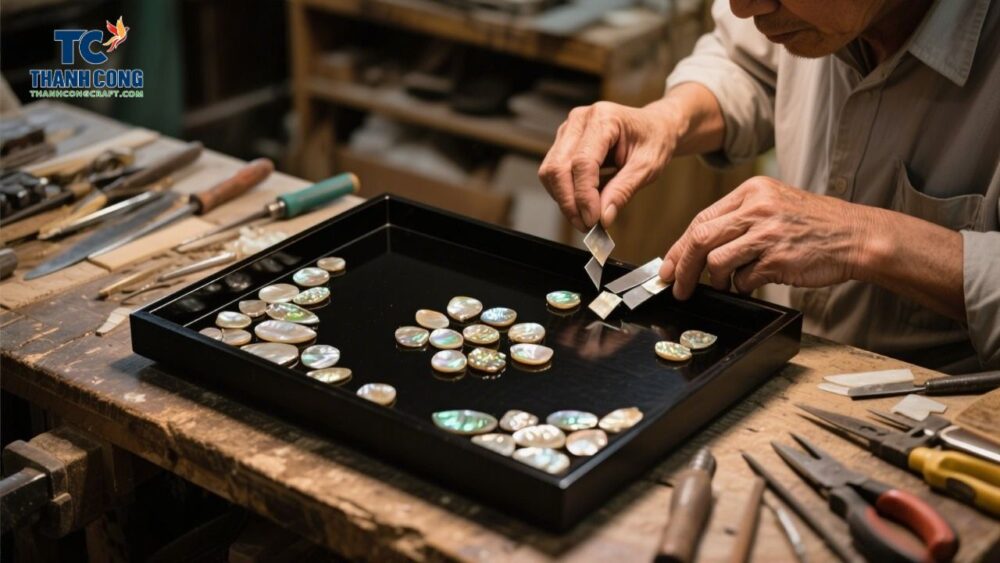
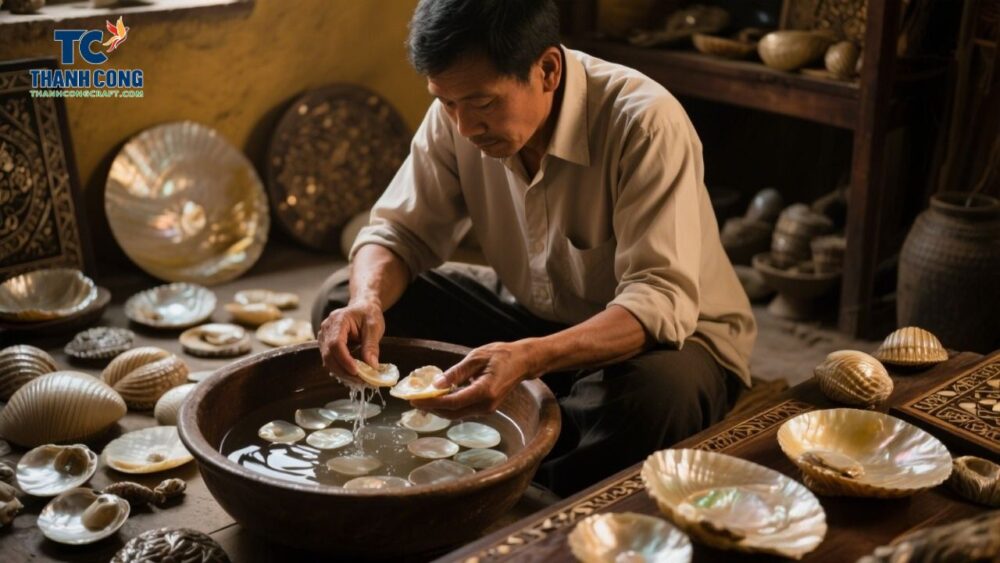
To begin with, artisans clean raw shells thoroughly using water and mild detergent. After that, they carefully sort the shells by color, thickness, and luster to ensure consistency in the final product. As a result of this careful selection process, the tray features even patterns and a flawlessly smooth surface.
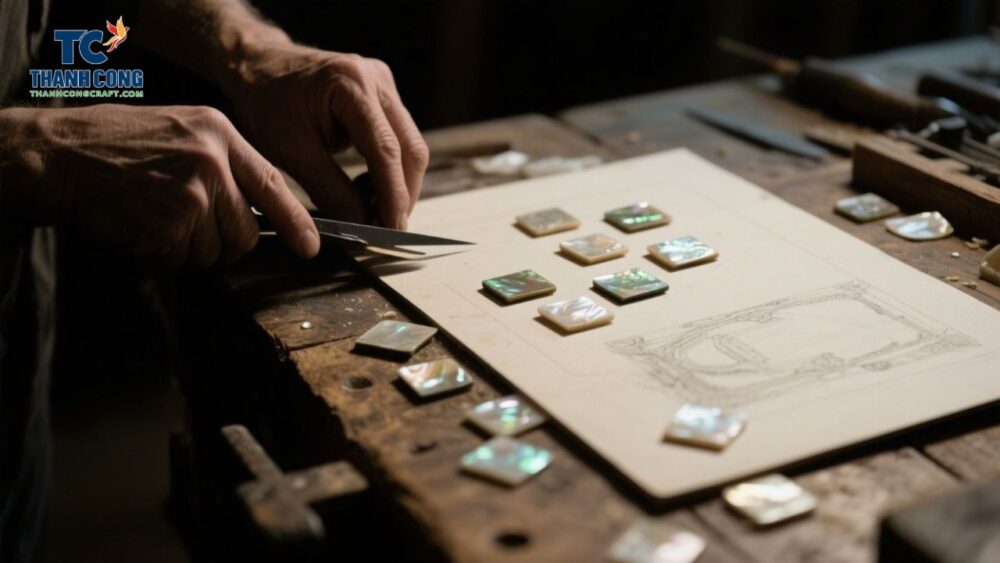
3.2 Designing and Cutting Inlay Pieces
Next in the process, artisans use sharp tools to carefully and gradually cut each shell into precise shapes. As a result of this detailed cutting step, every piece achieves the right size and smooth edges, which ultimately makes the inlay process more accurate and visually appealing. This careful cutting stage not only prepares the material for the inlay process but also ensures that every piece fits perfectly on the tray’s surface. Because every cut impacts the design, they work slowly and align pieces perfectly with the base tray.
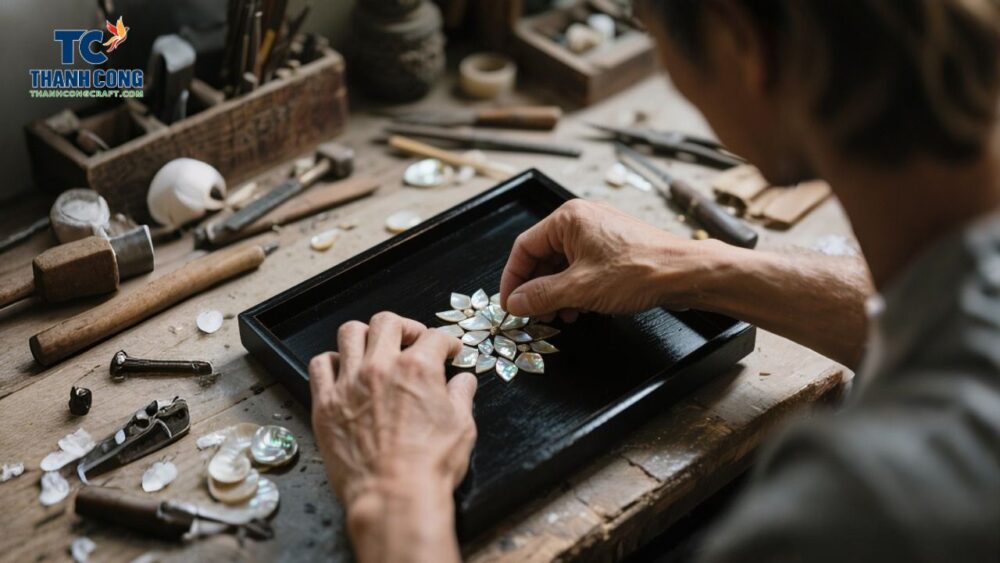
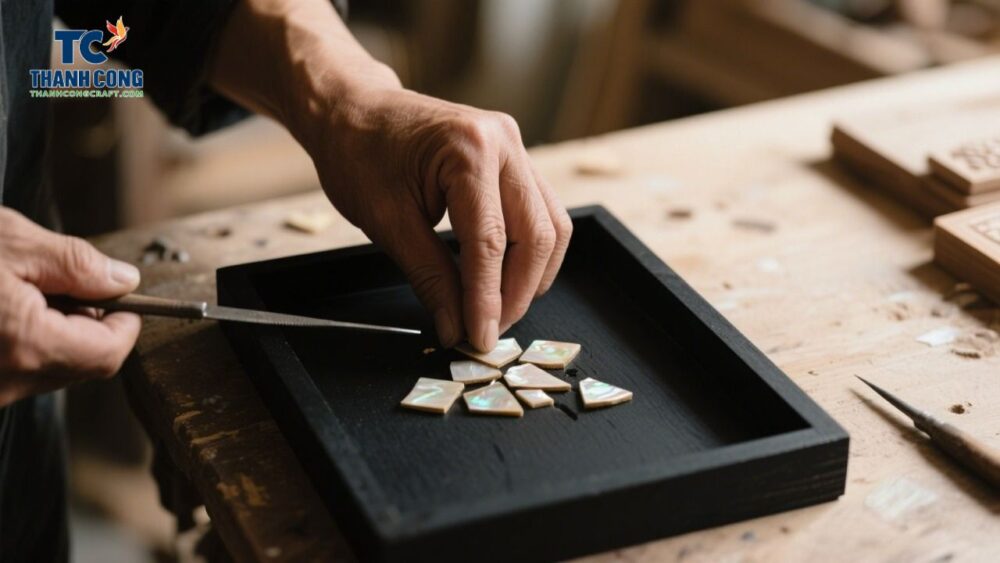
3.3 Hand Inlay and Lacquering
Next, artisans attach each shell piece to the tray’s surface using natural adhesive. Immediately after that, they apply multiple layers of lacquer, allowing each coat to dry completely before adding the next. Thanks to this multi-layered process, the tray’s structure becomes stronger, and as a result, the shell’s natural shimmer remains beautifully protected for long-term use.
🔗 Learn more: Using Mother of Pearl Trays: Common Mistakes to Avoid
4. Challenges When You Handcraft a Mother of Pearl Tray and How Artisans Solve Them
Sometimes shells crack during cutting or lose shine after lacquering. Instead of discarding them, artisans reshape the pieces or polish them again. Because of this problem-solving skill, even trays with initial flaws turn into flawless artworks.
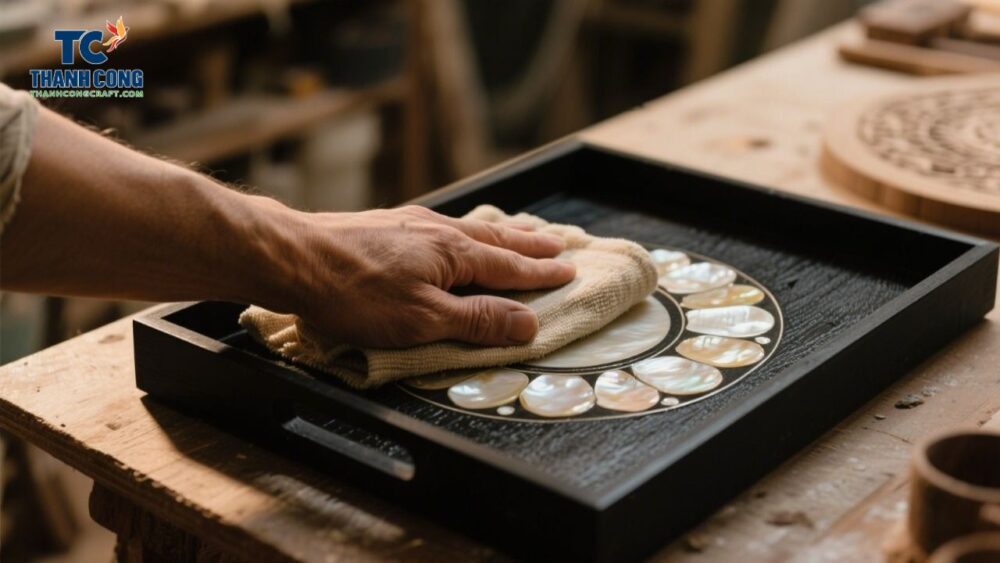
5. Finishing Touches and Quality Enhancement in Handcrafted Mother of Pearl Trays
After assembly, craftsmen polish trays using natural wax and soft brushes. This final step creates a mirror-like finish and enhances the iridescent beauty of mother of pearl. Additionally, artisans check every corner for smoothness and durability before packaging.
🔗 Explore polishing products: Mother Of Pearl Thermos
6. Visual Guide – From Raw Shells to Finished Tray
The infographic illustrates each stage – shell selection, cutting, inlay, lacquering, and polishing – making it easier to understand the meticulous handcrafting journey.
| Step | Description | Icon / Visual Suggestion |
|---|---|---|
| 1. Shell Selection | High-quality mother of pearl shells are cleaned and chosen based on color and thickness. | 🐚 Shell icon |
| 2. Cutting Shell Pieces | Artisans cut shells into small shapes matching the tray’s decorative design. | ✂️ Scissors cutting shell |
| 3. Pattern Design | A detailed design is drawn on the tray base as a guide for inlay. | 📝 Pencil and drawing |
| 4. Hand Inlay | Each shell piece is glued and manually embedded into the wooden tray base. | 🤲 Hand placing shell |
| 5. Lacquer Coating | Multiple layers of lacquer are applied, dried, and sanded for a smooth finish. | 🎨 Brush painting tray |
| 6. Polishing & Finishing | Tray is polished with wax to achieve a glossy, durable surface. | ✨ Polished tray shine |
Reach out to us today to learn more about our products or to place a wholesale order. We look forward to connecting with you!
- Thanh Cong Handicraft Co., Ltd
- Email: [email protected]
- Tel/WhatsApp: +84967485411
Explore our Products Collection for more choices! Contact Us!
