Are you ready to add a touch of natural charm to your home decor? Crafting a pine wreath DIY-style step by step is a delightful project that brings the beauty of the outdoors inside. Whether you’re a seasoned crafter or a beginner looking for a creative endeavor, making a pine wreath is a rewarding and enjoyable experience. This article will guide you how to make a pine wreath DIY step by step? pine wreath that will adorn your door or walls with rustic elegance.
1. How to make a pine wreath without a form?
Making a pine wreath without a form is a fun and creative project that allows you to showcase your crafting skills while incorporating natural elements into your home decor. Here’s how you can do it, along with the materials you’ll need:
Materials:
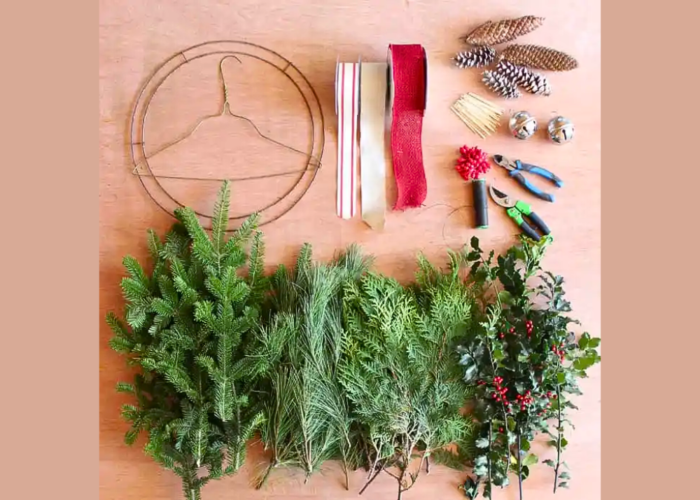
- Pine branches: Gather fresh or artificial pine branches, ensuring they are flexible enough to bend and shape.
- Pruning shears or scissors: For trimming and cutting the branches to the desired length.
- Floral wire or twine: To secure the branches together.
- Decorative elements (optional): Such as pine cones, berries, or ribbon to embellish your wreath.
Step by Step:
Step 1: Prepare the Pine Branches
Trim the pine branches into manageable lengths, typically around 6 to 8 inches long. Remove any excess leaves or small twigs from the branches. If you’re using fresh pine branches, allow them to dry slightly for easier handling.
Step 2: Create the Base
Prepare some flexible branches, such as willow branches or rose stems, to create the basic frame for the wreath. You can start by bending these flexible branches into a circular shape and use wire or twine to tie them together.
Step 3: Add More Branches
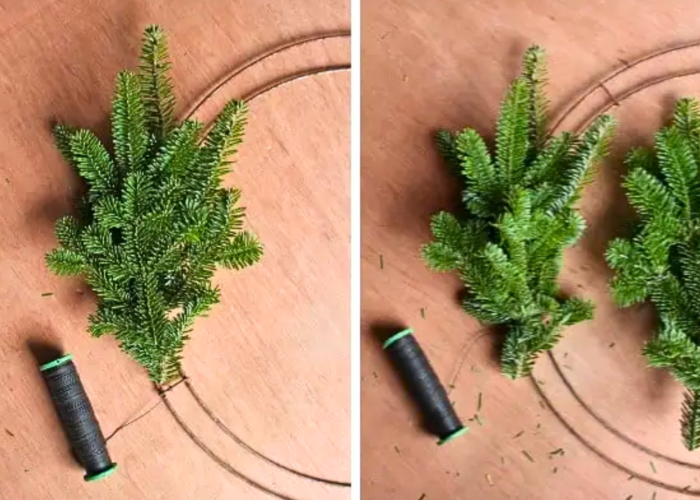
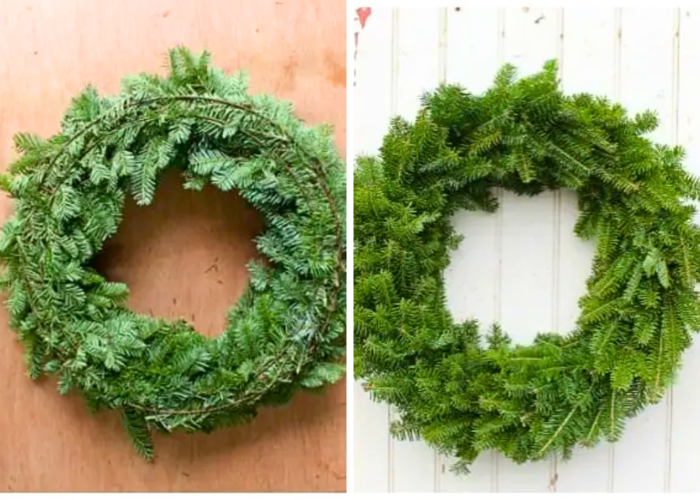
After obtaining the frame, begin attaching the pine branches to the frame using wire or twine. Position the pine branches so they overlap each other, creating a thick and evenly distributed layer around the frame. Ensure that each branch is securely and safely tied.
Step 4: Fill in Any Gaps
Once you have completed the basic layer, you can add decorative accents such as pine cones, dried pine needles, or even seasonal ornaments to enhance the beauty of your wreath.
Step 5: Decorate (Optional)
If desired, embellish your wreath with decorative elements such as pine cones, berries, or ribbon. Attach these decorations using wire or hot glue, arranging them evenly around the wreath for a festive touch.

Step 6: Hang and Display
Once you’re satisfied with the appearance of your pine wreath, attach a loop of wire or twine to the back for hanging. Find the perfect spot to display your handmade creation, whether it’s on your front door, above the fireplace, or as a centerpiece on your table.
Creating a pine wreath without a form allows you to customize the size and shape to suit your preferences, resulting in a unique and personalized decor piece that adds a touch of natural beauty to any space. Enjoy the process and let your creativity shine!
2. FAQs
2.1 What does the pine wreath symbolize?
The pine wreath symbolizes eternal life, renewal, and resilience due to the evergreen nature of pine branches. Its circular shape represents continuity and the enduring cycle of life. Additionally, pine wreaths convey warmth, hospitality, and festive cheer, making them popular decorations during holidays and special occasions. They also evoke feelings of protection and good luck, serving as auspicious symbols in many cultures
2.2 How long do fresh pine wreaths last?
Fresh pine wreaths can last from three weeks to three months, depending on various conditions such as how fresh they were when you first got them. To maximize their lifespan, it’s essential to keep them hydrated and cool. For indoor wreaths, regular misting and avoiding direct sunlight or heat sources can prolong their freshness. Outdoors, in cooler climates, wreaths can remain vibrant throughout the winter months.
2.3 How do you preserve pine wreaths?
To preserve a pine wreath, there are several effective methods that can be applied. One way is to use a solution of glycerin and water; trim the ends of the pine branches and soak them in this solution for complete absorption. Another method is to spray shellac or hairspray over the entire pine branches to preserve them. Additionally, keeping the pine branches dry is also a good preservation method, especially if you live in a low-humidity area. Some sources also suggest using a moisturizing spray to keep the pine branches hydrated, and regularly misting the back of the wreath so the cut branches can absorb water, maintaining fragrance and prolonging usage time. For best results, avoid exposing the wreath directly to sunlight and heat sources.
2.4 What to do with pine wreaths after Christmas?
After Christmas, pine wreaths that are no longer in use can be recycled into various creative projects. You can disassemble the wreath and use decorative elements such as faux berries, red ribbons, or ornaments to create a new wreath for the next year, or even repurpose them for other projects such as door wreaths, Christmas tree decorations, or table centerpieces for festive occasions. Additionally, the natural greenery of the wreath can be composted to fertilize gardens or used as decorative mulch for flower beds. This is a great way to reduce waste and maximize the use of available resources.
If you have any further questions, don’t hesitate to send thanhcongcraft an email us at info@thanhcongcraft.com or message us at WhatsApp: +84967485411. Hope to serve you soon! Best regard!


