Crafting a willow chicken is a rewarding and enjoyable project that adds a touch of rustic elegance to your garden or home decor. Willow, with its pliable branches and natural texture, lends itself perfectly to creating lifelike and delightful sculptures.
In this guide, we’ll explore the step-by-step process of how to make a willow chicken (hen or pheasant), from gathering the right branches to shaping and assembling the pieces. Let’s get started!
Contents
1. Steps to make a willow chicken
Creating a willow chicken involves weaving and shaping willow branches to form a three-dimensional sculpture. Here’s a step-by-step guide:
Materials needed:
- Fresh and flexible willow branches;
- Pruning shears or secateurs;
- Pliers;
- Gloves;
- Wire (optional, for reinforcement);
- Base or frame material (optional).
Step by step:
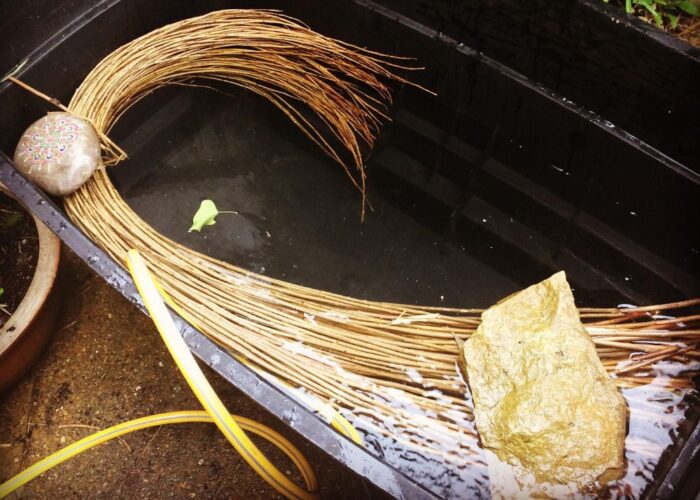
Step 1: Soak willow branches
Choose willow branches that are flexible and easy to bend. Soak the willow branches in water for a few hours. This process makes them more pliable and easier to work with. Once soaked, pat them dry with a towel.
Step 2: Shape the basic frame
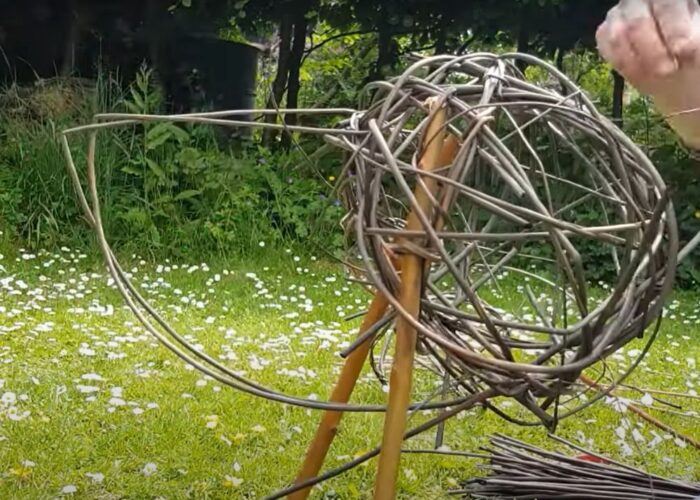
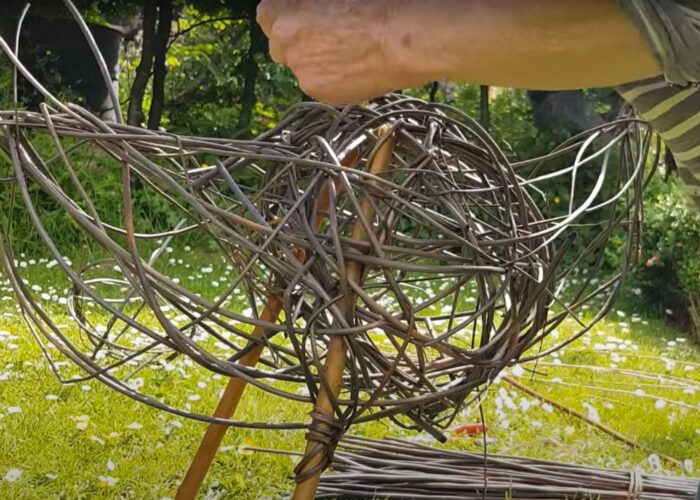
Use a thicker willow branch to form the body of the chicken and thinner branches for the neck, tail, and legs. Make and attach a willow ball to two tree branches (chicken legs) to form the body.
Step 3: Add detailing
Attach additional willow branches to create wings, comb, and beak. Secure these parts with wire, allowing your creativity to shine as you give your willow chicken its unique features.
Step 4: Secure and trim
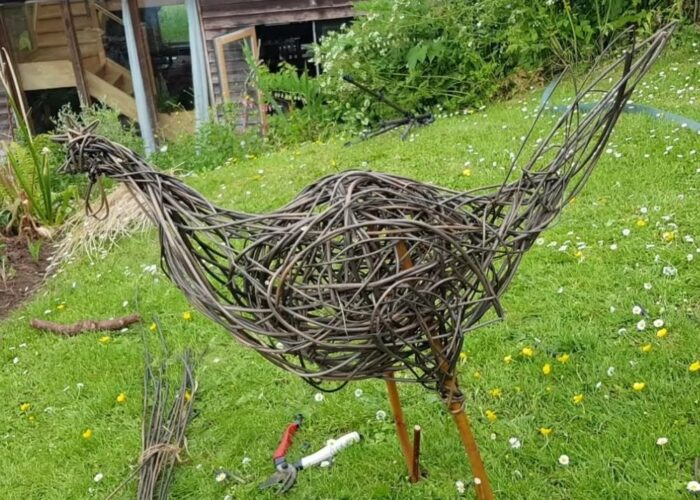
Ensure all branches are securely attached, and trim any excess. Refine the overall shape of the chicken, making sure it stands sturdily on its base.
Step 5: Let it dry
Allow your willow chicken to dry completely. Depending on the thickness of the branches, this may take a day or more. Drying will help the branches set in their shape.
Step 6: Add color or finish
If desired, enhance the appearance and durability of your willow chicken by adding color or a protective finish. Non-toxic paints or wood sealants work well for this step. Once the willow branches is dry and finished, find a special place to display your creation.
Remember, this is a basic guide, and you can get creative with your design. Adjust the steps based on your preferences and the size of the chicken you want to create.
2. Final thought
By following the making a willow chicken step-by-step guide provided, you can create a charming sculpture to enhance your garden or home decor. Soak, shape, detail, secure, and finish – these are the key steps to bringing your DIY chicken to life. Happy crafting!
If you have any further questions, don’t hesitate to send thanhcongcraft an email us at info@thanhcongcraft.com or message us at WhatsApp: +84967485411. Hope to serve you soon! Best regard!


