The willow pig is a charming and whimsical piece of art crafted from willow branches, showcasing the delightful fusion of nature and creative expression. In this step-by-step guide, we will explore the process of how to make a willow pig/piglet, offering you a detailed and enjoyable tutorial.
By following each step, you’ll not only create a charming piece of art but also connect with the versatility of willow branches in a fun and imaginative way.
1. How to make a willow pig?
Making a willow pig/ piglet is a creative and enjoyable craft project, resulting in a unique and natural piece of art using readily available materials. Here is a detailed guide on how to create a willow pig:
Materials:
- Willow branches;
- Cutting tools (pruners or scissors);
- Bending tools (pliers or hands);
- Twine or rope;
- Optional: Small willow pieces, buttons, or other materials for details.
Step by step:
Step 1: Select willow branches
Choose flexible and appropriately sized willow branches for your pig. Consider the length and thickness based on the desired size of the finished pig.
Step 2: Cut willow branches
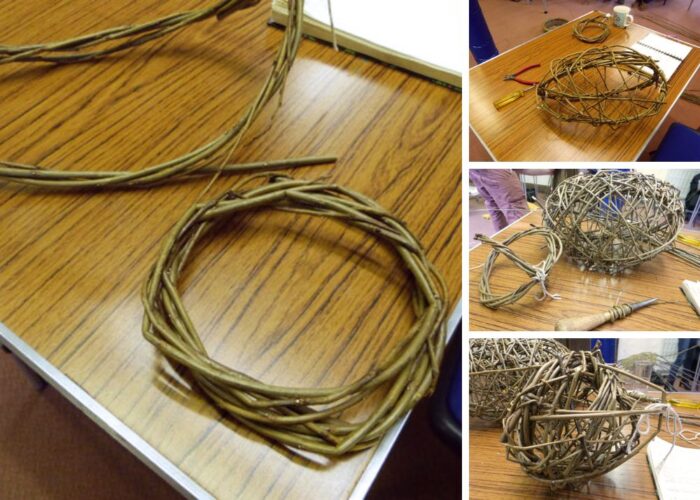
Use cutting tools to trim the willow branches into different sections – head, body, legs, and tail. Make clean cuts to ensure smooth edges.
Step 3: Bend the branches
Bend each section of the willow branches to achieve the desired shapes. Use pliers or your hands to carefully bend the branches without breaking them. Create curves for the body, legs, and tail.
Step 4: Assemble the pig
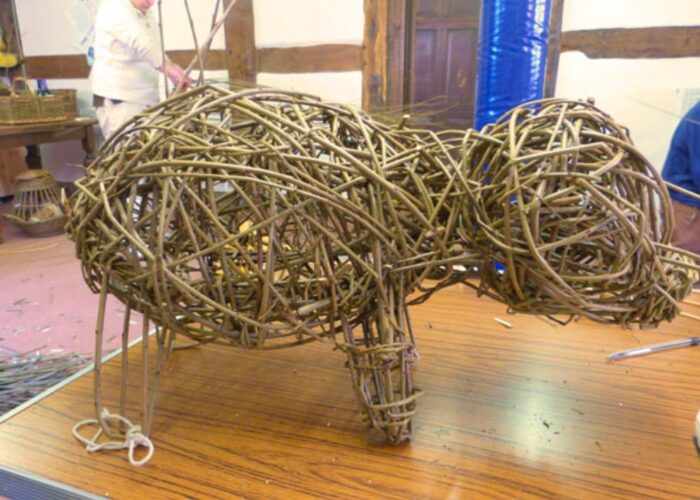
Tie the sections together using twine or rope. Start with the body, attaching the legs and tail securely. Ensure that the connections are tight to provide stability.
Step 5: Add details
Enhance the pig by adding details such as ears, snout, and eyes. You can use small willow pieces for these details, or get creative with buttons, nails, or other materials.
Step 6: Adjust and fine-tune
Review your willow pig and make any necessary adjustments. Check the proportions and overall shape. Fine-tune the details to enhance the pig’s appearance.
Step 7: Secure the joints
Make sure all joints and ties are secure. If needed, tighten the twine or rope to reinforce connections. This step is crucial for the stability and durability of your willow pig.
Step 8: Display and enjoy
Once you are satisfied with your willow pig, find a suitable place to display it. Share your creation with friends and family, and enjoy the unique and natural beauty of your handmade willow pig!
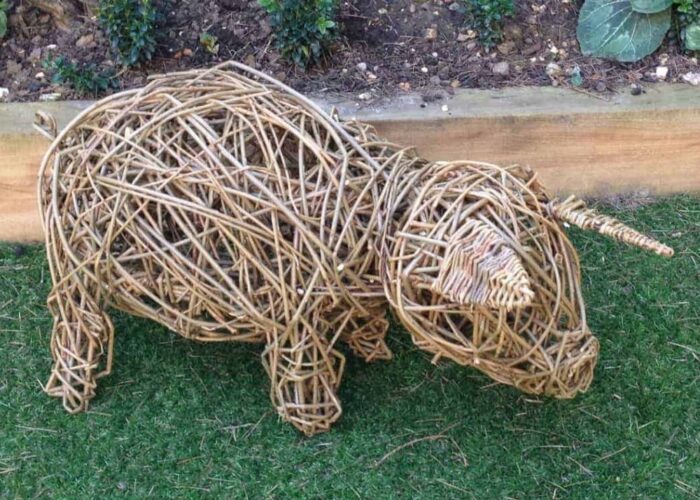
Remember, this is a creative process, so feel free to adapt and modify the steps based on your preferences and artistic vision.
2. FAQs
2.1 How to soak willow branches?
To soak willow branches, begin by stripping off leaves and smaller twigs. Submerge the branches in a container filled with water for at least 24 hours, ensuring they are fully covered. After soaking, check the flexibility, and if needed, continue for an additional 24 hours.
Once sufficiently pliable, remove the branches, allowing excess water to drip off or gently patting them dry. Now, the soaked willow branches are ready for use in various crafts.
2.2 What are the techniques of weaving willow?
Weaving willow involves several techniques, including twining, walking, and randing. Twining utilizes pairs of willow rods crossing each other in a spiral pattern. Walking involves weaving a single rod horizontally through upright rods, creating a sturdy framework. Randing employs a continuous, spiraling weave around a structure.
These techniques, combined with bending and shaping, allow for the creation of diverse woven items such as baskets, sculptures, and furniture.
2.3 How do you dry willow for weaving? How long does it take willow to dry out?
To dry willow for weaving, start by harvesting fresh, flexible branches and removing excess leaves. Arrange the branches in a cool, dry location with good air circulation, ensuring they are not exposed to direct sunlight. Depending on the thickness and environmental conditions, willow can take several weeks to a few months to dry completely.
Thinner branches may dry faster than thicker ones. Regularly check the flexibility and moisture content, and when the willow becomes dry and pliable, it is ready for weaving.
3. Final thought
In summary, crafting a willow pig blends nature with creativity, offering an enjoyable project for all skill levels. This guide provides clear instructions, ensuring success in sculpting charming piglets. With helpful FAQs included, it becomes a comprehensive resource for working with willow branches.
Making a willow pig isn’t just about crafting—it’s about fostering a connection to nature and community through handmade art. So, grab your tools and embark on the delightful journey of crafting your own whimsical pig.
If you have any further questions, don’t hesitate to send thanhcongcraft an email us at info@thanhcongcraft.com or message us at WhatsApp: +84967485411. Hope to serve you soon! Best regard!


