Learning how to weave a pack basket is both a traditional and practical skill, offering a sense of accomplishment and a connection to folk culture. This process requires not only patience and attention to detail but also creativity and finesse.
This article will guide you through the fundamental steps of making an adirondack/ trappers pack basket using natural materials, from selecting materials and preparing fibers to mastering the technique of weaving and completing the final product.
1. How to weave a pack basket?
Pack baskets have been an integral part of outdoor adventures for centuries, providing a reliable way to carry essentials while exploring the great outdoors. It has a rich history deeply rooted in outdoor exploration and survival. Dating back to indigenous cultures and early settlers, these sturdy baskets were crafted from natural materials and designed to withstand the rigors of the wilderness.
Traditionally woven by hand, pack baskets served as indispensable tools for hunters, gatherers, and travelers, offering a convenient way to transport food, tools, and supplies during long journeys. With their durable construction and ample storage capacity, pack baskets became synonymous with self-reliance and adventure.
Even today, pack baskets remain a beloved accessory for outdoor enthusiasts, hikers, and campers seeking to carry gear comfortably and efficiently. Whether trekking through rugged terrain or picnicking in the park, a well-crafted pack basket is a versatile and indispensable companion for any adventure.
Follow this step-by-step guide to make a trappers pack basket:
Step 1: Gathering materials
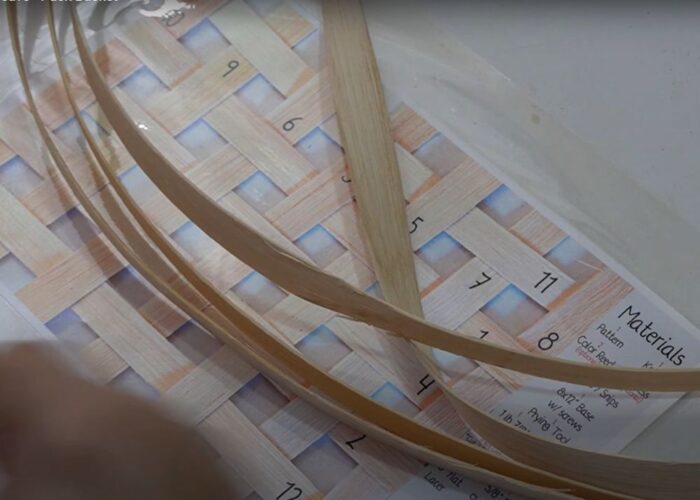
Begin by gathering the necessary materials. You will need sturdy, flexible materials such as reeds, willow branches, or rattan for the basket framework, along with thinner fibers like grasses or twine for weaving.
Step 2: Preparing materials
If using fresh branches or reeds, soak them in water for several hours or overnight to make them more pliable. Then, cut them to the desired length, ensuring they are long enough to form the base and sides of your basket.
Step 3: Creating the base
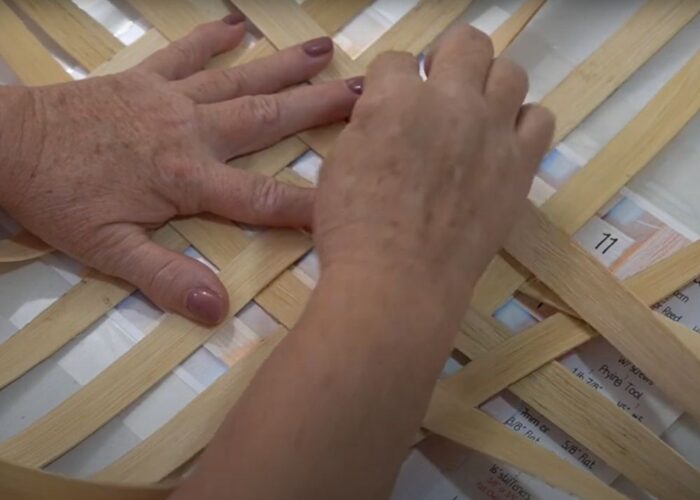
Start by laying out a circular or oval-shaped base using thicker branches or reeds. Weave them together in an overlapping pattern, securing the ends with additional weaving or by tucking them under adjacent pieces.
Step 4: Building the sides
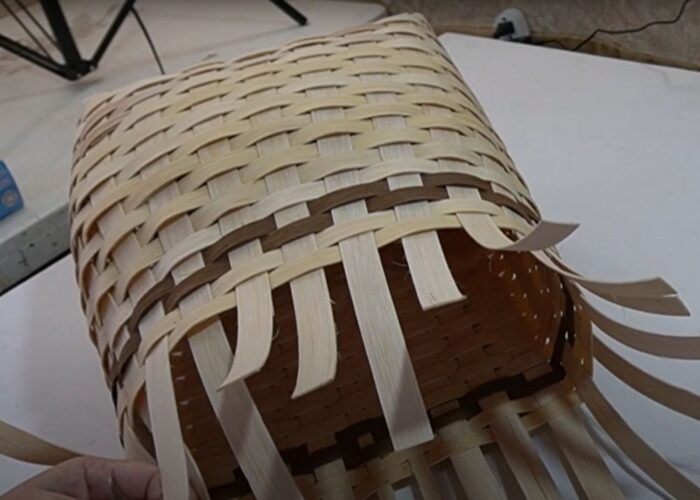
Once the base is complete, begin building up the sides of the basket by adding more layers of weaving material. Use a traditional weaving technique such as the “over-under” method to create a sturdy and secure structure.
Step 5: Shaping the basket
As you weave the sides upward, gradually taper the shape of the basket to create a flared or rounded design. Adjust the tension of the weaving material as needed to maintain an even and symmetrical shape.
Step 6: Adding handles
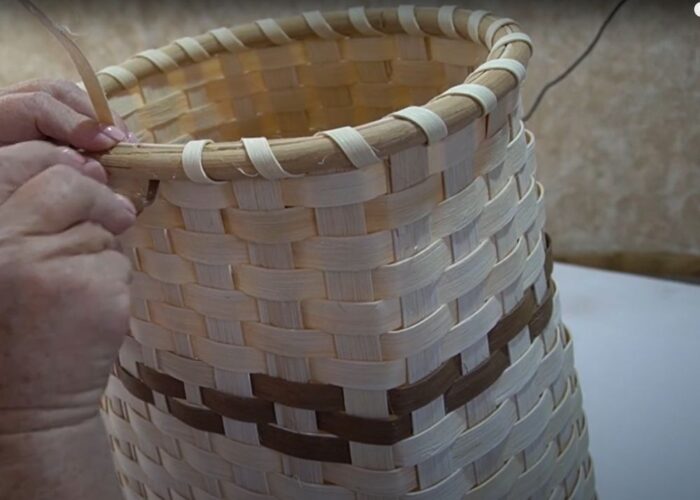
To create handles for your pack basket, weave sturdy loops or braids from thicker branches or reeds. Attach them securely to the sides of the basket using additional weaving material, ensuring they are positioned evenly for balance.
Step 7: Finishing touches
Once the basket has reached the desired height and shape, trim any excess material and secure the ends of the weaving to prevent unraveling. You can also add decorative touches such as colorful patterns or embellishments if desired.
Step 8: Finalizing the basket
Allow the basket to dry completely if using freshly soaked materials. Once dry, inspect the basket for any loose or uneven weaving, making any necessary adjustments for a polished finish.
Depending on the materials used and intended use of the basket, you may choose to seal or coat it with a protective finish such as varnish or linseed oil to enhance durability and longevity.
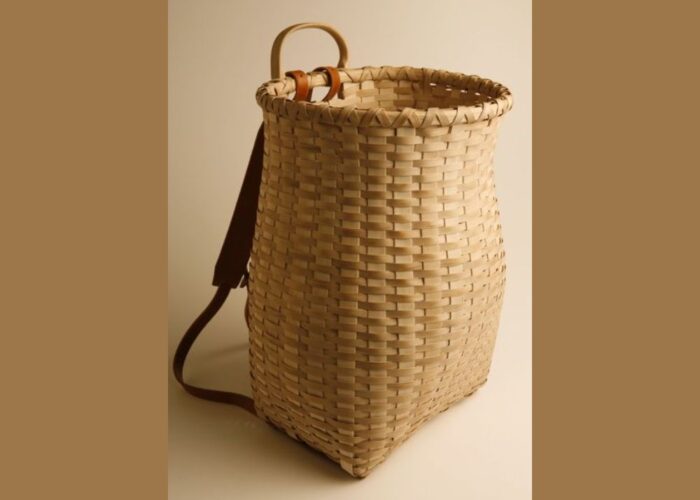
Congratulations! You have successfully woven your own pack basket. Use it for picnics, outdoor adventures, or as a decorative accent in your home. Embrace the satisfaction of creating a functional and beautiful piece through the art of weaving.
2. FAQs
2.1 What kind of ash is used for baskets?
The type of ash typically used for weaving baskets is the black ash tree (Fraxinus nigra). This tree species is prized for its long, straight fibers that are easily separated into thin strips, making it ideal for weaving intricate and durable baskets. The inner bark of the black ash tree is especially valued for basketry, as it can be processed into pliable strips suitable for weaving.
2.3 What are pack baskets made of?
Pack baskets are typically made of natural materials such as reeds, willow branches, rattan, or other flexible fibers. These materials are chosen for their strength, flexibility, and suitability for weaving. The framework of the pack basket is often constructed using thicker branches or reeds, while thinner fibers are woven together to create the body of the basket. Additionally, pack baskets may incorporate leather straps or handles for added durability and functionality.
2.4 How do you split ash for baskets?
To split ash for basket weaving, the process begins with selecting a suitable ash tree and cutting it into appropriately sized sections. Then, you’ll use a hammer and a splitting tool to create a split along the length of the wood section.
Once the split is formed, a chisel is used to further separate the wood. Some craftsmen also employ a method of lightly tapping the tree trunk to create spring wood cracks, making it easier to split the summer wood. The resulting wood strips are then halved and smoothed, readying them for the basket weaving process.
2.5 How do you preserve a pack basket?
To properly maintain a storage basket, you should consider the following points: Avoid exposing the basket directly to sunlight, as this can cause fading and reduce the durability of the material. Also, avoid placing the basket near heat sources such as heaters or radiators, as high temperatures can dry out and crack the material.
Place the basket in a dry, well-ventilated area and avoid damp places that can cause mold or damage. If the basket becomes dirty, gently wipe it with a damp cloth and avoid using strong chemicals that may damage the material. Finally, handle with care when moving or using the basket to avoid damaging or distorting it.
3. Final thought
Weaving a pack basket is not only a practical skill but also a connection to centuries of outdoor tradition and ingenuity. From its origins in ancient cultures to its continued relevance in modern adventures, the pack basket embodies the spirit of self-reliance and exploration.
By following the steps outlined in this guide, enthusiasts can create their own durable and versatile baskets, ready to accompany them on any journey into the wilderness. So, happy crafting!
If you have any further questions, don’t hesitate to send us an email us at info@thanhcongcraft.com or message us at WhatsApp: +84967485411. Hope to serve you soon! Best regard!


